Turn Any TV into a Smart TV: A Practical Connector Guide
Learn how a connector to make smart tv upgrades a standard television with streaming apps, internet features, and voice control using external devices. A step-by-step, safety-conscious guide for DIYers and makers.

To turn a regular TV into a smart TV, attach a streaming dongle or media box that plugs into HDMI and powers via USB. The connector to make smart tv adds apps, streaming, and voice control without replacing your TV. Gather a compatible HDMI dongle, a power supply, and a nearby Wi‑Fi network to get started.
What is a connector to make smart tv and when you need one
According to Adaptorized, a connector to make smart tv typically refers to an external streaming device that interfaces with your television via HDMI. These devices add internet connectivity, streaming apps, and often voice control without replacing your existing TV hardware. They’re ideal when your TV lacks built‑in smart features, or when you want to upgrade incrementally rather than replace the set. For DIYers and makers, understanding the role of the connector helps you pick the right tool for your viewing goals and budget.
Adapters and dongles are designed to plug into a single HDMI port and draw power from USB. The goal is to provide a familiar smart TV experience—apps like streaming services, navigation via remote or smartphone, and easy access to content—without a full rebuild of your entertainment setup.
Choosing the right connector: streaming dongle vs mini PC
There are two common paths to a smarter TV: a consumer streaming dongle (a compact plug‑in device) or a small, dedicated mini PC that runs a full operating system. For most DIY projects, a dongle is the simplest, most cost‑effective option. It typically supports popular streaming apps, standard HD or 4K video, and remote or mobile app control. A mini PC, while more flexible, adds cost, power consumption, and setup complexity. Based on Adaptorized analysis, most readers get faster results and a smoother experience with a purpose‑built streaming dongle rather than a generic mini PC.
When shopping, check app availability, processor speed, RAM, HDMI version compatibility, and whether the device supports your preferred streaming services.
Essential hardware and cable considerations
Before you connect anything, inventory the hardware you’ll need. A standard HDMI streaming dongle is the core component, paired with an HDMI cable if your dongle doesn’t include one. A USB power supply or port ensures reliable operation, as many dongles won’t power reliably from a TV’s USB port alone. You’ll also want a stable Wi‑Fi connection or an Ethernet adapter if your dongle supports wired networking. Finally, have a remote or a smartphone with the dongle’s companion app handy for navigation and setup.
Notes:
- Prefer a dedicated power adapter over drawing power from the TV to avoid voltage drops.
- If your TV sits far from power outlets, consider a short HDMI extension and a longer power cable for routing flexibility.
Network readiness and compatibility
A smart TV experience hinges on reliable network access. Verify your Wi‑Fi network is strong in the living room, or plan a wired solution if available. Some dongles offer dual‑band Wi‑Fi (2.4 GHz and 5 GHz) or support for Ethernet via an adapter; use whichever yields lower latency and fewer buffering events. Ensure the dongle supports your desired streaming services and that your TV’s HDMI input remains free for the dongle.
If you have a guest network or a strict firewall, you may need to adjust router settings to allow the streaming apps to communicate with their services. Always keep firmware on both the dongle and your router up to date for best compatibility.
Apps, content, and user experience
Once connected, you’ll land in the dongle’s app store or home screen. Install your favorite streaming apps, then sign in with your accounts. Organize apps for quick access and set default video quality to balance picture clarity with network performance. Many dongles support voice search and control through a paired remote or smartphone app, which can dramatically speed up navigation and reduce input friction.
Consider privacy implications: review app permissions and disable any services you don’t use. If you share the device with guests, enable a guest profile or kid mode where possible to limit data collection and default settings.
Troubleshooting common connectivity issues
If you experience buffering, first verify your network speed and proximity to the router. A weak signal is the most common culprit and can often be improved with a better placement or a Wi‑Fi extender. If the dongle won’t power on, check the USB power connection and try a different outlet or USB port on the TV.
Other frequent problems include no input signal after startup, or apps failing to load. Double‑check HDMI input selection, reboot the dongle, and ensure the latest firmware is installed. When apps crash, clear cache or reinstall the apps, and confirm you’re signed into the correct accounts.
Safety, privacy, and maintenance tips
Keep all cables tidy and avoid power strip overloads to reduce fire risk and accidental unplugging. Use surge protection if your setup involves multiple devices. Be mindful of data privacy when using streaming services—review permissions and consider guest modes when sharing devices in public spaces. Regularly check for firmware updates and security patches to minimize vulnerabilities.
Long‑term maintenance includes occasional power cycling, cleaning ports, and replacing aging cables. If you upgrade to a new dongle, reuse your existing HDMI cable and power supply when possible to minimize waste.
Next steps and best practices
Plan ahead for future upgrades by selecting a connector to make smart tv that supports additional apps and higher resolutions. Keep a simple, organized setup with labeled HDMI ports and a dedicated power supply. Periodically review installed apps and prune unused ones to keep performance smooth and responsive.
Adaptability is key: test different streaming services, adjust picture settings for your room, and tailor a home screen that makes sense for your viewing habits. With a thoughtful approach, your regular TV can deliver a smart‑TV experience without a full replacement.
Authority sources
- https://www.fcc.gov (Federal Communications Commission – consumer guidance on digital TV and connectivity)
- https://www.consumerreports.org (Independent testing and reviews on streaming devices and TVs)
- https://www.nist.gov (National Institute of Standards and Technology – hardware interoperability and safety best practices)
Tools & Materials
- HDMI streaming dongle(Choose one with app support and 1080p/4K capability; confirm HDMI version compatibility (HDMI 1.4/2.0) and remote control support.)
- HDMI cable(Use a standard HDMI 2.0 (or 1.4 if needed) cable.)
- USB power adapter or USB power supply(Prefer a dedicated wall power adapter over the TV’s USB port for stable power.)
- Wi‑Fi network or Ethernet adapter(Ensure a reliable network; 5 GHz Wi‑Fi is preferable if available.)
- Remote control or smartphone with streaming app(Navigate, install apps, and control playback.)
- HDMI extension (optional)(Useful if your HDMI port is hard to reach.)
- Surge protector or power strip (optional)(Protect devices from power surges and simplify cable routing.)
Steps
Estimated time: 30-45 minutes
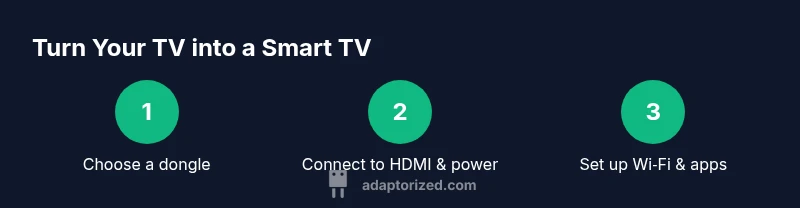
- 1
Choose your streaming connector
Decide between a compact streaming dongle or a small media box. Consider app availability, streaming quality, and budget before purchasing.
Tip: Aim for a dongle with broad app support and automatic updates. - 2
Check TV inputs and ports
Locate an accessible HDMI port and verify there’s space for a dongle and its power cable. If space is tight, plan to use an HDMI extension.
Tip: Label the HDMI port you’ll use to avoid input confusion. - 3
Connect the dongle to HDMI and power
Plug the dongle into the HDMI port and connect the USB power cable to a power source. Avoid relying solely on the TV’s USB port for power.
Tip: Use a dedicated wall adapter if possible for stable power. - 4
Power on TV and select input
Turn on the TV and switch to the HDMI input you used. Ensure the dongle boots correctly and shows on-screen prompts.
Tip: If you don’t see a prompt, try re-plugging the dongle or using a different HDMI port. - 5
Connect to Wi‑Fi and sign in
Follow on-screen instructions to connect to your home Wi‑Fi and sign in to your streaming accounts. This step enables app downloads and content access.
Tip: Consider starting with 2.4 GHz and upgrade to 5 GHz if buffering occurs. - 6
Install apps and customize home screen
Add your favorite streaming apps, arrange them logically, and set up a preferred order for quick access.
Tip: Disable apps you won’t use to keep navigation fast. - 7
Test streaming and adjust settings
Play content to confirm playback quality. Tweak display resolution and audio output to match your room setup.
Tip: Set video quality to a stable level that your network can sustain. - 8
Finalize safety and privacy settings
Review app permissions and enable any available guest or kid modes. Keep firmware updated for security.
Tip: Regularly check for updates and apply them promptly.
Your Questions Answered
What is a connector to make smart tv?
It is an external device, typically an HDMI dongle or small box, that adds internet connectivity and streaming apps to a non-smart TV. It acts as a bridge between your TV and online content.
It’s an external device that adds streaming apps to a regular TV.
Do I need internet to use a smart TV connector?
Yes. A reliable internet connection (Wi‑Fi or wired) is required to stream content and access apps. Without internet, your TV will function only as a display.
Yes, you need internet for streaming apps.
Can all TVs connect with a dongle?
Most TVs with an HDMI port can connect to a streaming dongle. TVs without HDMI typically cannot use standard dongles without additional adapters, which may affect performance.
Most HDMI TVs work; older ones without HDMI may not.
Will using a streaming dongle affect my TV warranty?
Using an external streaming dongle generally doesn’t modify or void the TV warranty. Always check the manufacturer’s terms and consider using reputable devices.
Often it won’t void your warranty, but check your terms.
How do I improve streaming quality?
Ensure a strong Wi‑Fi signal, reduce network congestion, and use devices that support your preferred resolution. If needed, connect via Ethernet for a more stable connection.
A strong network helps a lot; try Ethernet if possible.
What about privacy and data collection?
Streaming apps may collect usage data. Review app permissions, enable guest modes where available, and keep devices updated to reduce privacy risks.
Be mindful of app permissions and update regularly.
How long does setup usually take?
Most setups take about 20–40 minutes depending on familiarity with streaming apps and network setup.
Around half an hour on average.
Watch Video
What to Remember
- Choose the right connector for your needs.
- Power with a dedicated adapter for reliability.
- Configure apps and inputs for quick access.
- Test and optimize network and display settings.