NetSuite Salesforce Connector: A Practical How-To Guide
Learn how to connect NetSuite with Salesforce using a robust netsuite salesforce connector. This Adaptorized guide covers architecture, data mapping, security, and best practices.

Goal: implement a robust netsuite salesforce connector that synchronizes customers, orders, and products between NetSuite ERP and Salesforce CRM. You’ll define data mappings, choose an integration pattern, and configure secure access. Key requirements: admin access to both systems, OAuth credentials, and a reliable integration tool or middleware.
Why a netsuite Salesforce connector matters
A netsuite salesforce connector is more than a data bridge; it's the spine of your order-to-cash and customer lifecycle workflows. When NetSuite ERP and Salesforce CRM stay in sync, teams operate from a single source of truth, eliminating duplicate records, conflicting field values, and slow reconciliation. According to Adaptorized, a well‑designed connector reduces manual re-entry and accelerates value realization. You can keep customers up to date across systems, trigger real-time alerts, and generate unified reports that reflect the true state of your business. In practice, most mid-market and enterprise teams need to connect core entities such as customers, orders, invoices, and products. A thoughtful connector handles both standard field mappings and custom extensions, maintains data integrity during outages, and supports rollback if something goes wrong. The result is faster cycles, higher data quality, and a better experience for sales reps, customer service, and finance staff. This article walks you through architecture, patterns, and practical steps to get it right.
Tools & Materials
- NetSuite admin credentials(Admin role with access to customers, orders, and items)
- Salesforce admin credentials(API integration access and permissions to Accounts/Contacts/Opportunities)
- OAuth 2.0 credentials(Consumer key/secret and tokens for both systems or an integration platform)
- Integration middleware (iPaaS)(Mulesoft, Dell Boomi, Workato, or similar for scalable mapping)
- Sandbox environments (NetSuite & Salesforce)(Isolated test orgs for validation)
- Data mapping document template(Spreadsheets or schema docs detailing field mappings)
- API documentation for NetSuite & Salesforce(Reference for endpoints, limits, and data types)
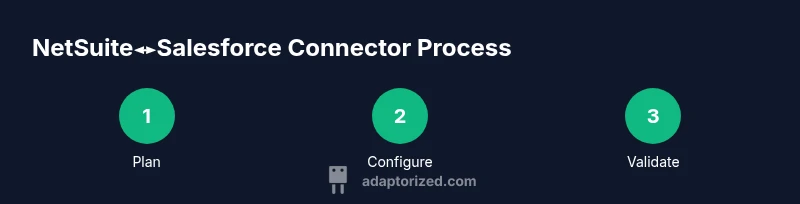
Steps
Estimated time: Total estimated time: 6-12 hours
- 1
Define objectives and scope
Clarify which records to sync (e.g., accounts, contacts, opportunities, orders) and set data quality targets. Identify latency tolerance and key performance indicators for go-live.
Tip: Create a short, testable success criterion to validate the MVP within 1–2 weeks. - 2
Provision and secure access
Obtain admin access in both systems and generate OAuth credentials or set up API keys. Establish an integration user with least-privilege roles.
Tip: Use separate credentials for production and sandbox to prevent accidental cross-environment changes. - 3
Design data mapping blueprint
Document how NetSuite fields map to Salesforce fields, including standard and custom fields, field lengths, and data types. Define upsert behavior with external IDs.
Tip: Prefer idempotent upserts to avoid duplicates on retries. - 4
Choose integration pattern
Decide between point-to-point vs. iPaaS and real-time vs. batch syncing based on data velocity and business impact.
Tip: Plan a phased rollout: MVP in real-time for key records, then expand. - 5
Configure endpoints and authentication
Set up API endpoints in the integration tool, apply OAuth scopes, and configure secure callbacks. Validate connectivity.
Tip: Run a test connection with a small dataset before full sync. - 6
Implement data transformations
Add field formatting, date and currency conversions, and custom logic for reconciliation. Prepare error handling rules.
Tip: Log transformation steps for audit trails and debugging. - 7
Build test harness and backfill plan
Create test cases for happy paths, error paths, and reconciliation checks. Plan historical backfill if needed.
Tip: Automate test data generation to speed validation. - 8
Go‑live readiness and cutover
Finalize the go‑live plan, communicate downtime if required, and enable monitoring dashboards. Execute the cutover with a rollback plan.
Tip: Keep a quick rollback script ready in case of critical issues. - 9
Monitor, optimize, and iterate
Track data quality, latency, and volume. Tweak mappings and batch sizes based on observed patterns. Plan small, incremental improvements.
Tip: Schedule regular reviews to keep mappings aligned with business changes.
Your Questions Answered
What is a netsuite salesforce connector?
A netsuite salesforce connector is a data integration solution that synchronizes records between NetSuite ERP and Salesforce CRM, enabling real-time or batched data flow between systems. It coordinates data like accounts, orders, and products to maintain a single source of truth.
A netsuite salesforce connector syncs data between NetSuite and Salesforce so teams see the same records in real time or on a schedule.
Do I need middleware to connect NetSuite and Salesforce?
Middleware (iPaaS) is not mandatory but highly beneficial for governance, mapping, and scalability. A direct API link can work for simple needs but tends to become fragile as models evolve.
You may start with direct API calls, but most teams prefer middleware for reliability and easy updates.
What data should be synced, and how often?
Commonly synced data includes accounts, contacts, opportunities, orders, and products. Sync frequency depends on business needs; real‑time is common for sales and service, while nightly batches can cover backfills.
Typically, accounts, contacts, orders, and products are synced, with real‑time for critical data and nightly updates for backfills.
How long does implementation take?
Implementation time varies with scope, data volume, and controls. A small MVP can take a few weeks in well‑designed projects; full production integrations may extend longer depending on governance needs.
It depends on scope and data, but a solid plan can get you live in weeks to a few months.
What are common risks and how can I mitigate them?
Risks include data mismatches, latency, and security concerns. Mitigate with clear governance, sandbox testing, robust error handling, and a well‑documented rollback plan.
Common risks are data mismatches and security gaps; they’re mitigated by governance and thorough testing.
How should I monitor the connector after go‑live?
Set up dashboards and alerts for data quality, latency, and failures. Schedule regular reviews of mappings and rotate credentials as part of security hygiene.
After go‑live, keep an eye on dashboards and run regular checks to catch issues early.
Watch Video
What to Remember
- Define a precise data map and governance plan
- Choose an integration pattern aligned with data velocity
- Secure credentials and enforce least privilege
- Test thoroughly in sandbox before going live
- Monitor performance and iterate improvements