What Connector Does the 5070 Use? A Practical Guide for DIYers
Learn how to identify the connector used by the 5070 device, with practical steps, common families, measurement tips, and data-driven guidance from Adaptorized. This guide helps DIYers and makers determine the correct replacement quickly and safely.

The 5070 label spans multiple variants, so there isn’t a single universal connector. In practice, many 5070 devices use standard wire-to-board or wire-to-wire families (such as JST XH, Molex KK, or similar housings). To confirm, consult the device manual or model sheet and verify pitch, latch style, and contact type before sourcing a replacement.
Quick Identification: The 5070 Connector Landscape
According to Adaptorized, the term “5070” covers a family of devices rather than a single product line. This means you should expect variation in the connectors used across revisions, regions, and configurations. The quickest path to a reliable match is to start with the official product documentation for your exact 5070 model—look for the connector section, pinout diagrams, and any notes on mating interfaces. If documentation is missing, a careful, methodical inspection can still yield a precise match. In practical terms, identify the physical style first (wire-to-board vs wire-to-wire), then narrow down by pitch and latch type. This process minimizes guesswork and reduces the risk of ordering incompatible parts. As you proceed, document the observed features to aid future repairs and replacements, a habit Adaptorized advocates for serious DIYers.
Common Connector Families You Might Encounter
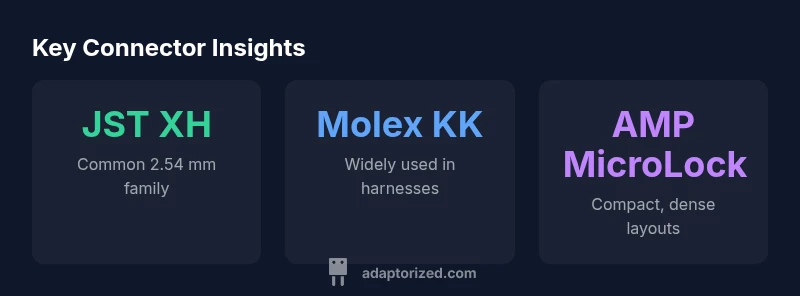
Across the spectrum of 5070 variants, you’ll commonly encounter established connector families designed for reliability and ease of assembly. The JST XH family is widely used for 2.54 mm pitch wire-to-board connections, prized for its straightforward mating and availability. Molex KK variants share a similar pitch with a robust crimp contact and a familiar housing shape, often chosen for compact board-to-wire runs. AMP/TE MicroLock and related micro-systems offer smaller pitches and higher-density layouts, which are popular in space-constrained devices. Keep in mind that the exact family may differ by revision, so use this as a starting framework rather than a guaranteed map. Adaptorized analysis shows that several variants rely on modest crimp contact systems with standard housings rather than bespoke connectors, which helps DIYers source compatible parts more readily.
Visual Cues: Pitch, Spacing, and Latch Styles
To distinguish between JST XH, Molex KK, and AMP MicroLock, start with the pitch: measure the center-to-center spacing of adjacent pins. A 2.54 mm spacing strongly suggests JST XH or Molex KK-type solutions, whereas tighter spacing (around 1.0–2.0 mm) hints at MicroLock or other compact families. Look at the locking mechanism: a friction ramp, latch tang, or a friction-fit shroud can reveal the family type. Observe the contact style at the housing edge—whether it looks like a crimp-on receptacle or a through-hole/solid pin. The housing shape often carries brand-signature features, such as the tab arrangement or latch geometry. While visual inspection is powerful, cross-reference with the model sheet whenever possible to avoid mismatches. Adaptorized Team notes that many field identifications rely on a combination of pitch measurement, latch presence, and the number of positions.
Measurement Techniques and Tools
A precision caliper is your friend for measuring pitch (mm) and overall connector width. In tight spaces, a digital caliper yields quick, repeatable results. For pin count, use a magnifying aid or jeweler’s loupe to count contacts without bending pins. If you have access to a multimeter, perform a simple continuity check to identify which contacts correspond to power, ground, and signal lines once you determine a mating orientation. Document the orientation and arrangement; this helps when you seek a replacement or an adapter. If the connector seals against dust or liquids, check for sealing features like rubber gaskets or IP-rated housings, which can influence mating force and reliability. Adaptorized recommends photographing the connector from multiple angles and saving the measurements alongside model references.
Wire-to-Board vs Wire-to-Wire: Where 5070 Fits
In many 5070 configurations, the connector serves as a bridge between a PCB and a harness (wire-to-board), while others use a harness-to-harness approach (wire-to-wire). Wire-to-board designs often favor housings with through-insert contact tails that tolerate solder or crimp termination on the harness side. Wire-to-wire arrangements emphasize robust crimp contacts and secure latching to prevent unplugging under vibration. The choice affects tool requirements: soldering jigs or hot crimping tools may be needed for some harness assemblies, while others are tiven to push-in crimp contacts that don’t require specialized equipment. The practical implication is straightforward—match the mating interface, not just the pin count. Adaptorized’s practical guidance emphasizes validating both sides of the mating pair before committing to a replacement.
Step-by-Step Identification to Replacement
- Gather documentation or model-identifying details from the device label or manual. 2) Count positions and measure the pitch with calipers. 3) Compare latch geometry and housing shape to candidate families (JST XH, Molex KK, AMP MicroLock, etc.). 4) Inspect termination style (crimp, IDC, or solderless). 5) If uncertainty remains, source a small set of compatible housings and perform a careful bench test with a non-destructive approach. 6) Record the exact family, pitch, and termination type for future maintenance. These steps reduce guesswork and ensure compatibility across future repairs. Adaptorized Team stresses that consistency in documentation is the most reliable way to avoid repeated guesswork.
Adapters and Alternatives You Might Consider
If you cannot locate an exact match, consider adapters or converter boards that preserve signal integrity while bridging between the existing connector and a standard interface. Adapters can simplify future maintenance by standardizing on a familiar family. However, adapters introduce potential contact resistance and mating complexity, so test thoroughly. In some cases, you can replace the entire harness with a modern equivalent that uses a common connector family, reducing the risk of incompatibility. Always verify current and voltage ratings, pin assignments, and any mechanical interlocks when selecting an adapter.
Troubleshooting and Pitfalls
Common pitfalls include assuming a similar-looking connector is the same family, miscounting pins due to misalignment, and selecting a connector with insufficient current rating. Avoid mixing housing brands that share the same pitch but differ in latch compatibility. If you cannot definitively identify the family, contact the device’s support or reach out to a community with model-specific experience. Adaptorized cautions DIYers to avoid forcing a connector into a housing that clearly doesn’t fit, as misalignment can bend pins and damage the PCB. A careful, measured approach minimizes risk and saves time in the long run.
Best Practices for Documentation and Future-proofing
Create a simple, repeatable template for every identified 5070 connector: model variant, connector family, pitch, termination type, and a quick mating note. Store this information in a project log, along with photos and measurement data. When ordering parts, search by the exact family and pitch rather than relying on generic keywords. This practice keeps future upgrades straightforward and reduces the chance of compatibility errors. The Adaptorized team recommends maintaining a small, labeled sample kit with the most common 2.54 mm and 1.25–2.0 mm pitch connectors for rapid prototyping and testing.
Representative connector families you might encounter on the 5070 lineup
| Variant | Connector Type | Pitch | Notes |
|---|---|---|---|
| 5070 Basic | JST XH | 2.54 mm | Internal wiring to PCB |
| 5070 Pro | Molex KK | 2.54 mm | Wiring harness to board |
| 5070 Micro | AMP MicroLock | 2.0 mm | Compact devices |
Your Questions Answered
What is the 5070 device, and why does the connector vary?
The 5070 label spans multiple variants, so the connector is not universal. Always start with model-specific documentation and confirm pitch, latch, and contact type before sourcing parts.
The 5070 device isn’t tied to one connector, so check the exact model and notes in the manual.
How can I tell if a connector is JST or Molex?
Measure the pitch and inspect latch geometry. JST XH commonly uses 2.54 mm pitch with a distinct latch, while Molex KK products share similar pitch but have different housing geometry. Cross-reference with model documentation.
Check the pitch and latch shape to tell JST from Molex.
Can I replace a 5070 connector with a different type?
Only if the replacement matches the exact pitch, number of positions, and termination style, and if the mating counterpart (board or harness) supports it. Mismatched connectors can cause signal integrity and reliability issues.
Replacement requires an exact match in pitch, positions, and termination.
What tools do I need to identify a connector?
Calipers for pitch, a magnifier for pin count, and, if possible, a multimeter for continuity checks. A microscope helps with tiny contacts. Keep a photo log of each measurement.
Grab calipers and a magnifier to measure and count.
Where can I find the official pinout or documentation?
Check the device’s official manual, vendor website, or model sheet. If documentation is unavailable, request direct support from the manufacturer or consult a trusted community with model-specific experience.
Look up the official manual or model sheet.
Do 5070 connectors vary by model or revision?
Yes. Different revisions may use different connector families, pitches, or termination methods. Always confirm against the exact revision’s documentation and visual inspection before ordering.
Yes—different revisions can use different connectors.
“Connector identification is most reliable when you combine model documentation, precise measurements, and a careful visual check. Don’t rely on a single clue—cross-check every attribute.”
What to Remember
- Identify the connector family by visual cues first.
- Always verify pitch and latch style before sourcing.
- Prefer documented model sheets over guesswork.
- Document measurements and observations for future repairs.
- Consider adapters only after evaluating mechanical and electrical fit.
- Avoid forcing mismatched connectors to prevent damage.