Drain Pipe Connector Fittings: A Practical DIY Guide for 2026
Master drain pipe connector fittings for PVC, CPVC, copper, and metal drains. Learn sizing, materials, installation, and troubleshooting with practical, step-by-step guidance for DIYers in 2026.

Learn how to select and install drain pipe connector fittings for PVC, CPVC, copper, and metal drains. You’ll understand when to use solvent-weld, compression, or slip-fit joints, how to measure for proper sizing, and how to seal connections to avoid leaks. Follow this step-by-step guide for a reliable, leak-free drainage system.
What drain pipe connector fittings are and why they matter
According to Adaptorized, drain pipe connector fittings are the unions that join pipes of the same or different materials to form a sealed drain system. For DIYers, understanding these fittings helps you avoid leaks, reduce clog risks, and meet local codes. The Adaptorized team emphasizes choosing the right fitting type for each connection—whether solvent-weld PVC, compression copper, or slip-joint cast iron—will influence reliability, ease of installation, and future maintenance. In practice, the most common connections involve PVC and CPVC for residential drain lines, but metal transitions (copper, brass, cast iron) remain in older homes and specialty applications. When you plan a job, list all materials, verify compatibility, and follow clean-cutting and deburring practices. The goal is a firm, leak-free joint that lasts for years. Drain pipe connector fittings come in families like slip joints, threaded adapters, compression rings, and solvent-weld sockets. If you’re new to this, start with simple PVC-to-PVC paths and advance to metal transitions gradually. According to Adaptorized, these fittings are the backbone of a reliable drainage system.
Types of drain pipe connector fittings
There are several families you’ll encounter:
- Slip-joint fittings: Probable for PVC and metal pipes with threadless, adjustable joints.
- Solvent-weld fittings: PVC/CPVC versions that create a permanent bond after primer and cement.
- Compression fittings: Used with copper, brass, or PEX to compress a ferrule around the pipe.
- Threaded adapters: Provide a seal using Teflon tape or pipe dope at male/female threads.
- Hub adapters and transitions: Link different pipe materials (e.g., copper to PVC) through a transition hub.
- Cleanouts and trap adapters: Allow access for clearing blockages and maintaining the trap.
Single-family homes often rely on PVC solvent-weld or compression transitions, while older houses may require hub-and-spigot or cast-iron connections. Each type has a distinct method for sizing and sealing, so read the manufacturer instructions and ensure compatibility with your pipe material.
Materials and compatibility
Your choice of material affects compatibility, sealing method, and long-term durability. PVC/CPVC, copper, brass, and cast iron each have specific pros and cons for drain applications. PVC is common for new installs due to ease of use with solvent-weld joints; CPVC offers higher temperature resistance. Copper drain lines may use compression or soldered connections; cast iron requires hub-style joints and sealing compounds. Always verify that the chosen fittings are rated for drainage and the pipe material's diameter. You’ll also need appropriate solvents, primers, Teflon tape, and thread sealants. Avoid mixing materials without a deliberate transition piece to prevent galvanic corrosion or leaks. For threaded connections, use pipe dope or PTFE tape and ensure threads are clean and dry before assembly. The goal is a reliable seal that can handle typical household pressures without failure.
Sizing, measurement, and threading
Drain pipe sizes are nominal. In most homes, common drain sizes include 1-1/2 inch and 2 inches, with smaller 1-1/4 inch used in older systems or appliance drains. Measure the outer diameter of the pipe and verify the nominal size printed on fittings. When joining pipes of different materials, you’ll often need a transition fitting or a reducer to maintain correct flow and avoid stress on the joint. For threaded connections, check the thread type (FPT vs MPT) and ensure you have the proper sealant. Always dry-fit the assembly before cementing or tightening to confirm alignment and avoid over-tightening, which can crack fittings or strip threads. If a pipe is damaged or rough-edged, cut back to clean material and re-cut to size. Correct sizing minimizes leaks and makes future maintenance easier.
Common configurations and layout considerations
Most residential drains follow a vertical drop pattern with a P-trap and dry-well venting. The way you arrange tees, elbows, and adapters influences slope, gravity drainage, and trap sealing. Minimize long, unsupported runs; support pipes and provide proper slope (usually 1/4 inch per foot for horizontal drains). Use cleanouts at convenient locations to allow blockages to be cleared without dismantling walls. When transitioning from metal to PVC, use appropriate adapters and preserve the hub depth so joints can be sealed correctly. In tight spaces, offset fittings and long-turn elbows provide room for access. Plan for future maintenance by keeping cleanouts accessible and labeling each joint.
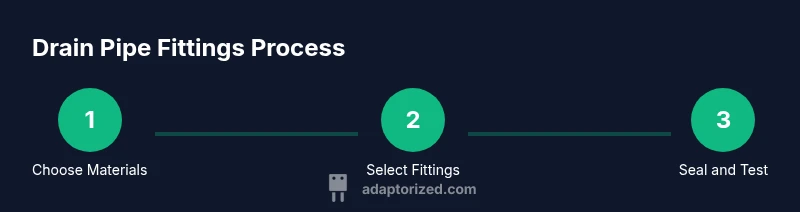
Step-by-step overview of a typical PVC drain connection
Begin with a dry-fit: measure lengths, trim, and test-fit every joint before applying primer and cement. Cut square with a pipe cutter, deburr, and dry-fit the male and female ends. Apply PVC primer to the mating surfaces, then a thin coat of solvent cement on each end. Join quickly and twist slightly to spread cement, hold for a few seconds to set; wipe excess with a rag. Allow solvent cure time per product instructions, then test with water to check for leaks. If any mist or drip appears, disassemble, clean, and reseat.
Soldering and metal pipe options
Metal drain lines, such as copper or cast iron, require different joining methods. Copper drains typically use compression fittings or soldered joints with flux and solder; ensure all joints are clean and use flux for reliable soldering. Cast iron drains may use hub-and-spigot fittings with lead-and-oakum or modern rubber gaskets and cement. When connecting copper to PVC, use a transition fitting and maintain proper slope and support. Always deburr copper edges before assembling, and detect leaks with soap solution after installation.
Troubleshooting leaks and proper seals
Common leaks occur at joints due to mismatched materials, improper taper, or insufficient sealing. Check for wetness, damp odor, or pooling under joints. Re-seal with appropriate materials: Teflon tape for threaded metal connections, plumber's tape for PVC, or silicone sealant at overlapping joints. Avoid overtightening or overtly forcing a joint; apply consistent torque and test after 24 hours of pressure.
Maintenance, inspection, and common mistakes
Inspect drains annually; look for corrosion on metal fittings, or UV exposure on PVC; replace worn gaskets and O-rings. Common mistakes include skipping primer on PVC solvent-weld joints, mixing materials without a proper transition, and skipping test fills after installation. Keep spare transition adapters for future renovations.
Codes, safety, and when to call a pro
Follow local plumbing codes; many jurisdictions require licensed plumbers for final connections in certain buildings; test for leaks thoroughly, ventilate working area when using solvents, and store solvents safely away from heat sources.
How to choose fittings for DIY projects
Guidelines from Adaptorized: match materials, confirm compatibility, consider temperature and flow requirements, and balance price with durability. For simple home tasks, PVC-to-PVC with solvent-weld joints provides quick results; for metal pipes, use compression or hub-and-spigot transitions with gasket seals. Always read manufacturer instructions, check for official certifications, and maintain a tidy workspace.
Tools & Materials
- PVC pipe cutter(Cuts clean, square; 1/2" to 2" sizes covered)
- Hacksaw or miter saw(For metal pipes or stubborn PVC)
- PVC primer(Used before solvent cement on PVC/CPVC joints)
- PVC solvent cement(Select the appropriate type for your PVC/CPVC)
- Deburring tool(Smooth edges to prevent cracks)
- Teflon tape (PTFE)(For threaded connections)
- Pipe wrench or adjustable pliers(Grip and tighten fittings securely)
- Measuring tape and marker(Accurate sizing and markings)
- Silicone sealant or plumber's putty(Optional for certain hub connections)
- Safety glasses(Eye protection during cutting and cementing)
- PipeDope or thread sealant(Use with metal threaded joints)
Steps
Estimated time: 60-120 minutes
- 1
Gather and verify materials
Begin by listing all required materials from your plan. Confirm compatibility with the pipe material and size. Gather safety gear and organize tools for efficient work.
Tip: Double-check material compatibility before cutting to avoid rework. - 2
Measure and plan layout
Measure existing pipe runs and plan fittings to minimize turns and ensure proper slope. Mark cut lines clearly on each pipe segment.
Tip: Always dry-fit before cutting to confirm alignment. - 3
Cut pipes squarely
Use a pipe cutter for PVC and an appropriate saw for metal. Cut straight across and remove burrs so joints seat evenly.
Tip: Keep blades sharp; a jagged cut leads to leaks. - 4
Deburr and clean joints
Deburr the inner edges and wipe dry surfaces to remove dust or debris that can compromise seals.
Tip: Even tiny burrs can prevent a full seating of the joint. - 5
Dry-fit the assembly
Before cementing or tightening, assemble all parts to verify fit and alignment. Adjust lengths if needed.
Tip: Dry-fit saves time and prevents miscuts. - 6
Apply primer and cement (PVC)
Brush PVC primer on the mating surfaces, then apply solvent cement and push the parts together with a slight twist.
Tip: Work quickly; cement sets fast, especially in warm conditions. - 7
Assemble joints and hold
Join components firmly and hold for the recommended time to ensure the bond sets properly.
Tip: Do not twist back and forth after engagement. - 8
Test for leaks and finish
After solvent cure time, run water through the system to check for leaks. If leaks appear, disassemble, re-seat, and retest.
Tip: Always test with a full or near-full water load.
Your Questions Answered
What are the main differences between solvent-weld (PVC) fittings and compression fittings for drain pipes?
Solvent-weld fittings permanently bond PVC by applying primer and cement, offering a clean, leak-free joint when installed correctly. Compression fittings rely on tightened ferrules and seals to grip the pipe and are easier to assemble but may require periodic checks for leaks.
PVC solvent-weld provides a permanent seal, while compression fittings are easier to install but may need occasional checks.
Can I join PVC to copper drain pipes?
Yes, but you should use a proper transition fitting and avoid direct solvent-weld or direct soldering between dissimilar metals. Transition adapters provide reliable joints and minimize galvanic corrosion.
Yes, use a transition adapter designed for PVC to copper.
Do I need primer for PVC joints?
Yes, for solvent-weld joints, primer is essential to soften the surfaces and ensure a strong bond; follow the cement manufacturer's directions.
Yes, apply primer before cement for PVC joints.
How can I tell if a joint is leaking after installation?
Look for wet spots, musty odors, dampness, or a visible drip near joints. Recheck seals and retest after resealing.
Watch for dampness or dripping around joints and test again.
What should I do if a joint fails after testing?
Disassemble, inspect for cracks or mismatches, clean surfaces, reapply the proper primer/cement or sealant, and test again. If failure persists, replace with a compatible fitting.
Take it apart, inspect, reseal, and retest.
Are there code requirements I should know before attempting a DIY drain install?
Local codes vary; check your jurisdiction’s plumbing code. Some tasks require permits or licensed professionals. Always follow safety guidelines and manufacturer instructions.
Check local codes and follow safety guidelines.
Watch Video
What to Remember
- Choose compatible materials to prevent corrosion.
- Dry-fit before cementing to avoid leaks.
- Follow correct sealing methods for each fitting type.
- Test thoroughly after installation for peace of mind.
- Plan layouts with maintenance and future upgrades in mind.