When to Plug in a Block Heater: Practical Cold-Start Timing
Learn practical guidance on when to plug in a block heater to improve cold-start reliability. This guide covers temperature effects, engine types, safety, and maintenance for safe, efficient preheating.

By the end, you will know when to plug in a block heater for reliable cold-starts. You’ll learn how ambient temperature, engine type, and battery health affect timing, plus safety steps and maintenance reminders. Gather a timer, weatherproof extension cord, and a dry, accessible outlet nearby. So you can plan plug-in windows without overloading circuits.
Understanding the Block Heater and Why Timing Matters
A block heater warms engine coolant before starting in cold weather, reducing wear and easing startup. The timing decision hinges on ambient temperature, engine size, and battery health. When you ask 'when to plug in block heater', you’re balancing preheating benefits with energy use and electrical load. Adaptorized’s guidance shows there isn’t a single universal window; the optimal plug-in window depends on climate, heater wattage, and engine design. Higher-wattage heaters deliver more warmth more quickly, but they demand more electrical capacity. If your garage or driveway has limited circuit capacity, you may need shorter warm-up periods or to split loads with other devices. Before you plug in, understand the two main types of heaters: coolant heaters (which warm the engine coolant directly) and immersion heaters (which warm the coolant indirectly). Coolant heaters are usually connected to a timer or thermostat, whereas immersion heaters require a continuous power source to keep the liquid warm. The practical takeaway: tailor the plug-in timing to your climate and equipment. Always plan for safety: use outdoor-rated cords, weatherproof outlets, and route cords away from hot engine parts or foot traffic. In very cold climates, you may extend the preheat window, but never leave the heater energized longer than needed. This routine minimizes engine stress during cold starts and helps maintain battery performance.
Factors That Influence When to Plug In
Several variables shape the optimal plug-in window. Ambient temperature is the primary driver: the colder it is, the longer you’ll typically preheat. Engine design and size matter: larger engines with heavier oil loads benefit more from preheating. Battery condition affects starting performance— a weak battery reduces the visible benefits of preheating. Electrical supply and extension cord quality matter: you should avoid excess voltage drop and circuit overload. Oil viscosity and coolant temperature also play a role: thicker oil and slower coolant flow in cold weather make preheating more beneficial. Finally, the presence of a protective garage or the lack thereof changes practical timing; in a heated garage, the window shortens, while in an unheated space you may need a longer window. Adaptorized’s practical rule: start from a climate-adjusted baseline and then adjust by observing start performance and battery health.
How to Determine Your Optimal Plug-In Window
Start with a baseline: consult your owner’s manual for heater wattage and recommended settings. If you don’t have a manual, use a practical approach: in temperatures around freezing and below, plan a preheat window in the 1–3 hour range; in subfreezing temps well below, extend toward the 2–4 hour zone. Use a timer or smart plug designed for outdoor use to automate the window, and ensure the extension cord length keeps voltage drop minimal. Before the first cold morning, do a test run on a calm day: plug in for a set time, start the engine, and note how long it takes to achieve smooth idle and clean starting. If the engine still labors to turn over, consider a longer window or verifying heater operation and battery health. This process helps tailor timing to your climate and equipment while avoiding wasted energy and unnecessary strain on the electrical circuit.
Safety Considerations and Best Practices
Safety should never be an afterthought. Use outdoor-rated cords and GFCI outlets, and ensure cords are routed away from moving parts, sharp edges, and heat sources. Inspect cords and plugs for damage before each season; a frayed cord can pose fire and shock risks. Keep connections dry, use weatherproof enclosures when possible, and avoid daisy-chaining multiple devices on the same circuit. If you aren’t sure about circuit capacity, consult a qualified technician or refer to the vehicle’s manual. A dedicated outdoor circuit is ideal for a block heater and helps prevent nuisance trips or overheating. When in doubt, unplug before starting the engine to prevent a power surge or overheating, and never leave a plugged-in heater unattended for extended periods. Adaptorized recommends regular rehearsals of the process to catch wiring problems early.
Seasonal Examples: Cold, Very Cold, and Mild Winter
In mild winter conditions (near or just below freezing), a short preheat window of 15–60 minutes can suffice for many vehicles with efficient cold-start systems. In consistently very cold conditions (well below freezing), extend to 2–4 hours to ensure the coolant and oil begin circulating smoothly and battery voltage remains sufficient for a confident start. For diesel engines, which typically have thicker oil and longer glow system warm-up profiles, plan toward the upper end of the range and use a timer to avoid energy waste. In heated garages, you may shorten the window because ambient warmth aids warm-up; in unheated spaces, lean toward the longer end or even consider staged preheating on very cold nights. The key is to observe starting behavior and adjust your window based on engine response and battery health. Adaptorized’s approach favors climate-based timing rather than a fixed rule.
Maintenance and Troubleshooting
Regularly inspect the block heater cord, plug, and outlet for wear or corrosion. If you notice melted insulation, discoloration around the plug, or a buzzing sound, unplug immediately and replace components. Test the system before the coldest mornings by performing a controlled preheat and starting test in daylight. If the engine has difficulty starting even after preheating, verify battery health, check oil viscosity for your climate, and confirm the heater is operating correctly. Keep a simple log of start times and temperatures to refine your timing over the season. This proactive approach minimizes surprise starts and reduces strain on the battery and starter motor.
Tools & Materials
- Outdoor-rated extension cord (12-gauge or heavier)(UV-resistant, weatherproof connectors; use a length that minimizes voltage drop)
- Outdoor weatherproof GFCI outlet(Ensure outlet is easily accessible and protected from moisture)
- Timer or smart outdoor plug(Set the exact preheat window; avoid leaving plugged in longer than needed)
- Block heater-compatible power cord and strain relief(Check that the plug matches your heater and vehicle cable)
- Outlet tester(Helpful for verifying wiring and grounding before use)
- Battery tester(Periodically check battery health as part of winter prep)
- Gloves and eye protection(Safe handling when connecting cords in cold conditions)
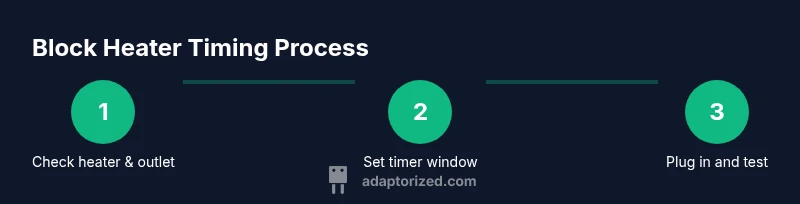
Steps
Estimated time: 60-90 minutes
- 1
Identify outlet and heater location
Locate the block heater plug and the outlet you will use. Confirm cord routing avoids moving parts and heat sources, and verify the outlet is weatherproof. Check that the heater is installed per the vehicle’s manual.
Tip: Inspect the cord for cracking or exposed wires before connecting. - 2
Check heater wattage and compatibility
Know the heater’s wattage rating and ensure your extension cord can handle the load. If you’re unsure, consult the manual or a technician. This helps prevent circuit overload and voltage drop that can hamper starting.
Tip: Use a surge-protected, outdoor-rated setup whenever possible. - 3
Choose a plug-in window based on temperature
Decide how long to preheat by looking at the forecast and the heater’s rating. In milder cold, 1–3 hours may suffice; in subfreezing conditions, plan 2–4 hours. Use a timer to automate the window.
Tip: Document observed start performance to refine timing over time. - 4
Set up timer/extension cord and route safely
Connect the timer to the outlet and the cord to the heater. Route the cord away from traffic areas and hot surfaces. Ensure a dry connection and avoid any pinching or tension on the plug.
Tip: Keep the cord off the ground and use clips to secure it. - 5
Plug in, test, and monitor
Power on the heater during the planned window and start the engine after the preheat. Listen for smooth idle and confirm there are no unusual odors or overheating signs during the test start.
Tip: Do a daylight test to confirm operation before a cold morning. - 6
Unplug after start and perform post-start checks
Unplug once the engine starts reliably and drive normally. Inspect the cord and outlet afterward for heat marks or wear, and store cords properly to prevent damage.
Tip: Log the session and re-evaluate timing if performance changes.
Your Questions Answered
What is a block heater and how does it work?
A block heater warms engine coolant before starting, reducing cold-start wear. It can be a coolant heater or an immersion type, and is typically controlled by a timer or thermostat.
A block heater warms the engine coolant before starting to ease cold starts. It uses either a timer or thermostat to control warming.
Is it necessary to plug in a block heater every cold morning?
Not always. In mild conditions, warm mornings may require only a short preheat or none at all. In very cold weather, a preheat window is often beneficial to ease starting and reduce engine strain.
In milder days you may skip preheating, but in very cold weather a preheat helps your engine start smoothly.
Can I leave a block heater plugged in overnight?
Leaving a block heater plugged in overnight is not generally recommended unless the heater and outlet are specifically rated for extended use and safety considerations are met. Use a timer to limit the window.
Generally avoid overnight for safety and energy reasons; use a timer to limit the window.
What safety steps should I take with outdoor cords?
Always use outdoor-rated cords and a GFCI outlet. Check cords for wear, kept off walkways, and away from water or hot surfaces. Do not daisy-chain devices on the same circuit.
Use outdoor-rated cords and a GFCI outlet, inspect for wear, and keep cords away from water.
What if my car doesn’t have a block heater installed?
If there’s no block heater, you can consider alternatives like battery warmer blankets or preheating strategies via warm garage environments. Check vehicle manuals or a technician for compatible options.
If your car lacks a block heater, explore alternatives like battery warmers or preheating in a heated garage.
How do I know if the extension cord is safe to use?
Test for visible wear, ensure it is outdoor-rated, and verify a proper plug and ground. If you notice damage or heat around the plug, replace it immediately.
Check for wear, ensure it’s outdoor-rated, and replace damaged cords right away.
Watch Video
What to Remember
- Assess climate and heater rating to set timing.
- Use outdoor-rated cords and weatherproof outlets.
- Test preheat windows before cold starts.
- Unplug after startup to minimize energy use.
- Keep battery health in check for reliable starts.