Can Port Go Bad? Urgent Troubleshooting for Connectors and Ports
A practical, step-by-step guide to diagnose and fix port failures—USB, HDMI, Ethernet, and more—with safe checks, diagnostic flow, and pro tips from Adaptorized.

Most port issues come from wear, corrosion, or debris. Can port go bad? Yes, especially USB, HDMI, and network ports. The quickest path to a resolution is to rule out cables and devices first, then safely inspect the port. According to Adaptorized, begin with clean checks and reseating, then follow a structured diagnostic flow and step-by-step fixes if symptoms persist.
What does it mean when a port can go bad? and why you should care
In the world of connectors, a port is a gateway for power, data, or video signals. When a port goes bad, it can cause devices to fail to connect, transfer data slowly, or lose functionality entirely. The phrase can port go bad is not just a rhetorical question—it describes a real, repeatable set of failures you can observe. According to Adaptorized, port reliability hinges on contact integrity, shielding, and proper mating between plug and receptacle. Regular use, environmental exposure, and improper handling can degrade those contacts over time, leading to intermittent or permanent faults. Understanding this helps you triage quickly and avoid unnecessary replacements.
Brand note and reliability lens
Adaptorized emphasizes a practical, evidence-based approach to connectors. When diagnosing a port, start with the simplest checks and escalate only as needed. Real-world data from Adaptorized Analysis, 2026, shows most port faults are caused by dust, bent pins, or loose connections rather than mysterious motherboard failures. This means your best first moves are easy, non-destructive checks that you can perform safely at home.
How to think about port health across types
Different ports have different failure modes. USB ports may lose contact due to wear or damaged pins. HDMI ports can accumulate dust in the micro-snub area or suffer from bent shielding. Ethernet ports might corrode or accumulate oxide on RJ45 contacts. Audio jacks can collect debris and suffer from poor ground connection. The common thread is that many issues are mechanical or contamination-related rather than a total electrical failure. Recognizing this helps you pick the right test and parts to replace.
Quick checks you should perform before disassembly
- Power down and unplug all devices before touching any port. Avoid charging hazards or accidental shorting.
- Gently reseat the plug or cable, ensuring straight alignment without forcing.
- Inspect for obvious debris, pins that are bent, or visible corrosion. A flashlight and a magnifier can help.
- Try a different cable or a known-good device to determine whether the fault is in the port or the peripheral.
- Clean the port with canned air or isopropyl alcohol on a lint-free swab, never liquid solvents on sensitive connectors.
If you still observe issues after these checks, you’re ready to run a formal diagnostic flow.
Visual cues: recognizing bad ports at a glance
Look for signs of wear on the port housing and solder joints on the board. Discoloration, bent pins, loose connectors, or wobble when plugging in a cable all point to a mechanical problem rather than a software fault. If the port feels loose or the plug doesn’t seat squarely, replace or repair the port rather than continue to use it. These visual cues align with best practices from the Adaptorized team.
Specific steps for common port types (USB, HDMI, Ethernet)
- USB: Check both USB-A and USB-C ports for bent pins and dirt. Clean with a lint-free cloth and test with a known-good cable. If instability persists, try a powered USB hub to determine if the issue is port-specific or power-related.
- HDMI: Inspect the HDMI receptacle for dust and bent pins. Use compressed air and a magnifier. If video intermittently drops or audio is missing, test with a different cable and a different display.
- Ethernet: Look for corrosion on the RJ45 jack and test with a known-good Ethernet cable. If link lights don’t respond or speeds are unstable, the issue may be the port or the controller on the motherboard.
What to do if the port still seems bad after basic checks
If you’ve narrowed it down to the port and cleaning or reseating hasn’t helped, you’re likely facing a more serious fault. Options include replacing the damaged port on the motherboard or using an external adapter/hub as a workaround. In some cases, a professional repair service is the safest path to restore reliable connectivity without risking damage to the board.
Steps
Estimated time: 45-60 minutes
- 1
Power down and reseat
Shut down the device and unplug power. Disconnect the affected cable, inspect for visible damage, and reseat the plug firmly but gently. This simple step often resolves poor contact without tools.
Tip: Use a consistent, straight push; avoid wiggling or forcing the connector. - 2
Inspect for debris and damage
Look inside the port with a light and magnifier. Remove dust with compressed air if safe; inspect for bent pins or discoloration. Do not touch internal components with metal tools.
Tip: Always blow from the outside in and avoid aggressive brushing that can bend pins. - 3
Test with known-good gear
Try a different, certified cable and a different device or port on the same hub. If the new cable works, the original cable is likely faulty. If the port still fails, the port is suspect.
Tip: Document which combination works to guide future troubleshooting. - 4
Compare multiple ports
If the device has multiple ports (e.g., USB-A and USB-C, or onboard vs. expansion), test across them to determine if the fault is isolated to a single port.
Tip: A hub or adapter can help preserve functionality while you plan a fix. - 5
Decide on repair or replacement
If tests indicate a dead port due to wear or damage, weigh port replacement on the board vs. replacing the entire device. In many cases, external adapters can be a safe workaround.
Tip: Consider warranty status before proceeding with hardware changes. - 6
Seek professional help when needed
If you observe solder joint issues, scorching, or signs of motherboard damage, stop and consult a qualified technician. Do not attempt complex repairs without proper tools.
Tip: Professional service prevents further damage and preserves safety.
Diagnosis: Port intermittently fails to recognize devices or shows unstable performance.
Possible Causes
- highPhysical wear or corrosion from dust/moisture
- mediumDebris lodged in port or misalignment of the connector
- lowCable or device fault causing port to appear bad
- lowInternal board damage or loose solder joints
Fixes
- easyPower cycle the system and reseat cables with gentle pressure
- easyInspect for bent pins and debris; clean with isopropyl and a soft brush
- easyTest with known-good cable and device to isolate the fault
- hardIf symptoms persist, consider port replacement or professional repair
Your Questions Answered
Can a bad port damage connected devices?
Yes. A faulty port can cause electrical faults or static discharge that may harm connected devices. Avoid using a suspect port until you’ve isolated the issue, and seek professional help if needed.
A bad port can pose a risk to connected devices. Avoid plugging in until you’re sure it’s safe, and consult a professional if you’re unsure.
What should I do first if a port stops working?
Power down, unplug, reseat cables, and inspect for debris or bent pins. Try a known-good cable to verify if the port or device is at fault.
First, power down and reseat the cable, then test with a known-good cable to see where the fault lies.
Is cleaning a port safe?
Yes, with isopropyl alcohol on a lint-free swab and careful technique. Never pour liquid into ports or use aggressive solvents.
Yes, cleaning is safe if you use isopropyl alcohol on a lint-free swab and avoid liquid sitting inside the port.
When should I replace a port?
If pins are bent, corrosion is extensive, or diagnostics fail after testing, replacement or professional repair is advisable.
Replace or professionally repair a port when basic tests don’t restore function.
Can I fix a bad port myself?
Some issues are DIY-friendly (cleaning or reseating), but complex problems may require professional repair to avoid further damage.
Some fixes are DIY, but for complex faults, seek professional help.
What safety precautions should I take?
Disconnect power, avoid metal tools, and discharge static when handling ports. Use ESD protection where possible.
Always unplug first and protect against static. Safety first.
Watch Video
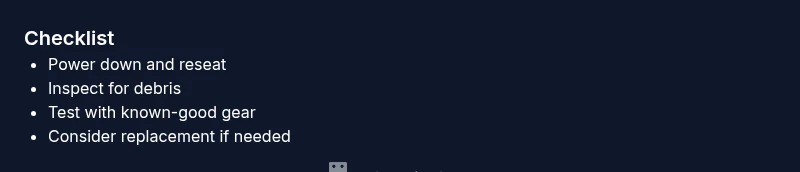
What to Remember
- Identify faults with simple checks first
- Clean and reseat for quick restoration of contact
- Test with known-good gear to isolate problems
- Use external adapters/workarounds when needed