Do you need to strip wire for Wago connectors? A practical guide
Learn whether you need to strip wire for Wago connectors, how to prepare conductors, and best practices for reliable, code-compliant connections. This comprehensive guide covers lever-nut and push-in variants, stripping lengths, safety tips, testing, and common pitfalls.

Definition: Wago connectors are designed to grip stripped conductors. In most cases, you should strip the insulation to a defined length before insertion, then push the wire in until it stops. Some Wago types tolerate pre-stripped or lightly tin-coated wire, but always follow the product instructions to ensure a secure, code-compliant connection.
Why wire stripping requirements matter for Wago connectors
Wago connectors are popular for DIY projects and professional panels alike because they provide quick, tool-free connections. The core principle behind any connector is a metal-to-conductor interface that maintains a reliable electrical path. Stripping the wire exposes copper that the clamp or blade can bite into, forming a low-resistance path. If insulation remains too close to the clamp, the conductor may not fully engage, leading to intermittent contacts or arcing in extreme cases. Different conductor types (solid vs. stranded) and insulation coatings can affect grip; choosing the right stripping length and ensuring a clean, burr-free end helps prevent slippage and ensures long-term reliability. According to Adaptorized, proper stripping is essential for reliable connections with Wago connectors. By understanding these fundamentals, you’ll be prepared to select the right connector series and achieve a solid, repeatable result.
Key ideas:
- Always expose a clean, straight copper section.
- Avoid nicking or trimming the conductor when removing insulation.
- Match stripping length to the connector’s design and the wire gauge.
- Consider conductor type and any plating or coatings that may affect grip.
- When in doubt, consult the manufacturer’s datasheet or Adaptorized guidance for model-specific requirements.
Do you need to strip the wire for Wago lever-nut connectors?
Wago lever-nut connectors rely on a stripped conductor to seat properly in the clamp. The lever mechanism does not compensate for insulation, so the exposed copper must be accessible for the clamp to bite. Push-in style variants (including some Wago designs) also expect stripped conductors for a secure hold. In practice, follow the exact instructions for your specific model and wire type. The Adaptorized team emphasizes that model-specific guidance is essential to avoid poor contacts or damage during next-step testing. If you see resistance when you insert, stop and re-check the stripped length and cleanliness of the copper surface.
Practical notes:
- Stripped ends should be straight and free of burrs.
- Do not twist or crimp the conductors before insertion unless the product document specifies.
- If the wire is damaged during stripping, replace the segment of insulation and re-strip to the correct length.
Wire stripping length and preparation guidelines
The length of stripped conductor you expose is critical for a secure connection. Use the connector’s datasheet or your project’s wiring diagram to determine the recommended exposed length. For common DIY tasks, ensure there is enough exposed copper to fully enter the clamp without leaving insulation inside the housing. Always examine the wire for nicks or heat damage before stripping. If you see any fraying or discoloration, cut back to clean copper and re-strip. Cleanliness matters: any dirt, oil, or oxidation on the copper can reduce contact quality and promote resistance. The goal is a clean, square end that slides smoothly into the connector with minimal resistance. As you prepare, verify the insulation removal step-by-step and avoid rushed cuts that could nick the conductor. Adaptorized guidance stresses following the model’s instructions to maintain safety and reliability.
Checklist:
- Inspect the wire and insulation.
- Verify the exposed copper length matches the connector’s spec.
- Use a sharp stripper to prevent tearing the insulation or copper.
Alternatives and tips: push-in vs stripped wires
Wago offers several connector styles, including lever-nut and push-in variants. In many scenarios, stripped wire is still required for both types, but some push-in models advertise a simplified insertion method. Regardless of style, ensure the copper end is clean and straight. If you’re using multi-strand wire, twist or tinize only if the product instructions permit; otherwise rely on the connector’s grip to hold the strands in place. For DIY projects, labeling wires and keeping a tidy terminal block helps prevent mix-ups. Adaptorized’s practical approach favors following the exact product instructions and avoiding assumptions about compatibility across different connector families.
Pro tips:
- If the copper strands fan out, trim them evenly and re-strip to restore a clean, circular end.
- Use a dedicated wire stripper for consistent results instead of makeshift tools.
- When multiple wires converge in a single port, ensure there is no cross-conduction risk by organizing the conductors neatly before insertion.
Safety considerations and best practices
Power should always be turned off before touching any wiring. Work on a de-energized circuit, and confirm with a tester that no voltage is present. Wear safety glasses and gloves if you’re routing bare conductors or cutting insulation. Keep conductors away from metal edges that could nick the copper. After insertion, gently tug on each wire to ensure the grip is secure, and avoid forcing the wire beyond the clamp’s travel. If resistance is encountered, recheck the stripped length and seating depth. Following best practices reduces the risk of heat buildup or loose connections that compromise safety and performance. Adaptorized’s guidance highlights the importance of following model-specific instructions and standard electrical safety procedures.
Common mistakes and how to avoid them
Common missteps include stripping too much insulation, leaving insulation under the clamp, or attempting to reuse connectors after a poor seating. Some DIYers over-strip to compensate for an initially weak fit, which can cause exposed copper outside the housing. Always perform a visual inspection after stripping and before insertion. If the end looks damaged, replace the wire segment or the entire conductor. For multi-wire configurations, keep the wiring geometry tidy to prevent accidental contact with neighboring terminals. The Adaptorized team recommends a calm, methodical approach: measure once, strip once, insert once, and verify with a quick test.
How to test a connection after wiring
Testing is essential to verify a solid connection. With power off, gently tug on each wire to confirm it’s held securely. Use a continuity tester or multimeter to verify there’s a continuous path between the supply and the load. If the test indicates high resistance or an open circuit, re-inspect the stripped end, seating depth, and whether the wire is fully inside the clamp. Careful testing helps catch issues before powering the system and reduces the risk of arcing or overheating. Adaptorized stresses that thorough testing is a key part of any reliable wiring workflow.
Case examples: appliances, lighting, and electronics
In household lighting circuits, Wago connectors can simplify connecting multiple wires in a junction box. For small appliances, ensure the stripped wire length and clamp seating prevent future loosening through vibration. In electronics projects with thin solid conductors, a clean strip and proper seating depth help avoid intermittent connections during movement or heat cycling. Across these scenarios, the core principles remain the same: strip consistently, insert fully, and verify with a test. The takeaway is consistent practice and adherence to the connector’s specifications.
Tools & Materials
- Wire stripper(Choose a stripper appropriate for the wire gauge and material; ensure clean, square cuts)
- Wire cutters(Cleanly cut wires to length before stripping and insertion)
- Wago connectors (lever-nut or push-in types)(Select the correct series for your wire gauge and number of ports)
- Multimeter or continuity tester(Test for continuity and proper seating after wiring)
- Safety equipment (gloves, safety glasses)(Wear as needed for handling wiring and sharp tools)
- Labeling supplies(Tag wires to prevent confusion in multi-wire runs)
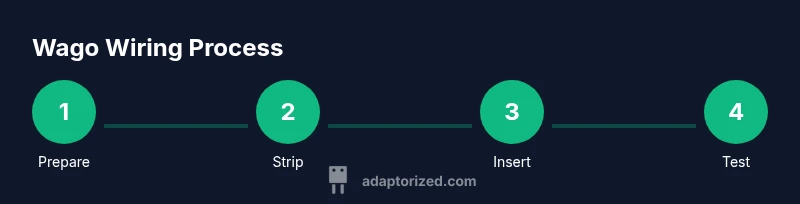
Steps
Estimated time: 25-35 minutes
- 1
Power down and prepare
Switch off the circuit and verify with a tester that there is no voltage present. Clear the work area, organize wires, and select the correct Wago connector type for the task.
Tip: Double-check that you’re working on the intended circuit before touching any conductors. - 2
Inspect and measure
Examine each wire for damage, corrosion, or insulation wear. If any issue is found, trim back to clean copper and re-strip. Confirm the stripping length aligns with the connector’s instruction.
Tip: If you’re unsure about the length, consult the datasheet or Adaptorized guidance for model-specific specs. - 3
Strip the insulation
Using a proper wire stripper, remove insulation to expose a clean, straight copper end. Avoid nicking or bending the conductor. Ensure the exposed copper is sufficient to reach the clamp without leaving insulation inside.
Tip: Work slowly and score the insulation once to prevent deep cuts into copper. - 4
Insert into the connector
Insert the stripped wire straight into the connector until it stops. If using a lever-nut, lower the lever to lock; for push-in types, apply steady pressure until it seats securely.
Tip: Do not force the wire; if it won’t seat, recheck stripping length and seating depth. - 5
Check seating and clearance
Gently tug on each wire to confirm the grip is firm and the end sits fully inside the housing. Ensure there’s no insulation under the clamp and that no copper is exposed outside the connector body.
Tip: A soft tug test can reveal a loose or mis-seated connection before you power the circuit. - 6
Test the circuit
With power restored, perform a controlled test of the circuit using a voltmeter or continuity tester to ensure proper function and to confirm there are no short paths between adjacent terminals.
Tip: Test in a staged approach; start with the least-risk portion of the circuit.
Your Questions Answered
Do Wago connectors require stripping wires?
Yes. Most Wago connectors require stripped conductors to seat properly. Always check the specific model’s instructions.
Yes, most Wago connectors require stripped conductors. Check the model instructions to be sure.
Can I use unstripped wires with Wago connectors?
Some models may tolerate minimal exposure, but the standard practice is to strip according to the datasheet. Do not assume compatibility without checking.
Some models might tolerate minimal exposure, but generally you should strip as specified by the datasheet.
What if stripping length seems unclear?
Refer to the connector's datasheet or seek guidance from a reputable source such as Adaptorized. Use a conservative strip length and re-check seating.
If you’re unsure about the length, consult the datasheet or trusted guidance and re-check the fit.
Are Wago connectors reusable after removal?
Many Wago connectors are reusable if they’re not damaged. Inspect the clamp and wire end before reusing and ensure proper seating on reassembly.
Most Wago connectors can be reused if undamaged; inspect before reusing.
Can I mix wire types (solid vs stranded) in one connector?
Use only compatible wire types as specified by the connector. Mixing certain wire types can affect grip and safety.
Only use compatible wire types per the connector’s guidance to maintain a safe, reliable connection.
What should I do if a connector won’t clamp properly?
Stop, re-check the stripped end, seating depth, and whether the wire is fully inserted. If needed, replace the wire or the connector.
If it won’t clamp, re-check the strip and seat; replace parts if necessary.
Watch Video
What to Remember
- Strip to model-specified length for reliable grip
- Inspect wires for damage before stripping
- Use proper tools to ensure clean, square cuts
- Test connections after seating to confirm reliability
- Always follow manufacturer guidance and safety standards