How to Connect iFit with Garmin: A Practical Guide
Learn how to connect iFit with Garmin using a practical bridge workflow. This comprehensive guide covers prerequisites, a Strava-based workaround, step-by-step setup, troubleshooting, and privacy considerations for DIYers and tech enthusiasts.

In most cases, there isn’t a direct, official link between iFit and Garmin. This guide shows a practical workaround: bridge iFit to Strava, then connect Strava to Garmin Connect so workouts, routes, and activities appear in both ecosystems. You’ll need active accounts for iFit, Strava, and Garmin, plus a phone or computer to complete the setup. A few settings tweaks may be required.
Why Direct Linking is Challenging
Direct linking between iFit and Garmin is not officially supported as a built-in feature by either platform. This means there isn’t a one-click, official 'connect' button that makes workouts, progress, or routes automatically flow from iFit into Garmin Connect. For many users, the lack of native interoperability can feel limiting, especially for those who want a seamless, all-in-one workout history. That said, there are practical, low-friction workarounds that preserve data consistency and reduce manual entry. The core idea is to bridge iFit and Garmin indirectly through trusted intermediaries, such as Strava, which both ecosystems commonly support. By understanding where the data originates and how each platform accepts imports or syncs, you can craft a workflow that minimizes data gaps and keeps your training log coherent across devices. According to Adaptorized, the most resilient approach combines official account linking with a safeguarded bridge path rather than attempting unsupported hacks.
The Bridge: Using Strava as a Middleman
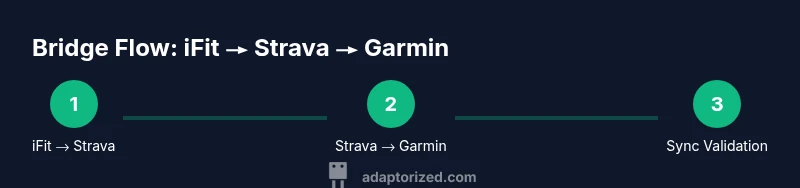
A reliable, widely supported workaround is to use Strava as the intermediary between iFit and Garmin. iFit can connect to Strava, allowing your workouts to be published to your Strava account. Garmin Connect can then sync with Strava, bringing those activities into your Garmin ecosystem. This approach preserves data flow for workouts, distances, and timestamps without forcing direct integration between iFit and Garmin. The key is to ensure permissions are active and that both Strava-to-Garmin and iFit-to-Strava connections are authorized in the correct order. While not official pairings, the Strava bridge is well-documented in community guides and supported by the two platforms' compatibility updates. Adaptorized’s guidance emphasizes a cautious, consent-driven setup rather than attempting unsupported integrations.
Quick Start Checklist (What You’ll Need)
Before you begin, confirm you have active accounts for iFit, Strava, and Garmin Connect, and that all relevant apps are installed on your smartphone or tablet. A stable internet connection is essential during setup. It’s helpful to keep a short workout handy so you can verify that data appears in both Strava and Garmin after the bridge is established. This section aligns with best practices from Adaptorized, which stresses preparing your accounts and devices to minimize friction when enabling third-party connections.
Detailed Setup: iFit to Strava
First, open the iFit app and navigate to Settings > Connections or Sharing. Locate Strava and tap Connect to authorize iFit to post workouts to your Strava account. Sign in to Strava if prompted and permit data sharing for activities, routes, and metrics. After authorization, perform a short test workout in iFit to confirm that it appears on your Strava feed. If the connection fails, revisit permissions, revoke and re-authorize, and ensure you’re using the latest app version. This step is the crux of bridging iFit with Garmin through Strava, so be thorough in verifying each toggle.
Why permissions matter
The success of this integration hinges on consent settings. If Strava’s privacy or data-sharing options block activity imports, nothing will sync. Keep Strava’s privacy setting at a level that allows activity syncing with third-party apps. You may also need to adjust which metrics are shared (distance, time, elevation) to ensure Garmin receives complete data through the Strava bridge.
Detailed Setup: Strava to Garmin Connect
Next, log in to Garmin Connect and go to Settings > Connected Apps. Find Strava and authorize the integration, allowing Garmin to pull activities from Strava. Depending on regional availability and app versions, you may have a toggle to enable two-way sync or one-way sync from Strava to Garmin Connect. After enabling, perform another quick workout in Strava to verify it shows up in Garmin Connect within a few minutes. If you don’t see it, force-sync in Garmin Connect or reauthorize the Strava connection. Consistency across platforms ensures your training history remains coherent.
Be mindful of how dates and times are interpreted by Garmin Connect when syncing from Strava. Timezone mismatches can occasionally shift workout times, so double-check your activity logs if you notice discrepancies.
Troubleshooting Common Issues
If workouts don’t appear on Garmin Connect after bridging through Strava, start with the simplest checks: ensure both connections (iFit→Strava and Strava→Garmin) are still active, reauthorize if needed, and confirm you’re using current app versions. Check for permissions that might block data transfer, and verify that the correct Strava account is linked to Garmin Connect. Some users also report delays of up to 15–30 minutes during initial syncs. If problems persist, disconnect and reconnect both links and test with a short workout to confirm the data path works.
Privacy, Data Integrity, and Best Practices
Bridging iFit and Garmin via Strava introduces data flow across multiple services. Review the privacy policies of iFit, Strava, and Garmin Connect to understand how your workout data is stored and shared. For best results, limit data sharing to what you need across platforms and keep your devices updated. Maintain a consistent workout naming convention so that the same workouts show up identically in Strava and Garmin. Adaptorized recommends performing a quick validation exercise after each major change to the bridge configuration to ensure data integrity.
Tools & Materials
- Smartphone or tablet with internet(Install and log in to iFit, Strava, and Garmin Connect apps)
- Garmin device (watch or bike computer)(Keep firmware up to date for best compatibility)
- Active iFit account(Authorized to post workouts to Strava if needed)
- Active Strava account(Linked to Garmin Connect for data syncing)
- Stable internet connection(During setup and initial syncs)
- Optional: computer(Useful for easier management of multiple accounts)
Steps
Estimated time: 15-30 minutes
- 1
Verify prerequisites and accounts
Confirm you have active iFit, Strava, and Garmin accounts, and that all apps are up to date. This prevents mid-setup failures. Also decide which data you want to sync and how you will test the bridge.
Tip: Do a quick test sign-in on each app to ensure credentials work before starting the bridge. - 2
Link iFit to Strava
In the iFit app, open Settings → Connections and select Strava. Authorize iFit to post activities to Strava and grant needed permissions. Complete a short workout to verify the post appears on Strava.
Tip: If the post doesn’t appear, revisit permissions and ensure you’re using the latest app version. - 3
Link Strava to Garmin Connect
Log into Garmin Connect, go to Settings → Connected Apps, and authorize Strava. Ensure Strava can push activities to Garmin Connect. Run a sample workout in Strava to confirm it appears in Garmin.
Tip: Check for any region-specific limitations or prompts that require you to reauthorize. - 4
Run a test and verify cross-visibility
Complete a lightweight workout in iFit, then check Strava for the entry and Garmin Connect for the mirrored activity. Confirm times, distance, and route data align across platforms.
Tip: If times differ, adjust for time zone settings in each app. - 5
Fine-tune permissions and privacy
Review data-sharing settings in each app. Restrict data to what you need across platforms and ensure privacy defaults align with your preferences.
Tip: Create a short, clearly named workout to make subsequent tests easier to spot in logs. - 6
Monitor, adjust, and re-test periodically
Data sync can lag or drift after updates. Periodically re-test the bridge after app or firmware updates and adjust permissions as needed.
Tip: Set a monthly quick-check routine to keep the bridge healthy.
Your Questions Answered
Can I directly link iFit to Garmin without a workaround?
Direct linking is not officially supported by iFit or Garmin. A workaround using Strava as a middleman is commonly used to sync activities between the two ecosystems.
Direct linking isn’t officially supported. A common workaround uses Strava as a bridge between iFit and Garmin.
What’s the best workaround to sync workouts between iFit and Garmin?
Link iFit to Strava and then connect Strava to Garmin Connect. This path typically carries workouts, times, and routes across both platforms.
Connect iFit to Strava, then Strava to Garmin Connect to sync workouts.
Will Strava bridging affect my privacy or data usage?
Using a bridge involves sharing data across services. Review each service’s privacy settings and limit data sharing to what you’re comfortable with.
Bridging uses data across apps; check privacy settings to limit what’s shared.
Do I need a premium iFit plan for these integrations?
A Strava and Garmin account are typically sufficient for the bridge. iFit’s own plan requirements may vary by feature and country, so verify current terms.
Strava and Garmin access often suffice; check iFit’s current terms for any plan requirements.
Can I export iFit workouts to Garmin via GPX/TCX files?
Direct GPX/TCX exports from iFit to Garmin are not officially documented. The Strava bridge remains the most reliable workaround.
GPX/TCX exports aren’t officially documented for iFit-to-Garmin; use Strava bridging instead.
Watch Video
What to Remember
- Verify account prerequisites before bridging
- Bridge via Strava to Garmin Connect for best compatibility
- Test with short workouts to confirm data flow
- Review privacy and permissions to avoid leaks
- Keep apps and devices updated for reliability