How to Connect Ifit and Strava: A Practical Guide
Learn how to connect ifit and Strava with practical steps, workarounds, and privacy tips. This Adaptorized guide covers direct integration checks, exporting workouts, and safe import workflows for DIY fitness enthusiasts.

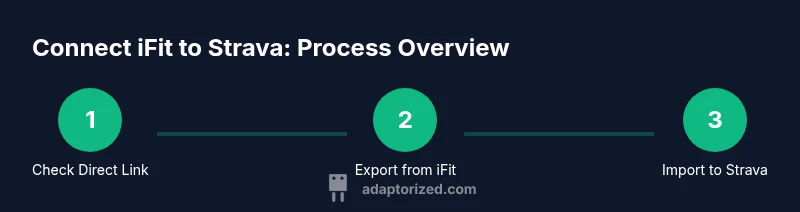
Direct, native syncing between iFit and Strava isn’t universally available. This guide shows practical, tested ways to bridge the two platforms, including checking for built-in options and safe workarounds. Expect step-by-step actions, data integrity checks, and privacy tips from Adaptorized. We’ll cover direct integrations if present, exports, imports, and tips to verify that workouts, routes, and metrics transfer correctly.
Introduction and integration status
According to Adaptorized, learning how to connect ifit and strava begins with a clear view of each platform’s capabilities and the current integration landscape. iFit centers on guided workouts and device ecosystems, while Strava excels at activity tracking, routes, and social sharing. As of 2026, there is no universal, one-click bridge between the two services that works for every user. Availability can depend on your device, region, and account type. The goal of this guide is to give you practical, tested paths to move data between the services, even when a direct link isn’t offered. By the end, you’ll know whether a direct integration exists for you, and if not, how to safely export, convert if needed, and import workouts so you can keep your fitness history in one place.
Direct integration status and what to check first
The most efficient path is always to enable a native integration if it exists. Start by opening the iFit app and checking Settings > Apps or Data Sharing for any Strava links. Then open Strava and look for Import or connected apps. If you find a direct option, follow the prompts to authorize both accounts and test with a short workout. If no direct link appears, move to the safe workarounds described later in this guide. The key is to confirm what data types are supported, because not all workouts, routes, or metrics transfer, and some platforms limit how far back you can sync.
Data you can sync and privacy considerations
Understand what data can move between iFit and Strava. Commonly supported elements include timestamped activity, duration, distance, pace, and GPS routes. Heart rate and cadence data may appear depending on device compatibility. Privacy matters: ensure that both accounts are set to the desired visibility and consider turning off automatic sharing for workouts you want private. Always review the data fields to avoid mismatches—time zones, activity types, and gear names can cause confusion when workouts appear in Strava. Authority sources are listed below for reference.
How to export workouts from iFit (if export is supported)
First, confirm iFit supports exporting workouts as GPX/TCX. If yes, sign in to the iFit website or app, navigate to your activity history, select a workout, and choose Export as GPX or TCX. Save the file to your computer. If iFit doesn’t offer export, you may be able to log the workout manually in Strava or use an intermediate step via another service that can export from iFit data in a transferable format. Adaptorized notes emphasize verifying compatibility before starting an export-heavy workflow.
How to import workouts into Strava
Log into Strava on the web, click Upload, choose File, and select your GPX/TCX file. Strava will process the data and create a new activity. Review the mapped fields (distance, duration, time) and adjust any mislabels (for example, changing the sport type). If you used a manual log instead of a file, create a new Strava activity and add notes about the workout so it remains traceable in your history.
Using intermediate apps or manual workarounds
If iFit cannot export directly, consider a two-step bridge: export from iFit to a portable format supported by a third-party tool, then convert to GPX/TCX for Strava import. Some users leverage a health data aggregator app that can sync with both platforms and export a GPX file. As a last resort, manually recreate workouts in Strava, attaching notes and GPS data where available. Always map fields consistently (distance, duration) to maintain accuracy.
Troubleshooting common issues
Data gaps: check that the export file includes GPS and time stamps. Duplicate activities: remove duplicates and re-import a clean file. Missing rides: verify that the file was saved correctly and that Strava accepted the upload. Timezone mismatches: adjust the start times during import or in a text note after upload. If data fails to transfer, retry with a smaller test file first, then scale up to fullExport batches.
Best practices for accuracy and privacy
Set consistent time zones across devices before exporting. Use a clear activity type mapping and verify GPS data after import. Review privacy settings for each platform to control who can view your activities. Enable two-factor authentication on both accounts and enable software updates to avoid compatibility issues. Keep your credentials secure and periodically audit connected apps.
What to do next and verification steps
Run a quick test by creating a small workout in iFit and attempting to export/import to Strava to confirm fields map correctly. Check key metrics (distance, duration, pace, GPS route) against the source. If everything aligns, continue with larger batches and maintain a regular audit cadence to catch drift early.
Authority sources
- https://developers.strava.com/docs/
- https://support.strava.com/hc/en-us
- https://help.ifit.com
Tools & Materials
- Smartphone or computer with internet(Access iFit and Strava accounts)
- iFit account credentials(Email, password; have 2FA ready)
- Strava account credentials(Email, password; have 2FA ready)
- GPX/TCX export capability(Check if iFit supports exporting workouts in GPX/TCX)
- GPX/TCX file transfer method(Upload to Strava or convert formats if needed)
- File conversion tools (optional)(Online converters or local tools to create GPX/TCX from other formats)
Steps
Estimated time: 60-120 minutes
- 1
Check direct integration options
Open iFit Settings and Strava Settings to look for a direct link or app connection option. If a direct integration exists, enable it and test with a short workout.
Tip: If you see a toggle, enable it and run a quick test to verify data syncing. - 2
Prepare your accounts
Log in to both iFit and Strava on a trusted device. Ensure two-factor authentication is enabled and your privacy settings reflect your preferred audience for new activities.
Tip: Have 2FA codes handy during setup. - 3
Export workouts from iFit
Navigate to your activity history and select a workout to export as GPX/TCX if the platform supports exporting. Save the file in a known folder on your device.
Tip: If GPX/TCX export isn’t available, note this and proceed to the workaround section. - 4
Convert to a Strava-compatible format
If needed, convert the exported file to GPX/TCX using a trusted converter. Ensure the file preserves timestamp, distance, and GPS data.
Tip: Double-check file integrity before importing. - 5
Import into Strava
Open Strava on the web, choose Upload > File, and select your GPX/TCX file. Strava will create a new activity with the imported data.
Tip: Review mapped fields and adjust activity type if required. - 6
Verify data accuracy
Compare key metrics (distance, duration, pace, GPS route) between the source and Strava. Correct any discrepancies by editing the Strava activity if needed.
Tip: Small mismatches are common; fix them before uploading larger batches. - 7
Explore intermediate options
If direct export/import isn’t feasible, consider an intermediary app that aggregates data from iFit and exports GPX/TCX for Strava, or manually log workouts in Strava as a fallback.
Tip: Use the intermediary option as a last resort, not a first choice. - 8
Document and maintain
Keep a simple log of how you connected iFit and Strava (methods used, file names, dates). Regularly verify a sample of workouts to prevent drift in your history.
Tip: This helps you reproduce the workflow later.
Your Questions Answered
Can I connect iFit directly to Strava without any workarounds?
As of 2026, there isn’t a universal direct integration that works for all users. If a direct link exists in your region and device, follow the prompts to enable it. Otherwise, use export/import or a bridging workflow described in this guide.
There isn’t a universal direct connection between iFit and Strava right now; check your apps for any built-in link, or follow export/import steps.
What data types typically transfer when bridging iFit and Strava?
Common exports include time, distance, pace, and GPS routes. Some devices also transmit heart rate and cadence where supported. Always verify which fields are preserved after import to avoid mislabeling.
Most transfers cover time, distance, pace, and GPS routes, with some devices sharing heart rate and cadence depending on compatibility.
If iFit won’t export, what should I do?
If iFit restricts exports, consider manual logging in Strava or using an intermediate app that can bridge data from iFit into a transferable format. Document any manual steps for future reference.
If exporting isn’t available, try manual logging in Strava or use an intermediary tool that can bridge the data.
Is a paid Strava account required to upload GPX files?
A Strava account is required to upload activities. Some advanced features require a paid plan, but basic GPX uploads are generally supported on standard accounts.
You need a Strava account to upload; basic uploads are usually supported on free plans, with extra features behind a paywall.
Can I automate the bridge between iFit and Strava?
Automation is limited and often depends on third-party services that can bridge data. Expect manual steps for many users, with occasional automation for select workflows.
Automation options exist but are limited; most people bridge data with export/import steps only.
What’s the best way to verify that a transfer worked correctly?
After import, review key metrics (distance, duration, GPS) and compare with the original iFit workout. Look for consistent timestamps and correct activity type, then adjust if needed.
Check the Strava activity against the source; verify distance, time, GPS data, and start times.
Watch Video
What to Remember
- Verify direct integration first
- Use GPX/TCX exports for Strava imports
- Review data mappings after each import
- Enable two-factor authentication on both accounts
- Document your workflow for repeatability