How to Get Rid of Liquid Detected in Lightning Connector: A Practical DIY Guide
Practical steps to safely dry a Lightning port, inspect for corrosion, and prevent future moisture in iPhone/Apple devices. Learn safe methods, what to avoid, and when to seek professional help.

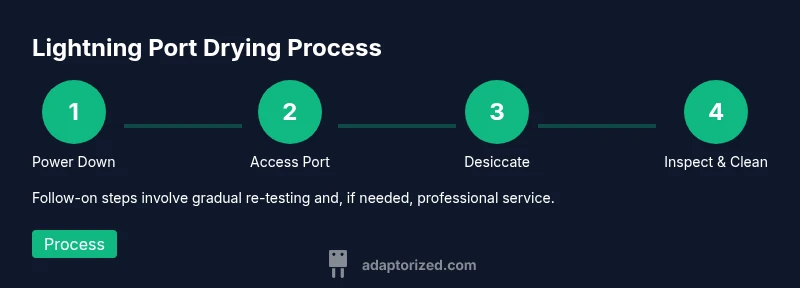
To address a Liquid Detection alert in a Lightning connector, power off the device, unplug accessories, and remove any case for full access. Use gentle drying with desiccants, inspect for remaining moisture, and, if needed, clean the port with 99% isopropyl alcohol after it’s completely dry. Follow the step-by-step remediation to minimize corrosion and preserve functionality.
What the moisture warning means for your Lightning connector
If you’re wondering how to get rid of liquid detected in lightning connector, you’re in the right place. The warning appears when moisture sensors inside the Lightning port detect trace amounts of liquid, or when residues from liquids mimic moisture conditions. In iPhone and iPad devices, this safety feature is designed to prevent short circuits and corrosion by preventing charging until the port is dry. This issue is more common in humid environments, during outdoor use after rain or sweat, or when devices are rapidly cooled and heated near water sources. The risk is not only immediate: moisture can corrode spring contacts, create conductive paths on the board, and accelerate oxide growth that dulls contacts over time. Adaptorized's guidance emphasizes that the first priority is to avoid powering the device or inserting cables while the port shows moisture, and to follow a controlled drying process. While the flashiest solution is often tempting, the long-term health of the connector depends on a patient, methodical approach that prioritizes gentle drying, safe cleaning, and careful inspection. By understanding what triggers the detection and what steps are safe, you can dramatically increase the odds of preserving charging performance and port integrity over months to come.
Immediate safety steps before you start
Before you begin any remediation, power down the device completely and disconnect any accessories such as cables, USB sticks, or adapters. If your phone is in a case, remove it to expose the port, and place the device on a dry, non-conductive surface away from heat sources. Do not shake or blow air forcefully into the port; moisture can travel deeper and spread across the circuitry. If the warning appeared after a fall in water or exposure to rain, consider whether internal moisture may still be present in other components. This stage is about reducing risk: turn off power to avoid short circuits, prevent accidental charging, and minimize the chance of further liquid migration. If you use a power bank or charger, keep it unplugged until the port is fully dry, and store the device in a dry room with stable temperature. Adaptorized’s approach in this stage stresses safety and minimal invasive handling—preserve the device’s current state and limit anything that could push moisture farther into the jack or the board.
Drying and desiccation: best-practice methods
Moisture inside the Lightning port can be stubborn, so use a combination of desiccants and patience. Place the device in a sealable container with silica gel packets or another desiccant, ensuring the port is accessible to air but not pressed against any objects. A typical dry-out window is 6–12 hours in a controlled environment, though longer times may be needed in humid climates. Do not apply heat from hair dryers, heat guns, or warm ovens, as rapid temperature changes can warp seals or push liquid further into the device. If you have access to a small fan or air bulb, gently circulate air near the port without forcing air into the jack. After the wait period, inspect the port with a bright light; if you still see moisture beads or a fogging effect, extend the drying time. The desiccant method is favored for being non-destructive and repeatable; it works best when the device remains off and undisturbed during the process. For DIYers, this phase is the core step that reduces the moisture level to safe thresholds before attempting any cleaning.
Cleaning and inspecting the port after drying
With the device dry, perform a careful inspection of the Lightning port. Look for discoloration, corrosion, or any debris that could impede contact. A soft, lint-free microfiber cloth can remove surface dust around the port, while a clean cotton swab moistened with a drop of 90–99% isopropyl alcohol can lift stubborn residues off non-metallic surfaces. Apply the alcohol to the swab rather than directly into the port to prevent excess liquid from entering. Wait for the port to dry again before re-checking moisture indicators or plugging in a cable. If you notice corrosion or pitting on the contacts, stop and proceed to professional service; attempting aggressive cleaning can worsen the damage. Avoid knocking or prying on the connector pins; they are delicate and susceptible to bending. Document your observations with a photo for reference if you will seek help later. This phase is about confirming dryness and ensuring there’s no conductive film that could cause charging faults.
Re-testing and when to stop
After the recommended drying period, re-check the moisture indicator and the port’s physical condition. If the indicator remains active, continue drying in small increments until it stabilizes. Reconnect a non-critical accessory (like a sealed, known-good cable) to see if charging or data transfer begins without triggering the moisture alert; do not press the device too hard onto the charger. If the port remains dry but a faint corrosion smell or signs of wear appear, set the device aside and arrange professional diagnostics. If you are able to test, do so in a low-stress environment, avoiding high-power charging until you’re confident the port is moisture-free. The critical point is not to force charging until you are certain the port is dry and the safety feature is no longer active. Adaptorized’s recommended practice is to validate dryness with repeated checks and to keep monitoring for days after remediation.
When to seek professional help
If, after a full drying cycle, the Liquid Detected warning persists for more than 24–48 hours, or you observe corrosion, discoloration, bent contacts, or loose components inside the port, professional service is warranted. A technician can inspect the motherboard traces, assess corrosion risk, and perform precision cleaning or component replacement if needed. While some opt to visit an authorized service provider, independent repair shops with LED-based port inspection tools can often diagnose deeper moisture issues. If your device is still under warranty or AppleCare coverage, confirm the terms for water damage; many policies exclude liquid exposure, but some exceptions may apply. Document dates, photos, and steps you took so a tech can reproduce the remediation efforts and verify dryness. The key is to avoid repeating quick fixes that could cause more harm than good.
Long-term prevention strategies
To minimize future moisture problems, adopt simple, repeatable habits. Use a protective case with a tight port seal when outdoors or near water, and avoid leaving devices in humid pockets or hot vehicles. Consider storing devices in a dry cabinet or with silica gel packs when traveling through moisture-rich environments. Regularly inspect charging ports for signs of wear or residue and clean gently with approved tools. If you are in a high-humidity area, consider using a dehumidifier in your workspace and keeping devices away from direct humidity sources during charging. These preventative measures reduce the chance of recurrent liquid detection warnings and extend the life of your Lightning port, the cable, and related circuitry. Adaptorized’s guidance emphasizes consistency and care—small, proactive steps matter as much as one-time fixes.
Common myths vs. facts
Myth: A quick hair dryer blast will dry the port instantly. Fact: Heat can push moisture deeper into the device and damage seals; it also risks warping connectors. Myth: If the warning clears, you’re in the clear. Fact: Residual moisture can remain in hidden areas; true dryness requires time and controlled desiccation. Myth: Water exposure automatically voids your warranty. Fact: Warranties vary by region and policy; check coverage carefully and document events. Myth: Any moisture means the device is ruined. Fact: Many devices recover fully with careful drying and inspection, but persistent moisture or corrosion is a red flag. This section helps you separate quick fixes from proven, safer methods and aligns expectations with real-world outcomes.
Tools & Materials
- Silica gel desiccant packets(Place in sealable container with device to accelerate drying)
- Lint-free microfiber cloth(Use gently around the port exterior)
- Isopropyl alcohol (90-99%)(For cleaning after drying; apply to swab, not port directly)
- Cotton swabs (lint-free)(Dampen lightly for residue removal)
- Small sealable container(Create a dry-out environment with desiccants)
- Bright handheld flashlight(Inspect port for moisture and debris)
- Soft brush (optional)(Gently remove stubborn dust without scratching)
Steps
Estimated time: 6-24 hours
- 1
Power down and disconnect
Fully power off the device and unplug all accessories. Remove the case to expose the port. This minimizes the risk of short circuits during the drying process.
Tip: If the device is unresponsive, hold the power button for 10 seconds before proceeding. - 2
Prepare for drying
Place the device on a dry, non-conductive surface. Do not shake or blow into the port. Set up a sealable container with desiccants nearby for a controlled dry-out.
Tip: Keep the environment cool and dry to avoid condensation. - 3
Desiccate for several hours
Put the device in the container with silica gel. Leave undisturbed for 6–12 hours (longer in high humidity). Do not apply heat or force air into the port.
Tip: Check the container after the first 6 hours; extend if moisture is still visible. - 4
Initial inspection after drying
Remove the device and inspect the Lightning port with a flashlight. If the port looks dry and free of residue, proceed to a gentle cleaning if needed.
Tip: Do not plug in cables yet; dryness first. - 5
Gentle cleaning (if needed)
Dampen a cotton swab with 99% isopropyl alcohol and gently wipe the outer port surfaces. Avoid pooling liquid and never pour cleaner directly into the jack.
Tip: Let the port air-dry for several minutes before reuse. - 6
Re-test with caution
Power on the device and try a low-risk accessory with minimal power. If the moisture indicator triggers again, power down and extend the drying window.
Tip: Use a known-good cable or accessory that you can replace easily. - 7
Decide on follow-up care
If the warning persists after extended drying or you see corrosion, schedule professional service. Do not force charging during the drying window.
Tip: Document dates, observations, and actions for technicians. - 8
Preventive habits
Adopt protective cases, avoid moisture-prone environments, and store devices with desiccants when traveling to reduce future occurrences.
Tip: Regularly inspect ports for wear and clean them gently.
Your Questions Answered
What does 'Liquid detected in Lightning connector' mean for my device?
The message indicates moisture is detected in the Lightning port, triggering safety measures to prevent short circuits. It does not guarantee the port is permanently damaged, but you should dry and inspect it before attempting to charge or connect accessories.
It means moisture has been detected in the port and you should dry and inspect it before charging.
Can I use a hair dryer to dry the port?
No. Using heat can push moisture deeper, warp components, and damage seals. It may also trigger further warnings or cause corrosion over time.
No, avoid heat sources like hair dryers; use desiccants and natural air drying instead.
Is the moisture indicator always reliable?
The indicator is a safety feature and is generally reliable, but it can trigger due to residues or misreads. Always verify by drying thoroughly and re-checking after the port is clearly dry.
It's a helpful guide, but you should confirm dryness with careful inspection and waiting periods.
Will moisture damage be covered under warranty?
Warranty terms vary by region and policy. Liquids are often excluded, but some plans may offer exceptions. Check your policy and document the incident before seeking service.
Check your warranty terms, as liquid exposure is commonly excluded.
How long should I wait after drying before using the device again?
Wait until the moisture indicators show no moisture and the port appears completely dry, typically after a full drying cycle. When in doubt, extend the wait to 24 hours and re-check.
Wait until the indicator is off and the port looks dry, usually after a full drying cycle.
What if moisture returns after remediation?
If moisture returns, stop using the port, re-run the drying process, and consider professional diagnostics. Recurrent moisture indicates deeper issues that DIY steps may not fix.
If it comes back, don’t push charging; seek professional help.
Watch Video
What to Remember
- Power down first to avoid short circuits.
- Use desiccants and a sealed environment for controlled drying.
- Inspect and clean gently; avoid aggressive probing.
- Seek professional help if moisture returns or corrosion is evident.