Why is Dock Connector Not Working? A Practical Troubleshoot Guide
Urgent guide to diagnose and fix a dock connector that isn’t working, with practical steps, safety tips, and checks to restore charging and data transfer fast across common docking setups.

The dock connector not working is most often caused by a loose or damaged mating surface, debris buildup, or a misaligned connector. Start by inspecting the port, gently removing lint or corrosion, and reseating the connection. If the issue persists, try a different cable or adapter to rule out the cable as the fault.
Why the dock connector fails: common culprits
According to Adaptorized, the dock connector not working usually points to contact issues rather than a complete part failure. The most common culprits are dirt or dust in the port, a damaged or bent mating surface, a loose or degraded cable, or a misaligned adapter. Inspect the plug and socket for any visible wear, corrosion, or lint. If moisture has entered the socket, opt for drying steps before attempting another connection. Also verify that the docking accessory is compatible with your device and supports the required data or charging protocol. In many DIY scenarios, simply reseating the connector while ensuring the device is powered off can restore function. If you still experience failure after a careful inspection, you may be dealing with a deeper issue such as bent pins or a fatigued cable that needs replacement. This guide outlines a practical, methodical approach to diagnose and fix the problem safely.
Quick checks you can perform without tools
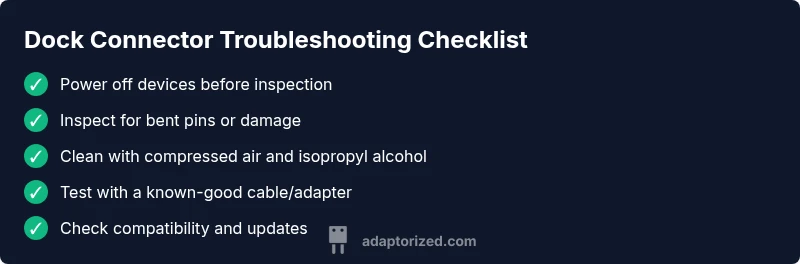
- Power status: Confirm the device and dock have adequate power before testing. A low or unstable power supply can masquerade as a dock fault.
- Port and cable rotation: If your dock uses multiple ports or channels, test each port and rotate the connector to check for a marginal contact.
- Look for visible damage: Inspect pins, housing, and cable insulation for bending, corrosion, or wear. Damaged components should be replaced rather than forced.
- Try a known-good cable/adapter: Swapping to a different cable helps isolate whether the problem lies with the cord or the dock itself.
- Device compatibility check: Ensure the dock is compatible with your device’s protocol (charging, data, or both) and that any required updates are installed.
Cleaning, inspection, and reseating the connector
Safety first: power down and unplug before touching the dock. Use a can of compressed air to remove loose dust from the port, holding the can upright. If stubborn debris remains, dampen a lint-free swab with 70% isopropyl alcohol and gently wipe the contacts. Let surfaces dry for about 30 seconds, then reinsert the connector with even pressure, ensuring alignment. Confirm the dock seats fully and doesn’t wobble. If the port shows corrosion or the pins are visibly bent, replacement is the safer option.
How to test with alternate cables and adapters
After cleaning and reseating, test with a different, known-good cable or adapter that matches the required spec. If the device recognizes the connection with the alternate cable but not with the original, you’ve isolated the fault to the accessory. If none of the cables work across multiple devices, the issue is likely in the dock port or device side circuitry. In that case, consider a firmware update if available and confirm that the device’s dock mode is enabled.
Steps
Estimated time: 20-40 minutes
- 1
Power down and disconnect
Power off the device and unplug all power sources before inspecting the dock. This prevents short circuits and makes inspection safer.
Tip: Always remove power before handling connectors. - 2
Inspect for visible damage
Look for bent pins, cracks in the housing, or loose fittings. Any obvious damage means the part may need replacement.
Tip: If you see corrosion, do not force connections. - 3
Clean the port
Use compressed air to remove loose debris, then wipe contacts with a 70% isopropyl alcohol-soaked swab. Allow to dry fully.
Tip: Do not soak the port or use excess liquid. - 4
Re-seat the connector
Gently push the dock connector into the port with even pressure until it sits firmly. Avoid wiggling or prying.
Tip: If the fit feels loose, the port may be worn. - 5
Test with an alternate cable
Connect using a different cable/adapter that supports the same protocol. Observe if charging/data transfer works.
Tip: Use a known-good cable to verify the dock’s function. - 6
Test with another device
Attempt the same docking setup with a different compatible device to see if the problem is device-specific.
Tip: This helps isolate the fault to device vs. dock. - 7
Check for updates or compatibility
Ensure firmware or software on the device supports docking. Install any available updates or clear compatibility issues.
Tip: Review release notes for docking support changes. - 8
Decide on replacement or professional help
If issues persist after all checks, the dock port or internal circuitry may be damaged and require professional service or replacement.
Tip: Professional service is recommended for physical port damage.
Diagnosis: Dock connector not working
Possible Causes
- highDirt, debris, or lint in the port
- mediumBent or damaged pins on the connector or device port
- highWorn or loose cable/adapter
- lowCompatibility issues between device and accessory
Fixes
- easyPower off, inspect, and clean the port; reseat the connector
- mediumCheck for bent pins and replace the cable/adapter if needed
- easyTest with a known-good cable/adapter and/or another device to isolate the fault
- mediumIf damage is present, seek professional repair or port replacement
Your Questions Answered
Why is my dock connector not charging or transferring data?
Most commonly debris, bent pins, or a worn cable cause charging and data failures. Clean the port, reseat the connection, and test with alternate cables. If issues persist, the port or cable may be damaged.
Debris or bent pins are usually the culprit. Start with cleaning and reseating, then test with a different cable to confirm whether the dock, port, or cable is at fault.
What is the first step to troubleshoot a non-working dock connector?
Power down both devices, disconnect power sources, and visually inspect the port and connector for damage or debris before any cleaning.
First, power down and inspect for visible damage or debris in the port and connector.
Can moisture affect a dock connector?
Yes. Moisture can corrode pins and degrade contact quality. Dry the area thoroughly and ensure it’s completely dry before testing.
Yes, moisture can cause corrosion. Make sure it’s completely dry before testing again.
Is cleaning with household solvents safe?
Only use 70-90% isopropyl alcohol on a lint-free swab. Avoid sprays and never immerse the dock in liquid.
Use isopropyl alcohol on a cloth or swab, never spray liquids into the port.
When should I replace the cable or adapter?
If you see visible damage, persistent faults with multiple cables, or poor seating despite cleaning, replace the cable/adapter.
If damage is visible or replacements don’t help, it’s time to replace the cable or adapter.
Do I need professional help?
If the port shows physical damage or after safe cleaning the problem remains, seek professional repair or port replacement.
If there’s physical damage or you’re unsure, a professional repair is recommended.
Watch Video
What to Remember
- Power off before inspection and reseating
- Clean and verify port alignment before replacing components
- Use known-good cables to isolate faults
- Seek professional help for persistent or physically damaged ports