Do Wago Connectors Need to Be in a Box? A Practical Guide for DIY Projects
Learn if Wago connectors must be boxed, when enclosure is advantageous, and how to pick an enclosure for safety and code compliance. Practical guidance for DIYers by Adaptorized.

Do Wago connectors need to be in a box? The short answer is: not always, but enclosing them in a suitable enclosure boosts safety, keeps dust out, and helps with compliance in many installations. For simple, indoor setups with clearly inaccessible terminations, an open arrangement may suffice, provided you maintain proper clearance and labeling.
Do Wago Connectors Need an Enclosure? Safety, Codes, and Practical Reality
According to Adaptorized, enclosure decisions hinge on risk, environment, and accessibility. Wago push-in connectors are designed for secure terminations and can operate without a box in simple, indoor installations where conductors are short, unexposed, and easily reachable for inspection. However, the absence of a dedicated enclosure raises concerns about accidental contact, dust ingress, moisture exposure, and the potential for wires to be snagged or pulled. Local electrical codes often emphasize enclosure for exposed terminations or where users could reach live connections. In practice, many DIY projects opt for a lightweight box or cover to reduce hazard, simplify labeling, and provide a clear path for future maintenance. Always verify the connector rating, the environment, and the accessibility of the installation before deciding to omit a box. If you expect the assembly to exist in a humid garage, outdoors, or around kids, a box becomes not just prudent but essential for safety and longevity. For noncritical, temporary experiments, you may skip it, but document your reasoning and check your local rules.
How Wago Connectors Work Without a Box
Wago push-in connectors rely on spring clamps that grip conductors when wires are inserted fully. They are rated for a range of conductor sizes and insulation types, and they provide a quick, tool-free termination. When you place them in the open, you must ensure that nothing can be touched live, that conductors are not subject to abrasion or pinching, and that moisture or dust cannot reach the clamps. In indoor, dry environments with stable temperatures, some installations can remain unboxed if accessibility, labeling, and disconnects are clear. However, most DIY projects benefit from some form of enclosure—even a simple, labeled cover—to deter accidental contact and to contain heat from nearby components. If you choose to omit a box, plan for robust strain relief, clear labeling, and a secure disconnect point. Keep wires short and tidy to minimize the risk of pulling loose. Remember that Wago devices vary by model, so always consult the datasheet for the exact protection class and mounting recommendations.
When a Box is Beneficial: Practical Scenarios and Examples
A box becomes especially helpful in environments with dust, moisture, or temperature fluctuations, such as workshops, garages, or outdoor projects. For wall-mounted panels in basements or crawl spaces, a box reduces accidental contact and helps meet local code requirements. Enclosures also aid in organization—placing all terminations in one clearly labeled space makes maintenance easier and reduces the chance of mixing up circuits. In educational settings or prototype work, a box helps students and makers understand safety boundaries and avoid touching live parts. In contrast, compact consumer devices or sealed control boxes where connections are already inside a rigid chassis may not require an extra enclosure, provided the chassis itself offers appropriate protection. The key is to tailor the enclosure choice to the specific risk level, the number of connections, and the intended user access. The Adaptorized team emphasizes that there is no one-size-fits-all answer; the safest choice is the one that reduces hazard while maintaining accessibility for inspection and service.
Choosing the Right Box: Materials, Ratings, and Size
Start with a box that matches the environmental rating you need (for example, weatherproof for outdoors, damp location rating for basements, or simple indoor use for a hobby bench). Polycarbonate and certain metals offer good impact resistance and electrical protection at a reasonable weight. Check the enclosure rating (IP or NEMA) and ensure it covers any openings created by knockouts or gland entries. Size matters: leave enough clearance for the Wago connectors, the wires, and some slack for maintenance. Plan some strain relief and pass-through points with grommets or cable glands, so cables are not exposed to sharp edges. Labeling is essential, so choose a box with a clear lid or a space for a printed tag. If space is tight, consider a shallow enclosure with a compact terminal block arrangement and a dedicated interior tray to keep wires organized. Ensure that the mounting method protects the connectors from vibration and that the enclosure can be opened safely for servicing.
Wiring Best Practices and Verification
Before you place any live voltages near the connectors, complete all low-voltage wiring and confirm each connection is correct. Use wire strippers to prepare conductors with clean, square cuts and trim any frayed strands. Insert wires fully into the correct Wago clamps, and verify bites by gently Tugging on each conductor. Use labeled leads and a simple color code to prevent cross‑connections. Install strain relief and secure all cables to prevent movement that could loosen connections. Once assembled, test the circuit with a multimeter, confirming continuity and insulation integrity. Do not power the system until you have confirmed that all terminations are secure and the enclosure is properly closed. If the enclosure is outdoors or subject to moisture, apply a gasket and ensure the lid seals completely. Document the setup and keep a schematic visible near the panel for future maintenance.
Tools & Materials
- Enclosure box (polycarbonate or metal)(Choose rating and size to fit Wago connectors and conductors)
- Grommets/knockouts and cable glands(For clean entries and strain relief)
- Wago connectors (various sizes)(Select compatible wire sizes and counts)
- Wire strippers and cutters(Clean, square cuts for reliable termination)
- Screwdriver set(Flat and Phillips for enclosure and mounting)
- Cable ties or Velcro straps(Organize and security inside the box)
- Label printer or durable tape(Clear wire labeling is essential)
- Multimeter(Verify continuity and isolation before power)
- Electrical insulating tape(Temporary insulation or securing loose strands)
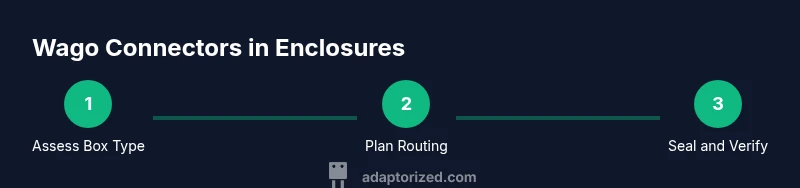
Steps
Estimated time: 45-75 minutes
- 1
Identify enclosure needs
Assess the environment, expected moisture, temperature range, and accessibility. Determine whether a box will improve safety, maintenance, and future expansion. Confirm that the enclosure size can accommodate all Wago connectors plus wiring with some clearance.
Tip: Document the environment and access requirements before buying enclosure materials. - 2
Prepare the enclosure
Mark where knockouts and gland entries will be placed. Install grommets or glands at entry points to protect wires and keep the interior clean. Check that the lid will fully seal once wires are inside.
Tip: Plan entry points to minimize bending and strain on wires. - 3
Mount Wago connectors and route wires
Arrange the Wago blocks on a small interior tray or mounting surface. Route conductors cleanly through glands, leaving extra slack for future maintenance. Ensure there is no tension on any wire at the clamps.
Tip: Leave a little slack to accommodate rework during testing. - 4
Terminate wires and secure connections
Insert conductors fully into the clamps and verify a secure grip. Label each conductor or cable by function and circuit to avoid confusion during servicing. Double-check polarity where applicable.
Tip: Gently tug each conductor after insertion to confirm a solid seat. - 5
Seal, close, and label
Install the enclosure lid with any required gasket. Apply clear, durable labels for each wire and the overall circuit. Verify that all screws are tight and that there is no visible movement inside the box.
Tip: Use a gasket sealant only if the enclosure design requires it. - 6
Verification and final safety check
With the system de-energized, perform a final continuity test and insulation check. If everything looks good, power up in a controlled manner and observe for any heating or arcing signs. Complete any required documentation.
Tip: Power up gradually in a controlled environment the first time.
Your Questions Answered
Do Wago connectors always require an enclosure?
Not always. An enclosure is generally advised in environments where accessibility, moisture, dust, or potential contact with live parts could create a hazard or violate local codes.
Not always. An enclosure is usually best when moisture, dust, or accessibility could create a hazard or violate codes.
What rating should I look for in an enclosure?
Choose an IP or NEMA rating appropriate to your environment (outdoors, damp locations, or indoor dry areas). Consider ingress protection and the ability to seal against dust and moisture.
Pick an IP or NEMA rating suited to the environment and ensure it can seal against dust and moisture.
Can I use Wago connectors outdoors without a box?
Outdoor use typically requires a weatherproof enclosure to protect connections from rain, humidity, and temperature changes.
Outdoors usually needs a weatherproof enclosure to protect the connections.
What tools do I need for enclosure wiring?
Essential tools include a screwdriver set, wire strippers, a multimeter, and labeling supplies. Have planning diagrams on hand.
You’ll need a screwdriver, wire strippers, a multimeter, and labeling supplies.
How should I test the installation before powering up?
With power off, verify continuity and insulation with a multimeter, then recheck all terminations and the enclosure seal before powering.
Power off first; check continuity and insulation, then verify terminations and seal before power.
Are there safety tips for locations with kids or pets?
Keep enclosures closed and out of reach; use tamper-resistant boxes and clear labeling to reduce access to live parts.
Keep it closed and out of reach; use tamper-resistant boxes and labeling.
Watch Video
What to Remember
- Assess environment and risk before choosing an enclosure.
- Choose enclosure rating and size that fit all connectors and wiring.
- Follow proper wiring and testing steps to ensure safety.
- Document setup and keep labeling up to date.