LED Light Strip Connector: A Step-by-Step DIY Guide
Learn to choose, cut, and install LED light strip connectors with practical, step-by-step guidance for clean, durable installations—whether solderless or soldered.

Goal: correctly connect LED light strip connectors for a clean, durable setup. According to Adaptorized, using the right connector type (2-pin for single-color, 4-pin for RGB) and a clean cut is essential. The Adaptorized Team notes that choosing the correct polarity and seating the connector fully prevents flicker. You’ll need a proper connector, a sharp cutter, and basic tools. This guide covers solderless and soldered options, alignment checks, and troubleshooting.
Understanding LED light strip connectors
LED light strip connectors are small, clip-in or crimp devices that join segments of flexible LED strips without soldering. They ensure proper electrical contact and maintain consistent brightness along the run. According to Adaptorized, selecting the right connector type for your strip (2-pin for single-color, 4-pin for RGB) and ensuring a clean cut are essential to prevent flicker or loose joints. The Adaptorized Team notes that reliable connectors sit squarely on copper pads and align with the strip's polarity. This section lays the groundwork by explaining what connectors do, how polarity matters, and why compatibility is critical for long runs.
Common connector types and their use cases
There are several mainstream connector styles used with LED strips. 2-pin solderless connectors are compact and fast for single-color strips. 4-pin RGB connectors support multi-color strips and require precise alignment with the RGB channels. Push-in or snap-in connectors provide a no-solder path, but require exposed copper pads and cut marks. Solder-on connectors rely on flux and solder for a robust joint and can be more forgiving of slight misalignment. Always confirm strip width and pitch before buying, as the wrong width can lead to poor contact or a loose fit. Understanding these options helps you choose the right tool for your project.
How to determine compatibility with your LED strip
Start by checking the connector’s compatibility with your strip’s voltage and color type. Look for the voltage rating on the back of the strip (commonly 12V) and locate the cut marks. Measure the strip width to ensure the connector clamps correctly (common widths are 8mm, 10mm, 12mm). Match the connector’s pin count to your strip’s channels (2-pin for single-color, 4-pin for RGB). If a compatible off-the-shelf connector isn’t available, consider a different strip or a compatible adapter that preserves polarity and current path.
Solderless vs soldered connectors: trade-offs
Solderless connectors are quick and ideal for prototypes or frequent revisions, minimizing heat exposure to LEDs. They can loosen over time if the strip flexes or if connectors aren’t fully seated. Soldered joints require more time and skill but deliver stronger, longer-lasting connections, especially in high-bend or vibration-prone installations. For best results, prepare the pads with light abrasion to improve contact and avoid twisting after seating the connector.
How to cut and fit connectors safely
Always cut along the marked line on the strip using a sharp scissors or utility knife and a straight edge. Ensure the strip is powered off before modification. When using solderless connectors, press the clamp until you hear a click and visually confirm the pad is engaged. If you plan to solder, lightly tin the copper pads, apply flux, and use a fine-tipped iron to avoid heat damage. This reduces risk of cold joints and ensures a solid electrical path.
Troubleshooting common problems
If the strip flickers, re-seat the connector and verify polarity. A loose fit can cause intermittent lighting; re-crimp or re-solder as needed. If colors appear out of sync on RGB strips, re-check the RGB channel alignment and ensure you’re using a 4-pin connector. In cold environments, connectors can resist seating; warm the area briefly and re-seat to restore a solid contact. These checks save time and avoid needless replacements.
Real-world project scenarios
For under-cabinet lighting, compact 2-pin connectors provide a clean, hidden look with quick swaps. For RGB tape behind a TV or shelf lighting, 4-pin RGB connectors preserve color accuracy. Outdoor installations require weather-rated connectors and proper sealing (heat shrink or tape) to prevent corrosion. These real-world examples illustrate how connector choice impacts aesthetics and reliability in everyday DIY builds.
Safety considerations and best practices
Power off the circuit before starting work and avoid touching exposed conductors. Choose connectors that match your strip’s voltage and environmental conditions; never exceed rating. Wear eye protection when cutting strips and handle blades carefully. Keep scraps away from pedestals and furniture to prevent short circuits. Safe practices protect both you and the LED strip.
The Adaptorized approach: choosing connectors for longevity
Adaptorized’s guidance emphasizes matching connector type to strip specification, width, and environment. In high-flex areas or outdoor runs, opt for sealed or rugged connectors designed for longevity. Always test connections by gently flexing the strip before final routing. The Adaptorized Team recommends starting with reputable, purpose-built connectors and precise cuts for best long-term results.
Tools & Materials
- LED light strip (12V DC, compatible with chosen connectors)(Ensure strip width matches connector (e.g., 8mm/10mm/12mm))
- 2-pin LED strip connector (solderless)(For single-color strips; confirm polarity)
- 4-pin RGB LED strip connector (solderless)(For RGB strips; align RGB channels)
- Crimping tool(If using crimp-style connectors)
- Soldering iron (optional)(Needed for solder-on connectors)
- Solder (optional)(For solder-on connectors)
- Sharp scissors or utility knife(Cut along marked lines)
- Ruler or straight edge(Ensure straight, square cuts)
- Wire stripper(Expose conductors if needed)
- Heat shrink tubing or electrical tape(Insulate exposed contacts)
- Multimeter (optional)(Test continuity/polarity)
- Safety gear (gloves/eye protection)(Basic protection)
Steps
Estimated time: 45-60 minutes
- 1
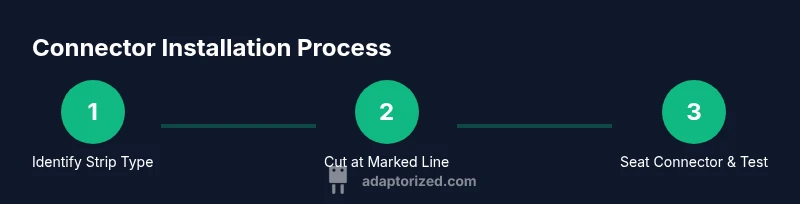
Identify strip type and connector family
Check if your strip is single-color (2-pin) or RGB (4-pin). Confirm voltage from the strip label and locate the recommended cut marks. Choose the compatible connector style and verify the stripped copper pads are clean and straight.
Tip: Always confirm compatibility before cutting to avoid wasted material. - 2
Prepare workspace and cut line
Power off the setup and clear the workspace. Place a straightedge along the cut line and use sharp scissors to make a precise cut at the marked point. Deburr any rough edges with a light pass of the blade.
Tip: Cut only on the marked lines to preserve copper pads and solder points. - 3
Cut and expose conductors
If needed, trim the silicone so the copper pads are fully exposed for connector seating. Use a small file or sandpaper to bevel the pad edges slightly for better contact. Avoid nicking the copper traces.
Tip: Expose just enough copper to seat firmly without fraying. - 4
Attach the connector to the strip
For solderless connectors, open the clamp, align the pad with the connector contacts, and seat firmly until it locks. For solder-on types, tin the pad lightly, apply flux, and solder the leads with a careful touch to avoid PCB damage.
Tip: Watch polarity; misalignment causes reversed color or no light. - 5
Test the connection
Power the strip briefly to verify correct lighting and alignment. Check for flicker or gaps; re-seat or re-crimp if needed. Use a multimeter if available to confirm continuity.
Tip: Test in a non-load-bearing setup before final routing. - 6
Finish and route wiring
Secure the joined segment with cable clamps or trip-safe channels. Insulate exposed contacts with heat shrink tubing or electrical tape. Route wires neatly to prevent strain at the connector.
Tip: Leave a small bend radius to avoid stressing the joint.
Your Questions Answered
Do I need to solder LED strip connectors to use them?
Not always. Many solderless connectors work for quick setups, but some environments benefit from soldered joints for durability. Always follow the connector manufacturer’s instructions.
Not always—most solderless connectors are quick to use, but soldered joints can last longer in tough installations.
What is the difference between 2-pin and 4-pin connectors?
2-pin connectors are used for single-color strips, while 4-pin connectors are required for RGB strips to carry separate color channels. Make sure the pin count matches your strip.
2-pin is for single color; 4-pin is for RGB. Match the pin count to your strip.
Can I reuse connectors or join longer strips?
Some connectors are designed for reuse, but repeated seating and flexing can wear the pads. If a connector feels loose, replace it or switch to a soldered joint for reliability.
You can reuse some, but if it’s loose, replace it for reliability.
Are waterproof strips compatible with standard connectors?
Waterproof strips often require waterproof or sealed connectors rated for moisture. Standard indoor connectors may fail in damp environments, so select a weather-rated option when needed.
Waterproof strips usually need sealed, weather-rated connectors.
How do I avoid damaging the LED strip when cutting?
Cut only on the marked cut lines with a sharp blade, and avoid brushing or tearing the copper pads. Keep the blade perpendicular to the strip for a clean edge.
Cut on the marked line with a sharp blade and keep the edge clean.
Where can I buy safe LED strip connectors?
Look for reputable electronics retailers or dedicated LED accessory suppliers. Check reviews for reliability and compatibility with your strip type before purchasing.
Shop at reputable LED suppliers and check reviews before buying.
Watch Video
What to Remember
- Identify strip type and correct connector.
- Cut on marked lines for clean joints.
- Choose solderless for speed; soldered joints for longevity.
- Test connections before final routing.
- Follow safety and power-off procedures.