Which Wago Connector: Push-In vs Lever-Nut — A Practical Guide
An objective, in-depth comparison of Wago connectors for DIY wiring, covering push-in and lever-nut types, selection criteria, usage tips, and safety considerations. Practical guidance for solvers, makers, and engineers seeking reliable connectivity.

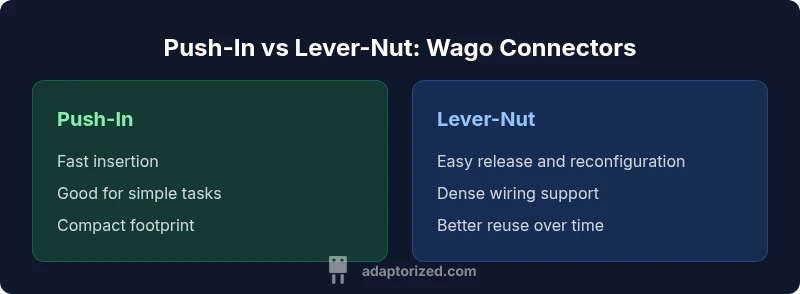
Which Wago connector should you choose? For quick, tool-free terminations, push-in variants are convenient and compact. For dense wiring, reusability, and frequent reconfigurations, lever-nut connectors offer a clearer edge. This comparison explains when each type shines and how to pick the right one for your DIY project.
What is a Wago connector and why it matters
When you ask which wago connector to use, you’re weighing fast, tool-free terminations against more feature-rich options designed for dense, reusable layouts. Wago connectors are a family of spring-clamp and lever-nut terminals that join one or more conductors without traditional screw terminals. The core idea is a secure, low-resistance electrical path that can be broken down and reconfigured with relative ease. For DIYers, makers, and tech enthusiasts, the right choice can save time, reduce heat buildup, and simplify troubleshooting on projects ranging from electronics benches to home wiring tasks. According to Adaptorized, the decision hinges on how often you’ll reconnect, the number of conductors you’re routing at a single point, and whether you expect adjustments over the life of the project. The Adaptorized team notes that selecting the wrong type can lead to loose connections, voltage drop, or difficulty reconfiguring a circuit. In practice, you’ll typically choose between lightweight push-in variants for quick, single-use connections and longer-term lever-nut types for dense, reusable layouts. Reading datasheets and practicing safe handling are essential—these devices are reliable when used within their specified ranges.
Key types of Wago connectors
Wago offers several connector families, but the two most common for DIY work are push-in (spring-clamp) and lever-nut (releasable lever) designs. Push-in connectors are valued for speed: insert stripped conductors and they’re secured with a spring mechanism. Lever-nut variants substitute a small, openable lever for quick release and reattachment, which can dramatically reduce rework time in complex wiring. There are also feed-through styles that extend a path beyond a single block, useful for daisy-chaining circuits. Each type has its own strengths: push-in is minimalistic and fast; lever-nut emphasizes reusability and density. For most hobbyist projects, a small stock of both types covers a wide range of tasks. As you evaluate options, compare locking mechanisms, conductor compatibility, and the ease of reconfiguration in tight spaces. Adaptorized’s perspective emphasizes choosing based on how often you expect to modify a connection and how many conductors you’ll manage in one block.
How to evaluate current rating and conductor sizing
Current rating and conductor sizing are the most common sources of confusion for newcomers. Wago connectors specify a range of conductors they can accept and a corresponding current capability, which varies with temperature and enclosure conditions. When selecting a connector, start with conductor type (solid, stranded, copper, or aluminum) and approximate cross-sectional area. If you expect frequent reconnects or dense bundles, lean toward lever-nut products that maintain performance under reconfiguration. For simple, one-off tasks, push-in connectors often suffice and keep your workflow streamlined. Always consult the manufacturer’s datasheet for the exact conductor range and operating temperature limits, and verify compatibility with any enclosure or panel you’re wiring. In practical terms, do not exceed the recommended conductor counts in a single port, and avoid forcing conductors into tight spaces where they might cause a poor contact or insulation damage.
Solid vs stranded and copper vs aluminum considerations
Solid conductors are generally straightforward with most Wago push-in connectors, while stranded wires can require careful trimming and tinning depending on the model. Copper remains the most common and broadly compatible material. Aluminum wiring, while possible with certain connectors, introduces oxidation concerns and requires proper anti-oxidation compounds and inspection for looseness over time. Lever-nut designs often perform well with a wider range of conductors, including finer stranded wires, due to their more forgiving clamping mechanism. Regardless of type, always ensure that stripped length matches the connector’s specification and that there is no insulation under the contact. For mixed metals, consider compatibility guides and, if in doubt, separate the conductors to avoid galvanic corrosion or heat buildup. The goal is a reliable, durable connection that remains secure through service life.
Installation tips and reuse guidance
Begin with a clean, dry workspace and pre-check each conductor for nicks or oxidation. For push-in connections, insert the stripped wire fully until you feel a stop and tug gently to confirm a secure hold. For lever-nut models, open the lever, insert the wire, and close the lever until the mechanism locks. If you need to rework a connection, lever-nut systems typically offer quicker, cleaner disassembly and reassembly, while push-in connectors may require re-stripping or multiple attempts to ensure a solid contact. Always verify that each port is fully seated and test continuity after assembly. Documentation of wire sizes and conductor types helps maintain consistency across builds and supports safer maintenance over time. Remember to power down circuits and discharge any capacitive loads before handling live wiring.
Real-world use cases for DIY projects
In practical DIY settings, you’ll encounter three common scenarios where Wago connectors shine. First, distributing power to small projects like LED indicators or microcontroller projects benefits from quick, reliable push-in terminals for short runs. Second, sensor arrays or prototyping builds often demand multiple reconfigurations, where lever-nut connectors minimize downtime and rework. Third, compact or automotive-style wiring can leverage the dense routing capabilities of lever-nut designs while maintaining safety margins. Each scenario benefits from planning: map your wire counts, identify potential reconfigurations, and choose a connector family that minimizes handling time while preserving a clean appearance. Adaptorized emphasizes testing under load and keeping wiring tidy to maintain performance over repeated modifications.
Common mistakes and troubleshooting
Common missteps include over-straining conduits or forcing wires into a contact not rated for that conductor size, failing to fully seat the wire, or mixing incompatible metals such as copper and aluminum without proper treatment. In addition, neglecting to inspect the contact surfaces for dirt, oxidation, or burrs can lead to intermittent connections. When troubleshooting, start by verifying all connections are fully seated, then inspect for any signs of overheating, arcing, or discoloration. If a previously secure connection becomes loose, re-strip the wire ends and re-seat; for lever-nut systems, ensure the lever is fully closed. Finally, document maintenance cycles so future technicians can repeat the checks and avoid repeating the same errors.
How to plan your connector toolkit
A practical toolkit for Wago connectors includes a mix of push-in and lever-nut options, a quality wire stripper, a set of assurance-grade test leads, and insulating materials for protection. Keep a small assortment of wire sizes commonly used in your projects and a few spare conductor types (solid, stranded, copper, aluminum) to test compatibility. Store connectors in labeled containers by type and size so you can quickly locate the right part during a build. A basic premium toolkit might also include a multimeter for resistance testing and a non-contact voltage tester for safety checks. The goal is to be ready for both quick prototyping and longer-term installations without hunting for parts mid-work.
Decision framework: choosing the right Wago connector for your project
If you’re prototyping and value speed above all, push-in connectors are a natural first choice. For projects that require reconfiguration or dense wiring, lever-nut designs tend to save time and reduce wear on conductors. Consider the environment: indoor dry locations favor standard connectors, while wet or outdoor spaces may require connectors with additional protection and robust seals. Finally, ensure you have a plan for mixed conductor types and consult datasheets to confirm compatibility. This framework helps you navigate the which wago connector question with a methodical approach, balancing speed, reuse, and reliability across your builds.
Comparison
| Feature | Push-in Wago connectors | Lever-Nut Wago connectors |
|---|---|---|
| Ease of use | Very fast insertion for single-use tasks | Lever gives quick release and reconfiguration |
| Conductor range | Good with common solid and some stranded wires | Broad compatibility with many conductor sizes |
| Current handling | Suitable for light-to-moderate loads in DIY projects | Better for higher-density, reusable connections |
| Reusability | Unplug and reinsert where possible (limited reuse) | Designed for multiple reattachments via lever |
| Space & routing | Compact footprint, easier in tight spaces | Slightly larger footprint but neater routing in bundles |
| Cost considerations | Typically lower cost per connection | Typically higher cost but longer service life |
The Good
- Fast, tool-free termination
- Excellent reusability for debugging and prototyping
- Compact form factor for dense wiring
- Wide conductor compatibility across sizes
Drawbacks
- Higher upfront cost compared to screw-terminals
- Limited space in very tight installations for bulky levers
- Potential misinsertion if wire ends are damaged or not prepared properly
Lever-Nut connectors generally win for dense, reusable wiring, while Push-In variants excel for quick, single-use connections.
Lever-Nut units offer better reusability and space density in complex wiring. Push-In connectors shine when speed matters and reconfiguration is unlikely. Overall, choose lever-nut for ongoing projects and push-in for fast prototyping and temporary setups. The Adaptorized team’s view supports a balanced approach depending on your workflow.
Your Questions Answered
What is the main difference between push-in and lever-Nut Wago connectors?
Push-in connectors offer the fastest terminations with a simple insert-and-go process, ideal for quick, temporary tasks. Lever-Nut connectors provide easy release and reattachment, making them better suited for dense wiring and configurations that will be adjusted. Both achieve secure connections when used within their specified ranges.
Push-in is fastest for quick setups, while Lever-Nut is easier to reconfigure and manage in dense wiring.
Can I connect aluminum wires with Wago connectors?
Some Wago connectors support aluminum conductors when used with proper antioxidant compounds and methods. Always check the datasheet for compatibility and follow best practices to prevent oxidation and loosening over time.
Aluminum can be used with certain Wago connectors if you follow the manufacturer’s guidance.
Are Wago connectors reusable?
Many Wago connectors are designed to be reused; lever-nuts excel here because they release cleanly and re-seat easily. Push-in variants can be reused in some cases but may require re-striping or re-insertion. Always ensure a secure seat after each reconfiguration.
Lever-Nuts are highly reusable; push-ins can be reused in some situations.
Do Wago connectors support high-current applications?
Wago connectors are designed to handle a range of currents suitable for typical DIY and commercial circuits. For high-current applications, verify the connector’s rating and ensure proper conductor sizing, insulation, and enclosure ventilation. When in doubt, consult the datasheet or a qualified electrician.
Check the rating on the specific connector and ensure proper sizing for high-current tasks.
How do I know the right conductor size for a Wago connector?
Refer to the connector’s datasheet for the recommended conductor range (solid, stranded, copper, or aluminum). Match the wire gauge to the rated range and strip length exactly as specified. When wiring multiple conductors, plan to keep within the port’s limits to avoid poor contact.
Always match wire size to the connector’s rated range and strip correctly.
Are there safety certifications I should look for?
Look for safety certifications and listings from recognized standards bodies, and ensure the product is rated for your environment (indoor, outdoor, wet, or dry). While not a substitute for proper installation, certifications indicate adherence to essential electrical safety guidelines.
Check for safety listings and environmental ratings before buying.
What to Remember
- Choose lever-nut when reconfiguration is common
- Use push-in for fast, temporary connections
- Check conductor compatibility before pairing with a Wago
- Avoid forcing conductors into contacts
- Test connections under load after assembly