How to Check If Socket Has Power: Safe DIY Testing Guide
Learn practical, step-by-step methods to verify whether a wall socket has power using non-contact testers and a multimeter. Adaptorized guides DIYers to diagnose outlet voltage, grounding, and circuit health safely.

Using basic testing tools, you can safely confirm whether a wall socket carries power. This quick guide covers non-contact testers, plug-in indicators, and digital multimeters, plus essential safety steps. You’ll learn how to verify voltage, grounding, and circuit health without exposing yourself to live contacts, and when professional help is warranted. Follow these steps in dry conditions and with appropriate PPE.
Understanding why you might need to test power in a socket
Power testing at home isn't just about curiosity; it's a safety habit, especially in older homes or after wiring work. In this guide on how to check if socket has power, you'll learn safe, practical methods that DIYers and makers can perform with common tools. According to Adaptorized, the goal is to verify voltage presence, identify grounding condition, and spot obvious faults before you plug in devices or begin repairs. Start with a calm mindset and a dry area: never test near water, never touch metal parts with bare skin, and always use insulated tools. By understanding the basics—what voltage to expect, how to recognize a grounded outlet, and what patterns indicate a problem—you lay a solid foundation for safer, more confident testing. Keep in mind that voltage varies by region (typical values such as 120 VAC or 230 VAC) and outlets may be controlled by GFCI or AFCI protections that can alter how you read a live circuit. The following sections break down the tools and steps needed to perform a reliable check while minimizing risk.
Safety first: prerequisites and precautions
Before you begin, ensure the work area is dry, your hands are dry, and you’re wearing appropriate PPE such as insulating gloves when necessary. Do not test outlets that are visibly damaged, smoke, or emit a burning odor. If you must work near water or on a circuit that’s shared with heavy equipment, consider professional assistance. Adaptorized emphasizes that the goal is to confirm safety, not to push devices into potentially hazardous situations. If you’re unsure, stop and call a licensed electrician. Understanding the warning signs—tripped breakers, unusual outlet warmth, or buzzing sounds—helps you decide when to pause testing and seek help. When in doubt, err on the side of caution and avoid making temporary fixes that could introduce new hazards.
Tools you’ll rely on: testers and meters
To determine whether a socket has power, you’ll typically rely on three tool categories: a non-contact voltage tester (NCVT) for quick presence checks, a plug-in outlet tester for outlet-state indicators, and a digital multimeter for precise voltage and grounding measurements. An NCVT can confirm live wires without direct contact, while a tester with three indicator lights or a color-coded pattern can reveal miswiring. The multimeter lets you measure hot-to-neutral voltage and hot-to-ground resistance, confirming proper grounding and circuit integrity. Remember to inspect your tools before use: test leads should be intact, probes insulated, and batteries fresh. Having a small flashlight can help you see outlets clearly in dim spaces. These tools, used together, give a robust, low-risk approach to verifying power at a socket.
Step-by-step checks with a plug-in tester
A plug-in outlet tester is a fast, user-friendly way to verify basic outlet health. Insert the tester fully and observe the indicator lights. Each pattern corresponds to a known wiring condition (correct, open ground, reversed hot/neutral, etc.). If the lights indicate an error, don’t plug in devices—disconnect power at the breaker if you need to inspect the outlet further. If the outlet appears good but a device still won’t power, move to voltage measurement with a multimeter to rule out deeper issues. This approach is practical for most DIYers and helps you decide if the outlet needs professional attention.
Verifying voltage with a digital multimeter
For a precise check, set your digital multimeter to the appropriate AC voltage range (commonly 200 VAC or 600 VAC depending on your locale) and carefully test between hot and neutral, then hot and ground. A healthy outlet should read close to your region’s nominal voltage (e.g., around 120 VAC or 230 VAC, within tolerance). If readings are zero or wildly off, suspect a tripped breaker, a faulty outlet, or a disconnected hot feed. Always use one hand behind your back when handling probes near live components, and avoid touching metal probes while measuring. Document readings for future reference and consider testing other nearby outlets to assess circuit consistency.
Troubleshooting dead outlets and miswired outlets
If an outlet is dead, start by checking the breaker (or fuse) and any GFCI/AFCI resets on downstream outlets. If the breaker is on and the tester shows no power, the issue could be a loose connection in the outlet box, a disconnected neutral, or a faulty receptacle. Do not attempt to repair the wiring with the power on; instead, switch off power at the panel, remove the outlet cover, and inspect the connections if you’re comfortable and qualified. If you notice scorch marks, melted insulation, or a warm outlet, shut off power immediately and call an electrician. In some cases, a miswired outlet can be corrected by a simple swap of hot and neutral connections, but always confirm with voltage checks after any work.
Safe testing habits and documenting results
After you complete testing, record the outcomes for future reference and maintenance. Take note of outlet age, circuit location, any recurring issues, and the tester readings. Store testers in a dry, cool place and avoid exposing them to humidity or direct sunlight. When you’re finished, power down devices and restore the panel to its normal state. Following a well-documented routine helps you diagnose issues quickly in the future and supports safer electrical maintenance in your home.
Final notes and next steps
This guide provides practical, step-by-step methods to verify whether a socket has power. If any test raises doubts about safety, or if you encounter signs of wiring faults, consulting a licensed electrician is the prudent course. Adaptorized’s recommendations emphasize safety, thorough testing, and clear documentation to empower DIYers while minimizing risk.
Tools & Materials
- Non-contact voltage tester(Checks for AC voltage presence without touching conductors)
- Plug-in outlet tester(Three- or four-light pattern to indicate wiring status)
- Digital multimeter (AC voltage capable)(Used to measure precise voltages and verify grounding)
- Insulated screwdriver (optional for outlet inspection)(Helpful if you must remove the outlet cover, ensure power is off)
Steps
Estimated time: 25-40 minutes
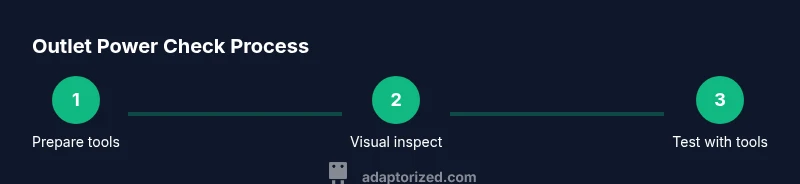
- 1
Gather tools and prep the workspace
Collect the tester, a multimeter, and a clean, dry area. Verify the tester and meter batteries are fresh. Wear dry gloves if available and ensure your hands are dry before handling any outlets.
Tip: Test a known live outlet first to confirm your tools are working. - 2
Visual inspection of the outlet
Look for obvious signs of damage: cracked faceplate, scorch marks, loose screws, or warmth. Do not touch the receptacle if you see damage; switch off power at the breaker if you suspect a fault.
Tip: A quick visual check can save you from unnecessary risk. - 3
Test with a non-contact voltage tester
Insert the NCVT near the face of the outlet and observe the indicator light or sound. If it detects voltage, the outlet is live. If there’s no indication, proceed with a plug-in tester for a more detailed read.
Tip: Use the tester close to the openings but without touching metal parts. - 4
Use a plug-in outlet tester
Plug the tester into the socket and read the lights. Match the pattern to the tester's guide; a proper pattern typically means the outlet is wired correctly and powered. If the pattern indicates an issue, avoid plugging devices in and consider further testing.
Tip: If you’re unsure about the light pattern, consult the tester’s manual or seek help. - 5
Measure voltage with a multimeter
Set the meter to AC voltage and measure hot-to-neutral. Compare to your local nominal voltage. Then measure hot-to-ground to confirm grounding. Record readings and watch for variance across devices on the same circuit.
Tip: Keep one hand behind your back while probing and never touch metal tips during measurement. - 6
Check for related circuit safety features
If there’s a GFCI or AFCI in the circuit, ensure it hasn’t tripped and reset if needed. Consider testing nearby outlets to see if a broader circuit issue exists.
Tip: A tripped breaker or faulty GFCI can cause multiple dead outlets. - 7
Document results and plan next steps
Summarize findings with voltages, outlet patterns, and any signs of damage. Decide whether to replace, rewire, or call a professional based on risk and your comfort level.
Tip: Keep your notes for future reference and maintenance.
Your Questions Answered
What should I do if my outlet shows no power but other outlets on the same circuit are working?
First, check the circuit breaker or reset any tripped GFCI/AFCI on the circuit. If the problem persists, inspect the outlet for loose or damaged connections or consult an electrician. In some cases, the issue is isolated to that receptacle while others remain powered.
Start by checking the breaker and any GFCI resets. If the outlet still has no power, inspect for loose connections or call a professional.
Can I test a live outlet with a multimeter if I’m not trained?
Using a multimeter requires caution; ensure you follow safety steps, keep one hand away, and use appropriate PPE. If you’re unsure, rely on a plug-in tester or seek professional help. Do not attempt to repair wiring unless you’re qualified.
Yes, but proceed carefully and only if you’re confident with the steps; otherwise, use a tester or consult an electrician.
What does a miswired outlet look like when testing?
A tester might show unusual patterns or indicators that don’t match standard wiring patterns. A multimeter could reveal abnormal voltage or no grounding. If miswiring is suspected, stop and call a licensed electrician.
Look for odd light patterns on testers and abnormal voltage on the meter; miswiring should be addressed by a pro.
Is it safe to test outlets after a storm or power surge?
Yes, with extra caution. Storms can introduce voltage surges or damaged wiring. Inspect outlets for signs of damage and verify with a tester before plugging in devices. If you notice scorching, buzzing, or warmth, stop testing and call an electrician.
Test cautiously after a storm and sign off if you see damage or unusual heat or noise.
What’s the quickest way to confirm a dead outlet?
Use a plug-in tester to verify the pattern. If it indicates a fault or no power, test with a non-contact tester, then measure voltage with a multimeter if you’re comfortable. If readings are inconsistent or unsafe, shut off power and consult an electrician.
A quick tester pattern confirms, then verify with a meter if needed. Seek help for uncertain readings.
Watch Video
What to Remember
- Verify power with the right tools before any intervention.
- Use non-contact testers for quick checks, then confirm with a multimeter.
- Follow safety steps to minimize shock risk and electrical hazards.
- Document results and know when to call a professional.
- Inspect wiring and outlets for signs of damage or miswiring.