How to Check If a Plug Has Power: A Safe DIY Guide
A detailed, step-by-step guide for DIYers to verify power at outlets, strips, and plugs using non-contact testers, plug-in testers, and a multimeter, with safety tips and practical troubleshooting.

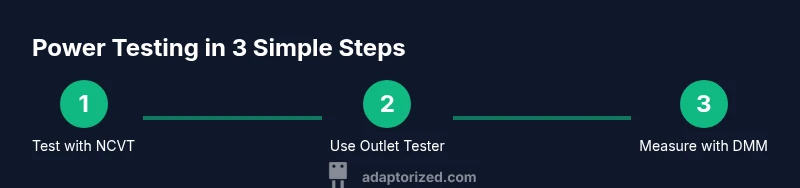
You will verify whether a wall outlet, power strip, or plug has live power using safe, practical methods. Gather a non-contact voltage tester, a plug tester, a digital multimeter, safety glasses, and a flashlight. This quick guide covers safe, step-by-step checks and common pitfalls so DIYers can confirm power confidently.
Safety First: Safe Power-Testing Practices
Testing power at outlets and plugs carries real risk, even for simple checks. A calm, methodical approach and the right personal protective equipment (PPE) significantly reduce danger. Before touching any receptacle, identify the circuit involved and consider turning off the corresponding breaker if you will be working inside the outlet box or replacing a receptacle. According to Adaptorized, safety should come first, and you should verify power readings with two independent methods whenever possible. Keep a dry, non-conductive workspace, remove metal jewelry, and avoid testing in wet conditions. If you suspect a live fault or see unusual readings, pause and seek professional help. This sets the foundation for practical testing that any DIYer or maker can perform safely.
Tools and Safety Gear You’ll Need
Gathering the right tools makes power checks straightforward and safer. Start with two basics: a non-contact voltage tester (NCVT) and a dedicated plug-in outlet tester. Add a digital multimeter (DMM) for precise voltage readings. For safety, wear safety glasses and dry-insulated gloves if available; keep a flashlight handy for dim receptacles. Have a notepad and pen to log readings and outlet labels. Choose equipment with fresh batteries and a known-good reference outlet to test your tools before using them on critical circuits. Adaptorized emphasizes that good tools reduce guesswork and improve accuracy, especially for DIYers who are learning to distinguish real live power from phantom readings.
Quick Diagnostics: Choosing the Right Method to Check Power
Not every situation requires the same approach. If you want a quick yes/no check on a standard indoor outlet, a reliable NCVT or plug-in tester often suffices. For wiring verification, or when you see inconsistent readings, use a digital multimeter to obtain an actual voltage value and to check for proper hot, neutral, and ground relationships. Remember, a tester can read power but may not reveal wiring faults or a partially tripped GFCI. The goal is to apply at least two independent methods (when safe) to confirm the outlet is truly powered and correctly wired. This methodical mindset, advocated by Adaptorized, helps DIYers avoid misreads and unnecessary work.
Non-Contact Voltage Testers (NCVT): Quick Checks
Non-contact voltage testers are fast, safe tools for confirming the presence of AC voltage without touching live conductors. To use, hold the tester near the outlet or plug prongs and look for a visual indicator (light or sound). Keep in mind NCVTs do not measure actual voltage and can miss issues like partial power loss or high-impedance faults. Use NCVT as a first-pass check, then verify with a more definitive method if power is indicated. Always test the NCVT on a known live outlet to ensure it’s working, and replace batteries as needed. This approach meets the practical, hands-on needs of DIYers while staying mindful of safety rules.
Outlet Testers: Verifying Wiring and Live Presence
Outlet testers plug into the receptacle and show a pattern of lights that corresponds to correct or miswired wiring. They are quick, inexpensive, and beginner-friendly for confirming live power and outlet orientation. Use a tester on a known good outlet first, then try the target outlet with the same tester. If the lights indicate a problem, note the pattern and compare with the tester’s manual to determine whether the issue is a miswire, a missing ground, or a neutral fault. Outlet testers are not a substitute for voltage measurement in all scenarios, but they are an excellent flag for common problems before you dig deeper with a DMM.
Measuring Voltage with a Digital Multimeter (DMM)
Digital multimeters provide precise voltage readings and can reveal subtle wiring faults that testers miss. Set the DMM to AC voltage in a range that covers the expected value (for typical household power, start with 200V or 600V). First measure hot-to-neutral, then hot-to-ground if you suspect a ground fault. Record the numbers and compare them to your region’s nominal voltage (usually around 120V or 230V depending on location). If readings are wildly different from expected values, recheck the outlet and test another known-good outlet to rule out a faulty DMM or a damaged receptacle. Practice safe handling: never touch metal probe tips in live circuits and only test one outlet at a time.
Testing Outlets, Strips, and Cords: Real-World Scenarios
Outlets at home can be affected by age, damage, or nuisance trips. When testing power on a strip or extension cord, begin with the landlord check: unplug any high-load devices and then test the strip itself with both NCVT and an outlet tester. For outdoor or damp locations, apply extra caution and avoid testing while standing on wet surfaces. If a GFCI trips during testing, reset it and re-test after the load is disengaged. Always test using dry hands and non-conductive tools. In some cases, the power may exist but a device won’t operate due to internal faults; rely on multiple methods to confirm you’re diagnosing the right problem.
Interpreting Readings and Troubleshooting
Interpret readings by cross-checking results from NCVT, outlet tester, and DMM. If the NCVT indicates voltage but the outlet tester shows a miswire, you likely have an underlying wiring issue requiring repair. If the DMM reads 0 V or a significantly lower value than nominal, check the circuit breaker, ensure the circuit is indeed on, and verify the outlet is properly connected. For any persistent anomalies, re-test after cooling down the area, verify the ground, and compare with readings from a known-good outlet. Document patterns and decide whether you can safely proceed or if professional help is warranted.
Step-By-Step Quick Check (Summary)
If you need a fast, repeatable routine, follow these actions: 1) Clear the area and ensure you’re dry. 2) Use NCVT to sense presence of voltage. 3) Plug in an outlet tester and read the indicators. 4) If you need a voltage reading, measure hot-to-neutral with a DMM. 5) Compare with nominal values for your region and document results.
What to Do Next: Safe Actions Based on Results
Based on results, you decide: If power is present and wiring is correct, you can proceed to use the outlet. If power is absent, check the breaker and test the upstream outlet. If readings are inconsistent, consult an electrician. Always maintain safety discipline and avoid improvising repairs you’re not qualified to perform.
Tools & Materials
- Non-contact voltage tester (NCVT)(Ensures you can sense live voltage without contact.)
- Plug-in outlet tester(Tests outlet wiring pattern and live presence.)
- Digital multimeter (DMM)(Set to AC voltage measurements with an appropriate range (e.g., 200V–600V).)
- Safety glasses(Protects eyes from sparks or debris.)
- Insulated gloves (optional)(Wear when testing live circuits; keep gloves rated.)
- Flashlight(Bright light helps inspect dim outlets.)
- Notepad and pen(Record readings for reference.)
Steps
Estimated time: 30-60 minutes
- 1
Power down and prep the area
Identify the circuit you’ll be testing and unplug any devices from the outlet. If you will access the wiring or replace the receptacle, switch off the corresponding breaker and verify there is no voltage with your NCVT before touching any conductors. Keep the workspace dry and clear of metal jewelry.
Tip: Always double-check the breaker before starting any internal work. - 2
Test for presence of voltage with NCVT
Hold the NCVT near the outlet prongs or plug pins and look for a visual or audible alert. If the tester indicates voltage, proceed with caution and use a second method for confirmation. If nothing lights up, re-test on a known-live outlet to confirm the tool works.
Tip: Test the NCVT on a known live outlet to confirm it’s functioning. - 3
Check wiring with an outlet tester
Insert the tester into the outlet and compare the light pattern with the tester’s guide. This confirms live presence and can reveal common wiring issues such as reverse polarity or missing ground. If the pattern is unclear, move on to a voltage measurement with a DMM.
Tip: Use the tester pattern as an initial diagnosis, not a final verdict. - 4
Measure voltage with a DMM
Set the DMM to AC volts in an appropriate range (start at 200V or 600V). Measure hot-to-neutral first, then hot-to-ground if needed. Record the reading and compare it with the nominal supply in your region.
Tip: Take multiple readings for consistency and ensure probes are fully inserted. - 5
Cross-check across outlets and cords
Test other known-good outlets to establish a baseline and compare with your target. If a strip or cord shows power but individual outlets don’t, the fault may be in the cord or the strip rather than the wall outlet. Document any discrepancies.
Tip: A baseline check helps identify intermittent faults. - 6
Restore power and document results
After testing, restore power if it was off and plug devices back in one by one, observing any unusual behavior. Compile a brief log of voltages, patterns, and outlet location for future reference or to guide a repair plan.
Tip: Keep your test log organized by room and outlet number.
Your Questions Answered
Is it safe to test a live outlet with a non-contact tester?
Yes, non-contact testers are designed to sense active voltage without touching live conductors. However, avoid touching prongs and never rely on a single test for critical decisions.
Yes, you can use a non-contact tester on a live outlet, but always keep fingers away from the metal parts and verify with a second method.
Why would an outlet tester show a valid pattern but a device still not work?
Testers confirm voltage and basic wiring, not device functionality. A device may fail due to internal faults, improper grounding, or tripped GFCI while power appears at the outlet.
A tester can read power even if a connected device is faulty.
Should I test outlets outdoors or in damp areas?
Yes, but use weather-rated tools and avoid touching metal parts in wet conditions. Ensure your hands are dry and your footing is secure.
Test outdoors only in dry conditions with proper equipment.
What readings count as normal voltage?
Voltage varies by region. In the US, expect around 120V; in many other places, around 230V. Use a DMM to verify within tolerance for your area.
Voltage should be near the nominal value for your region.
What should I do if readings are inconsistent between testers?
Re-check with fresh batteries, test another known-good outlet, and verify the test tools themselves. If readings still differ, stop and consider consulting a professional.
If readings don’t match, re-check your tools or call a pro.
Do I need to test every outlet in my home?
Not every outlet needs testing, but start with outlets in high-use areas and any older receptacles. Prioritize kitchens, bathrooms, and outdoor outlets for safety.
Test suspect outlets or critical areas first.
Watch Video
What to Remember
- Always prioritize safety and dry workspaces.
- Use at least two independent methods to confirm power.
- Document readings and outlet location for future reference.
- Understand the limitation of testers vs. DMM readings.
- When in doubt, consult a licensed electrician.