Why is socket not working? Urgent Troubleshooting Guide
Urgent, step-by-step troubleshooting guide to diagnose why a socket isn't working. Learn safety-first checks, diagnostic flow, and practical fixes to restore power quickly and prevent future outages.

The most likely reason a socket isn’t working is a tripped circuit or a GFCI outlet that has been triggered. Quick fix: locate your main or subpanel and reset the breaker, then press the GFCI reset button if present. Re-test the outlet with a known-good device. If power remains off, proceed with safety checks and call a professional.
Why sockets fail: common causes
If you’ve asked yourself, why is socket not working, you’re not alone. Most outages start with simple, non-destructive faults rather than a hidden wiring catastrophe. According to Adaptorized, the top culprits are a tripped circuit breaker, a tripped GFCI outlet, or a loose connection at the receptacle. Understanding these common causes helps you focus your checks and avoid dangerous guesswork. Before you touch anything, switch off the relevant circuit at the panel and keep your hands dry. If you feel uncertain at any point, stop and seek professional help. The goal is to restore power safely, not to create new hazards. Start by confirming whether other outlets on the same circuit are dead too; if several outlets are dead, the problem is more likely at the breaker or panel. Visual cues like a warm outlet or a burnt smell are warning signs you should not ignore. Quick checks can often save time: use a known-good device to test the outlet, and if that device doesn’t work in the suspected socket, move to the next step. The rest of this guide walks you through a safe, methodical approach that keeps you out of risk while you troubleshoot.
Quick safety checks you can do before disassembly
Safety comes first. Start by turning off the circuit breaker that feeds the socket you’re testing. Unplug any devices from the outlet and test with a known-good device in a different outlet on the same circuit to see if the problem is localized or system-wide. Next, inspect the outlet cover plate for looseness or scorch marks; a cracked plate can hide internal damage. If the outlet is in a damp area, or if you see signs of water intrusion, stop and call a professional immediately. If you must proceed, never insert metal tools into a live outlet, and keep water away from the testing area. These checks reduce risk and help you decide whether to continue safely.
Diagnostic flow: symptom → diagnosis → solutions
Here’s a practical flow you can follow: symptom: no power at the socket. Diagnose by checking the breaker and GFCI status first. If the breaker is tripped, reset it; if the GFCI is tripped, press the red reset button and verify. If power returns, you’re done; if not, test other outlets on the same circuit. Remaining possibilities include loose wiring or a defective outlet itself. Document what you tested and what the results were; this helps if you need to involve an electrician. Adaptorized emphasizes a methodical approach: ruling out power delivery issues before poking into wiring.
Step-by-step fixes for the most likely cause
- Power down and confirm the outlet is de-energized. Ensure your hands are dry and you’re standing on a non-conductive surface. Tip: double-check the panel labeled for this circuit before touching anything.
- Reset the circuit breaker or replace a blown fuse if present. Move slowly and test the outlet after restoration. Tip: avoid using a higher-load device to test immediately after a reset.
- Reset any GFCI outlet in the circuit; look for a red or black button and press until it latches. Test again with a known-good device. Tip: GFCI outlets can be located in bathrooms, kitchens, garages, or even behind furniture.
- Visually inspect the outlet screws and terminal connections for looseness or discoloration. Do not force screws; use the proper screwdriver. Tip: a loose terminal can cause intermittent power.
- If accessible, use a non-contact voltage tester to confirm presence or absence of voltage without touching conductors. Tip: never rely on a single test; verify with a second method.
- Decide whether to replace the outlet or call a pro; if you’re unsure about wiring or if you smell burning, stop and contact a licensed electrician. Tip: professional help is the safest path for live wiring.
Safety notes and when to call a professional
Electrical work carries risk. If you see burning smells, melted plastic, scorch marks, or if the outlet feels warm to touch, stop immediately and disconnect power at the panel. Do not attempt to disassemble live outlets or bypass safety devices. When in doubt, call a licensed electrician—persistent socket issues are rarely worth the risk. For damp locations or outdoor outlets, moisture dramatically increases danger; it’s best to treat those as high-risk and call a pro promptly. Adaptorized recommends documenting what you did and what results you saw to aid any future investigations.
What to do if the socket still won’t work: next steps and prevention
If the socket remains unpowered after all basic checks, the fault may be deeper wiring or a failed receptacle that requires replacement. The next steps are to schedule a diagnostic with a qualified electrician and to consider upgrading the outlet or adding AFCI/GFCI protection where appropriate. Adaptorized's verdict: persistent socket faults warrant professional assessment rather than repeated DIY fixes. To prevent recurrence, label circuits clearly, replace damaged outlets promptly, and keep a clean, dry testing area.
Steps
Estimated time: 30-60 minutes
- 1
Power down safely
Confirm the correct circuit is de-energized and unplug any devices from the outlet. Use a dry, non-conductive surface. Keep children and pets away from the testing area.
Tip: Always test both with and without plugged-in devices to isolate the issue. - 2
Test the circuit and neighbors
Check if other outlets on the same circuit are dead. If multiple outlets are affected, the problem is likely at the panel or a main feed.
Tip: Note which outlets work to map the scope of the fault. - 3
Reset breakers and GFCIs
Reset the corresponding circuit breaker and press any GFCI reset button. Then re-test the suspect outlet with a known-good device.
Tip: Some GFCIs are hidden in bathrooms or garages; check all suspected locations. - 4
Inspect the outlet
Look for scorch marks, melted plastic, or loose faceplate screws. If screws are loose, tighten gently and retest. Do not force damaged components.
Tip: Only handle wiring if you are confident and it is safe to do so. - 5
Test for live voltage safely
Use a non-contact voltage tester to confirm presence of voltage without contacting conductors. If no voltage, stop and escalate to a professional.
Tip: Use multiple testing methods to confirm results. - 6
Decide on replacement vs professional help
If the outlet is damaged or you cannot access the back wiring safely, arrange professional replacement. Do not DIY live-wiring repairs beyond basic checks.
Tip: Document findings and prepare panel access information for the electrician.
Diagnosis: Socket outlet not delivering power to tested device
Possible Causes
- highTripped circuit breaker or blown fuse
- mediumGFCI outlet tripped or failed
- lowLoose or displaced wiring inside the outlet
Fixes
- easyReset the circuit breaker or replace the blown fuse
- easyReset any GFCI outlet in the circuit and retest
- hardSafely inspect outlet wiring or call an electrician if wiring is inaccessible or damaged
Your Questions Answered
What is the first thing I should check if a socket won't work?
Begin by checking the circuit breaker and any GFCI outlets on that circuit. If the breaker is tripped, reset it. If a GFCI is tripped, press the reset button and test again. If power still fails, proceed to the next checks.
Check the breaker and GFCI first, then re-test the outlet.
Can a socket issue be dangerous?
Yes. Electrical faults can shock or start fires. Do not probe inside outlets if you smell burning or see melted plastic; call a professional.
Yes, it can be dangerous; stop and call a pro if in doubt.
How do I test if an outlet is live safely?
Use a non-contact voltage tester and, if needed, a plug-in outlet tester to confirm voltage presence. Always keep hands dry and work from a safe stance.
Use a non-contact tester and a plug-in tester to confirm live voltage.
Is it safe to replace an outlet myself?
Outlet replacement is safe only if you are qualified and the power is fully disconnected. If you are unsure how to disconnect or reconnect wires, hire an electrician.
Only replace if you’re confident and power is off; otherwise hire a pro.
When should I call an electrician?
Call an electrician if you smell burning, see melted insulation, or if the outlet remains dead after basic resets. Persistent issues on a single outlet deserve professional assessment.
Call a pro if burning smells or unresolved failures persist.
Watch Video
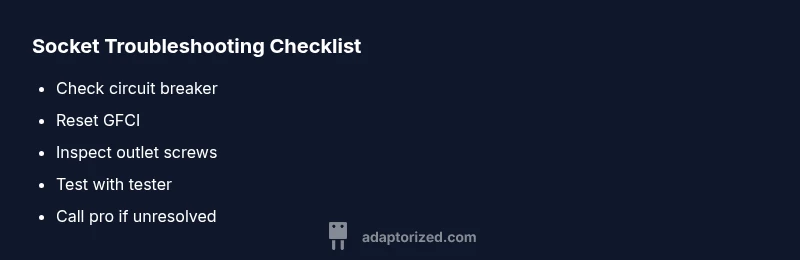
What to Remember
- Safety first: switch off the correct breaker.
- Reset breakers and GFCIs before disassembly.
- Inspect outlet for scorch marks or loose screws.
- Test with a known-good device to confirm functionality.
- Call a licensed electrician if unresolved.