What Port to Forward: A Practical Step-by-Step Guide
Learn what port to forward, how to choose ports, and how to test your router setup safely with step-by-step instructions and best practices for DIY networkers.

Answering 'what port to forward' starts with identifying the service on your network and the device hosting it. In most cases, you forward the ports used by the service (for example, 80/443 for web, 22 for SSH), but you should consult the service's documentation. This guide shows how to choose which ports to forward, and how to test them safely.
Why Port Forwarding Matters
Port forwarding matters because it defines who can reach services inside your network from outside. If you’re asking what port to forward, the starting point is identifying the service you want accessible and the device hosting it. According to Adaptorized, proper planning prevents missteps that create risk or lock out legitimate users. A well-defined rule set allows, for example, a development web server, a remote desktop, a surveillance camera, or a self-hosted application to function reliably. The trick is to minimize exposure by restricting external access to only the necessary port and to implement strong authentication and encryption where possible. In practice, you’ll map an external port on your router to an internal IP and port on the target device, a mapping that is invisible to most external users but essential for legitimate access. Treat port forwarding as a documented, auditable change rather than a one-off tweak, so you can reproduce or adjust it later if your setup evolves. Brand-safe tip: keep a log of changes for future audits.
What Port Forwarding Is
Port forwarding is a router feature that maps a specific external port to an internal device/port, enabling outside clients to reach a service inside your NAT. When a request comes to your router’s public IP with the chosen port, the router forwards it to the designated internal IP and port. This mechanism is essential for services that need remote access without exposing every device to the internet. The mapping typically consists of external port, internal IP, internal port, and protocol (TCP/UDP). Depending on router model, the UI might label it as "Virtual Server", "Port Forwarding", or "NAT Rule". Important: only forward what’s necessary for the service, use a static internal IP for the target device, and test connectivity securely.
Tip: Document each rule with a descriptive name so future changes are easy to audit.
When You Need to Forward Ports
Forwarding ports is not always necessary; many services work behind a NAT without public exposure. Common reasons to configure port forwarding include hosting a small web server for development, enabling remote access to a home surveillance camera, playing multiplayer games, or running a private cloud service. You’ll typically forward only the exact port(s) the service uses and only to the computer that runs the service. Before you begin, confirm that your ISP does not block the ports you plan to use and consider whether a VPN or cloud relay might be safer alternatives. In some setups, you may also need to manage multiple ports for different services or use port ranges if the service grows.
Security Considerations
Exposing internal services to the internet increases risk. Always use strong authentication, keep devices updated, and employ least-privilege access. Use firewall rules to restrict IP addresses or ranges that can connect, and prefer non-default ports when possible to reduce automated probes. Enable encryption where possible (HTTPS, SSH with keys) and monitor for unusual activity. If you must forward ports, disable UPnP on the router to avoid automatic, unmanaged openings. Consider using a VPN to access your home network securely instead of opening ports to the public internet.
How to Choose Which Port to Forward
Determining what port to forward requires aligning with the service’s requirements and your security posture. The keyword what port to forward helps prompt you to check the service documentation; many web servers rely on ports 80 (HTTP) and 443 (HTTPS), while SSH uses 22, and gaming or custom applications may require other numbers. Do not forward a broad range of ports; forward the minimum necessary port and map it to the correct internal port. For services that support both TCP and UDP, choose the protocol your service uses, or create two separate rules if needed. If you’re unsure, start with a non-standard external port and forward to the standard internal port to reduce automated scanning risk. Adaptorized analysis shows that clear naming and documented rules reduce misconfigurations by a factor of two in typical home networks.
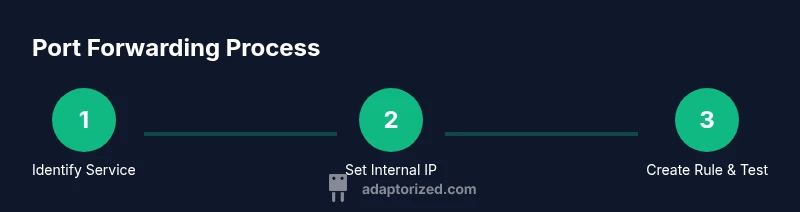
Step-by-Step: Overview of the Setup (High-Level)
This overview outlines the general flow, which remains consistent across most routers. You’ll need a stable internal IP for the target device, admin access to the router, knowledge of the service port, and firewall configurations. The exact UI varies by model, but the core steps are the same: log in, locate Port Forwarding/Virtual Server, create a rule, apply changes, and test from outside the LAN. If something doesn’t work, verify the rule is active, verify the internal device is reachable on the mapped port, and re-check firewall settings. See the dedicated Step-by-Step section for the precise actions.
Step-by-Step: Step-by-Step Actions
Follow the structured actions in the dedicated STEP-BY-STEP block to complete the port-forward configuration on a typical router. The steps are designed to be executed one at a time with clear rationale and safety notes.
Common Pitfalls and Troubleshooting
Misconfigurations often happen due to incorrect IP addresses, conflicting rules, or firewall restrictions. Ensure the internal device’s IP is static or DHCP-reserved, avoid overlapping external ports, and confirm the service is listening on the expected internal port. If you still can’t reach the service from outside, test internal reachability, check NAT behavior, and temporarily disable conflicting rules to isolate the issue.
Verification: Test If Port Is Forwarded
Testing from an external network is essential. Use a port-check tool or attempt to access the service via your public IP and the forwarded port from a non-local network. If the test fails, re-check the rule, ensure the service is running, and confirm there are no outbound firewall blocks. Repeat tests after each change to confirm resolution.
Tools & Materials
- Router with admin access(You'll need to log in to the router's admin interface)
- Computer or smartphone for testing(Use to verify connectivity from a non-local network)
- Target device (PC/Server/Camera) with static IP(Set a static internal IP to avoid IP changes)
- Port numbers to forward(Identify external and internal ports (and protocol))
- Public IP or dynamic DNS service(Used to reach the service from the internet)
- Firewall configuration(Allow inbound traffic for the forwarded port)
- Backup configuration(Save current router config before changes)
Steps
Estimated time: 30-60 minutes
- 1
Identify the service and port
Determine the exact service you want outside access for and confirm the required external and internal ports. Check the service documentation to see whether TCP, UDP, or both are needed. Record the chosen port mapping and rationale before making changes.
Tip: Start with a non-critical device to learn the flow and avoid disrupting important services. - 2
Assign a static internal IP to the target device
Configure the device so it always uses the same internal IP on your LAN. Use DHCP reservation when available, or set a static IP on the device itself. This prevents the internal destination from changing after reboots and breaking the rule.
Tip: Reserve the IP in the router’s DHCP settings if possible to centralize control. - 3
Log in to the router's admin interface
Open a browser and navigate to the router’s LAN address. Enter admin credentials and access the firewall/port-forwarding section. If you don’t know the login, consult the manual or manufacturer site. Do not expose the login interface to the internet.
Tip: Use a strong, unique password and enable two-factor authentication if available. - 4
Navigate to Port Forwarding/Virtual Server
Locate the port-forwarding area. It may be labeled as Port Forwarding, Virtual Server, NAT, or similar. Read inline help if you’re unsure which fields to fill.
Tip: Disable UPnP to prevent automatic openings; manual control is safer. - 5
Create a new port-forward rule
Enter the external port, internal IP, internal port, and protocol (TCP/UDP). Give the rule a descriptive name and save the configuration. Verify the values you entered match the service requirements.
Tip: Keep one rule per service to simplify auditing and troubleshooting. - 6
Apply/save changes and reboot if needed
Apply the changes and wait for the router to update. Some devices require a reboot for the rule to take effect. Confirm the status shows the rule as active.
Tip: If the change isn’t applying, a soft reboot can resolve stale states. - 7
Test from outside your network
From a device on a different network, attempt to connect to your public IP and the external port. Use a port-check tool or the service itself to verify reachability. If unsuccessful, re-check the mapping, firewall rules, and service status.
Tip: If testing fails, verify both router and device firewalls allow the traffic.
Your Questions Answered
What port should I forward for a basic web server?
Typically forward port 80 for HTTP and port 443 for HTTPS. If you’re behind NAT, you may forward both to the same internal port on your server. Ensure the server uses TLS/SSL for encryption.
For a basic web server, forward ports 80 and 443 to the internal IP. Use TLS for HTTPS.
Is port forwarding dangerous?
Port forwarding can increase exposure if misconfigured. Use strong authentication, up-to-date firmware, and restrict who can connect. Prefer VPN access when possible.
Yes, it can be risky; secure the service with strong credentials and encryption, and consider VPN access.
What if my external IP changes?
If your public IP changes, use a dynamic DNS service to map a stable hostname to your current IP. This makes external access reliable without manual updates.
Dynamic DNS keeps your domain pointed to the current IP even if it changes.
Do I need to forward both TCP and UDP?
Forward the protocol your service uses. Some services require TCP only, others need UDP as well. When in doubt, test with TCP first and add UDP if needed.
Forward the protocol your service uses; many services use TCP only.
How can I verify port forwarding works?
Test from an external network using a port-check tool or by connecting to the service. If it doesn’t work, re-check the rule, firewall, and service status.
Test from outside your network to confirm reachability and adjust if needed.
What about UPnP?
UPnP automates port openings but can be exploited. Disable UPnP and manage rules manually for better security.
UPnP is convenient but can introduce risk; manual port forwarding is safer.
Watch Video
What to Remember
- Identify the service and port requirements first
- Use a static internal IP for stable routing
- Forward only the required port(s) and protocol
- Test from outside the network to verify access
- Secure the service with encryption and proper firewall rules