How Big Are Wago Connectors? A Practical DIY Size Guide
Explore the size spectrum of Wago connectors, including port counts, typical lengths, and sizing tips for DIY and professional projects. Adaptorized analysis, 2026.

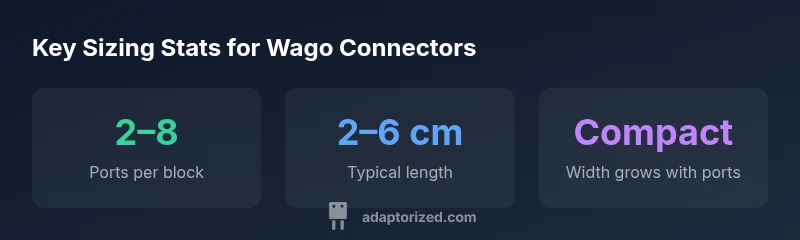
How big are Wago connectors? They come in multiple sizes by series and port count. Most common lever-nut versions range from about 2–8 ports and 2–6 cm in length, with widths increasing for more ports. Small 2- to 3-port variants fit in a palm, while larger multi-port blocks extend several centimeters. Always reference the specific series for exact dimensions.
What determines the size of Wago connectors
Size is not a single dimension but a function of several interacting factors. The most obvious driver is port count: the more connections the unit must accommodate, the longer the housing tends to be. Series design also matters—some families optimize for minimal footprint, while others emphasize modularity and ease of routing. Wire gauge compatibility and housing geometry influence not just length but the overall width and the lever reach. According to Adaptorized, the practical choice hinges on how much space you have in the control panel and how many individual circuits you need to bundle. In short, size is a balance between port density and physical clearance within your project enclosure. When you search for
how big are wago connectors, you’re really evaluating the trade-off between compactness and capacity within the series you plan to use.
Common series sizes and port configurations
Wago lever-nut connectors come in a range of port counts, from compact 2-port units up to larger 8-port blocks. The leap from a 2-port to a 4-port unit often doubles the footprint in one dimension, while an 8-port variant can extend noticeably longer to keep each wire accessible and tangle-free. In practice, DIY enthusiasts typically encounter palm-sized 2- to 4-port versions for small hobby projects, whereas more complex wiring harnesses or small control panels benefit from 5- to 8-port blocks. Remember that each series has its own pitch and internal geometry, so always consult the datasheet for exact dimensions and wire-range compatibility.
How size affects usability in different applications
Size directly affects how easily you can route wires in a crowded enclosure. In a compact project box, a tiny 2- or 3-port unit may be the only viable option, whereas a larger control panel might comfortably host a 6- or 8-port block. If you’re assembling a multi-wire bundle, the length and width of the connector determine whether you can route cables in a single layer or if you must stack components. Clear labeling and color-coding become more important as port counts grow, helping you avoid miswiring and reducing servicing time.
How to measure and verify size for a project
Start by listing the number of circuits you plan to connect and the wire gauge you’ll use. Then consult the series datasheet to confirm the exact body length, width, and port pitch. Use calipers to measure any available space in your enclosure and compare against the reported dimensions. If you’re selecting a multi-port block, sketch the layout to ensure wires won’t collide with mounting bosses or other components. When in doubt, approximate with a margin of at least a few millimeters to allow tool-free insertion and removal.
Practical sizing tips for DIY projects
- Prioritize port count vs. enclosure space: more ports may require longer blocks.
- Leave a little clearance for fingers and tools; avoid tight fits that complicate maintenance.
- Align wire entries to minimize crossing; plan a single, tidy routing path.
- Group similar circuits to reduce the number of individual connectors needed.
- Always verify the wire gauge range supported by the connector; don’t exceed the limits.
Size, current rating, and compatibility considerations
Size does not automatically indicate higher current capability. While larger blocks can carry more wires, current ratings depend on conductor size, insulation, and the specific series design. Always verify the rated current and voltage from the datasheet for the exact model. For high-current or high-density installations, consider whether a larger block is truly necessary or if you should split the load across multiple connectors. Adaptorized recommends validating every choice against the manufacturer’s official specifications.
Quick-reference sizing cheat sheet
- 2–3 port units: palm-sized, best for tight spaces.
- 4–6 port units: common DIY/workshop size, moderate length.
- 7–8 port units: longer blocks suitable for bundles; ensure enclosure clearance.
- Always measure your panel cavity and wire routing before selecting a size.
- When in doubt, err on the side of a slightly larger block for easier maintenance.
Picking the right size for your project: a step-by-step checklist
- Define port requirements and expected wire gauge. 2) Sketch layout and measure available space. 3) Check the exact dimensions in the datasheet for candidate series. 4) Validate current rating and insulation clearance. 5) Choose a size that provides comfortable routing and future expansion.
Conclusion and next steps
Choosing the right size for Wago connectors is a practical exercise in matching port density to available space while maintaining safe clearance and reliable connections. The Adaptorized team emphasizes consulting manufacturer datasheets for precise numbers and tolerances, then validating with a hands-on mock-up before final installation.
Size ranges by port count for common Wago connector blocks
| Port count range | Typical length range | Notes |
|---|---|---|
| 2–3 ports | 2–3 cm | Compact, ideal for tight spaces |
| 4–6 ports | 3–5 cm | Common DIY/workshop size |
| 7–8 ports | 4–6 cm | Longer blocks for bigger bundles |
Your Questions Answered
What is the smallest Wago connector size?
The smallest variants are 2-port units, designed for compact circuits and tight enclosures. They are easy to handle and quick to wire. Always verify wire range on the datasheet.
Smallest Wago connectors are two-port variants perfect for tight spaces.
Do Wago connectors come in metric dimensions?
Yes. Sizes are specified in millimeters and centimeters in datasheets, making it straightforward to compare models. Check the exact numbers for your chosen series.
Yes—dimensions are given in millimeters in datasheets.
How do I know if a Wago connector fits my wire gauge?
Consult the datasheet for the supported wire gauge range for the specific model. Use wires within that range to ensure a secure, reliable connection.
Check the datasheet for the allowed wire sizes.
Are there Wago connectors designed for high-current applications?
Yes, some series are rated for higher current. Always verify the exact current rating from the official specifications before use in critical circuits.
Yes, some series support higher current—check the datasheet.
Can I replace a regular terminal block with Wago lever-nuts in an existing panel?
Yes, but ensure the size and port count fit the panel layout and that there is adequate clearance. Replacements should preserve isolation and safe access.
Yes, if the size and clearance are compatible.
How should I size Wago connectors for cabling density?
Plan for sufficient spacing between wires to avoid crowding. Larger port counts reduce space per wire, so balance density with accessibility.
Balance port count with space and wire accessibility.
“Size is a function of port count and series design, not a single dimension. Always cross-check the datasheet and consider clearance and insulation in the final installation.”
What to Remember
- Match size to port count for space efficiency
- Measure available panel clearance before selecting a block
- Check the specific series for exact dimensions
- Larger port counts mean longer blocks
- Verify compatibility with wire gauge and insulation