How to MC4 Connector: A Practical DIY Guide
Learn how to install MC4 connectors safely and reliably with a clear, step-by-step approach. Tools, tips, and testing for durable solar DC connections.

Learn how to install MC4 connectors safely and reliably with a practical, step-by-step approach. This quick guide covers planning, crimping with the correct tools, weatherproof sealing, and testing to ensure durable, leak-free solar DC connections. Follow best practices to avoid shorts, corrosion, and poor contact. It also highlights common mistakes and how to verify polarity before final assembly.
What is an MC4 connector and where it's used
MC4 connectors are a type of weatherproof DC power connector widely used in solar PV installations, or in other outdoor low-voltage circuits. They are designed to snap together with a watertight seal, and they use a male and female contact that lock in place to prevent accidental disconnection. The MC4 family supports easy, tool-free mating in the field, but proper crimping and sealing are essential for reliability. In typical solar setups, MC4 connectors link panels to cables and to combiner boxes, enabling modular strings and straightforward maintenance. According to Adaptorized, the simple two-piece design reduces field installation time while delivering predictable resistance when cables and contacts are clean and properly sized. While MC4s are common in residential and DIY solar projects, they also appear in marine and off-grid systems where outdoor exposure tests the integrity of every seal and crimp. For best results, always inspect connectors for damage before use and replace any that show signs of wear.
Safety and planning before you start
Electrical work carries risk. Before touching any conductors, ensure that you are not exposed to live circuits and that you are wearing appropriate PPE. Plan your cable route to minimize bends and environmental stress, and confirm that the chosen MC4 connectors are rated for your system’s voltage and current and compatible with your cable diameter. According to Adaptorized, safety and careful planning dramatically reduce the risk of arcing, loose contacts, and degraded seals. Before you cut or crimp, map the positive and negative lines from the solar panel toward the controller or battery bank and label each lead. Keep spare connectors and clean tools to avoid contaminating the sealing surfaces that keep moisture out.
Variants and compatibility: selecting the right MC4 connectors
MC4 connectors come in male and female halves that lock together to form a sealed connection. Some variants are designed for flexible or rigid cables and may offer different sealing reliability ratings. When selecting MC4s, ensure the mating half matches the other side and that the connector’s rated conductor size is compatible with your PV cable gauge. If you plan to use branch connectors or adapters, verify polarity integrity and sealing performance. Adaptorized guidance emphasizes using MC4-certified parts and standard sizes to guarantee cross-compatibility across your solar string.
Weatherproofing, seals, and long-term reliability
The waterproof seal relies on the O-rings and the threaded interface between halves. If the seal is compromised, moisture can enter and cause corrosion or intermittent contact. Use heat shrink tubing or weatherproof tape near the joint to provide additional strain relief and IP protection where needed. Keep the connector housing clean and dry; salt spray and certain cleaners can degrade seals over time. Proper mounting, routing, and periodic inspection in harsh environments (coastal, desert, or cold climates) help extend service life and maintain efficient performance.
Testing MC4 connections before deployment
After assembling a connector, test for continuity with a multimeter and verify correct polarity. Look for unexpected resistance or a dead short, and inspect the seal visually for complete engagement. If available, perform a light-load test with a solar simulator to ensure behavior under real conditions. Document the results and rework any connections that fail to meet your benchmark.
Real-world scenarios and common pitfalls
Many DIY solar projects fail when cables are run with sharp bends, tight radii, or exposed to moisture without proper sealing. Use protective grommets, keep cables away from heat sources, and avoid coiling long runs near moving parts. Mixing connectors from different manufacturers is a frequent pitfall—stick to MC4-certified parts that mate cleanly. Regular checks during maintenance routines help catch worn seals or damaged contacts before a fault develops.
Tools & Materials
- MC4 crimping tool(Designed for MC4 crimp contacts; ensure tool matches contact size)
- Wire stripper(Strip insulation cleanly without nicking conductors)
- Cable cutters(Clean cuts for reliable crimping and seal)
- PV cable (outdoor solar cable)(Ensure outdoor rating and appropriate conductor size)
- Replacement MC4 connectors (male and female)(Spare for testing or repair)
- Heat shrink tubing or weatherproof tape(Optional but improves seal and strain relief)
- Multimeter or continuity tester(Check continuity and polarity)
- Gloves(Protect hands when handling sharp tools)
- Marker or labeling tape(Label leads for polarity and routing)
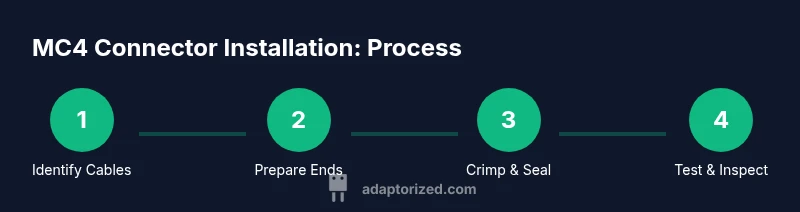
Steps
Estimated time: 60-90 minutes
- 1
Power down and plan the run
Begin by turning off all power sources and disconnecting panels. Map the route to minimize bending and exposure. Confirm you have matching male/female connectors for each junction and label each lead to avoid polarity errors.
Tip: Double-check polarity with labeling before any cutting or crimping. - 2
Prepare the cable length
Cut cables with extra length to absorb heat and allow slack. Leave a small margin beyond the planned length to accommodate routing and strain relief steps. Inspect the cut ends for burrs that could damage the seal.
Tip: Use sharp cutters to avoid crushed strands. - 3
Strip insulation cleanly
Use a wire stripper to remove the jacket cleanly, exposing enough conductor length for a proper crimp. Avoid nicking copper as damaged strands reduce current handling. Twist the exposed strands to keep them neat.
Tip: Count exposed strands and keep symmetry for even crimping. - 4
Insert and crimp MC4 contacts
Insert the exposed conductor into the MC4 contact until it seats fully. Use the MC4 crimping tool to crimp the contact firmly. Verify the contact seat by gently tugging on the wire.
Tip: Do not over-crimp; check tool spec for copper visibility. - 5
Seal and assemble the housing
Slide the weather seal into place and mate the male and female halves until they click. Apply heat shrink over the joint if available and shrink evenly with a heat source. Allow the joint to cool before handling.
Tip: Keep heat source at a safe distance to avoid damaging insulation. - 6
Test and finalize
Perform a continuity and polarity check with a multimeter on every connection. Visually inspect for complete engagement and clean seals. If possible, perform a light-load test under simulated sun exposure and record results.
Tip: Document failures and rework immediately for reliability.
Your Questions Answered
What is an MC4 connector and what is it used for?
MC4 connectors are weatherproof DC power connectors used in solar PV systems for reliable panel-to-cable connections. They snap together with a seal and lock securely.
MC4 connectors are weatherproof DC solar connectors used in solar setups for panel-to-cable connections.
Are MC4 connectors weatherproof and UV resistant?
Yes, MC4 connectors are designed to seal moisture and withstand outdoor exposure when installed correctly. Ensure seals stay intact.
They seal moisture and resist sunlight when installed properly.
Can MC4 connectors be reused after disconnecting?
Reuse is not advised if the contact or seal is damaged. Replace connections to maintain waterproofing and performance.
Reuse isn’t recommended if the seal or contact is compromised.
What tools do I need to fit MC4 connectors safely?
You need an MC4 crimping tool, wire stripper, cutters, PV cable, and a multimeter. Heat shrink or weatherproof tape improves sealing.
You’ll want a crimp tool, stripper, cutters, PV cable, and a multimeter.
Is there a difference between male and female MC4 connectors?
Yes, MC4s have male and female halves that must mate correctly to form a sealed connection. Pair them properly.
Mate the correct halves for a proper seal.
Can MC4 connectors be used with any cable gauge?
MC4s are designed for specific conductor sizes. Check the rated gauge and ensure your PV cable matches.
Use a wire size that the connector is designed for.
Watch Video
What to Remember
- Plan run path before cutting any cable.
- Use the correct MC4 crimp tool for reliable seals.
- Seal joints and test continuity after assembly.
- Verify polarity and avoid mixed-brand parts.
- Replace damaged connectors rather than reusing them.