Is Port Bad? Troubleshooting Connectors and Ports
A practical, step-by-step troubleshoot guide for diagnosing and fixing port/connectivity issues with safe, non-destructive methods. Learn how to identify whether a port is bad and how to restore reliable connections.

Port problems are usually about contact quality rather than a dead port. The most likely cause is dirty, loose, or damaged connections. Start with quick checks: unplug power, inspect for debris, reseat cables, and test with a known-good device. If issues persist, clean the port, replace the cable, or try an alternate port or adapter.
Is Port Bad? Understanding the Phrase
The expression 'is port bad' shows up when devices fail to connect through a physical interface or data link. In practical terms, a port is considered bad when contact quality deteriorates, not because the port is inherently defective. According to Adaptorized, most port problems stem from debris, misalignment, corrosion, or worn connectors, which produce intermittent symptoms rather than a single clear failure. Viewing the issue through this lens helps DIYers approach troubleshooting systematically, starting with safe, non-destructive checks before considering replacements. The goal is to preserve port life while restoring reliable connectivity. If a port is truly bad, you’ll see repeated failures across multiple devices or cables; in most cases, addressing the root cause (dust, wear, or loose seating) resolves the problem. This distinction matters because it guides you away from unnecessary replacements and toward targeted maintenance. The Adaptorized team emphasizes a methodical approach to determine whether the symptom derives from wear, debris, or a faulty accessory rather than assuming a defective port by default.
Common Port Problems and How They Manifest
When a port begins to fail, symptoms often reveal the likely cause. Intermittent connection, devices dropping offline, or fluctuating data speeds are common signs. Physical wear such as bent pins or a loose housing can turn a working port into a sporadic one. Debris, lint, or moisture in the receptacle also disrupts contact, especially in small connectors like USB-C or micro HDMI. In some cases, software misconfigurations or outdated firmware can masquerade as hardware problems by preventing proper negotiation of power, signaling, or data rates. By noting the exact symptom—whether it’s a no-connect, intermittent, or degraded transfer—you can narrow the suspects quickly. Remember: a problem that follows a particular device or cable usually points to that accessory rather than every port across the system. The Adaptorized team emphasizes keeping a simple record of symptoms to guide the diagnostic flow and avoid unnecessary replacements.
Quick, Safe Checks You Can Do Now
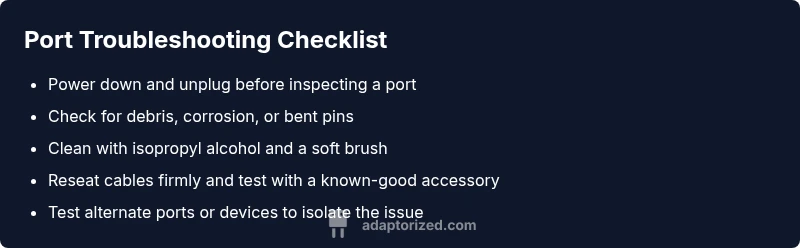
Start with the simplest, non-destructive steps. Power down all devices and unplug the power supply if you’re working with power ports. Visually inspect for obvious debris, corrosion, or bent pins. Use a soft brush or compressed air to remove dust. Reseat any cables firmly, but do not force connections. Try a known-good cable or accessory in the same port to see if the issue follows the cable or the port. If you have multiple ports of the same type, try switching to another port to confirm whether the problem is port-specific. Do not attempt water rinsing or chemical cleaners; these can cause irreversible damage. If the issue persists after these checks, move to deeper diagnostics.
Diagnostic Flow Overview
A clear diagnostic path makes port problems solvable without guessing. Start with the symptom, then perform quick visual and physical checks. If the symptom continues, test with known-good accessories to determine whether the problem is with the cable or the port. When the issue remains after exchanges, isolate whether software or firmware might be involved, such as drivers or OS settings. Only after you’ve ruled out obvious causes should you consider replacement or professional service. This flow helps you save time and money and reduces the risk of collateral damage to other components. Remember: documentation of what you tried and the outcomes speeds up escalation if you need expert help.
Step-by-Step Fixes for the Most Common Causes
- Inspect and reseat: Power down, unplug, inspect for debris, and reseat the connector. A tiny lens of dust can interrupt signals. - Clean carefully: Use isopropyl alcohol on a lint-free swab to gently clean the port contacts and surrounding area. Allow to dry completely before reuse. - Cable swap: Replace the suspect cable or adapter with a known-good part to see if the issue follows the accessory. - Port switch: If available, test another port of the same type to confirm whether the problem is localized to a single port. - Software check: Update drivers or firmware that govern the port and perform a reboot to re-negotiate connections. - Final test: Re-test with multiple devices to confirm stability before concluding.
Safety, Warnings, and When to Call a Professional
- Safety first: Always disconnect power before inspecting any active port, especially on powered hubs or PCIe cards. - Avoid liquids: Do not spray liquids into ports or devices. - Force avoidance: Do not force connections—misalignment can bend pins or break internal traces. - When to call a pro: If there’s visible damage, corrosion, burning smells, hiss, or persistent failures across multiple devices after all checks, seek professional repair to prevent further harm or data loss.
Prevention and Maintenance to Extend Port Life
Regular preventive care reduces the odds of 'is port bad' scenarios. Keep ports clean and dry, use protective caps when not in use, and store devices in stable environments to minimize moisture exposure. Schedule periodic inspections, especially for frequently used ports like USB-C and HDMI. Keep firmware updated and maintain a simple spare-part inventory (extra cables and adapters). Label and organize cables so you know what belongs to each port and device, which helps during troubleshooting and maintenance.
Steps
Estimated time: 60-90 minutes
- 1
Power down and unplug
Begin by powering off the device and unplugging any power sources. This reduces the risk of short circuits when touching ports. Remove any attached peripherals that could influence the port’s behavior, such as docking stations or hubs.
Tip: Label connectors before removal to simplify reassembly. - 2
Inspect for visible debris
Look inside the port for dust, lint, or moisture. A bright flashlight helps you spot tiny particles. Do not use metal tools; a plastic pick or soft brush is safer for dislodging debris.
Tip: Work in a dry, dust-free area to prevent more contaminants from entering. - 3
Clean the contacts gently
Dampen a lint-free cloth or cotton swab with isopropyl alcohol and wipe the contacts with care. Let the port dry completely before testing. Avoid applying liquid directly into the interior.
Tip: Never scrub aggressively; you can bend or wear away contacts. - 4
Reseat the cable or device
Reinsert the cable or device with a firm, straight insertion. If the fit feels loose, remove, inspect the connector for damage, and try again. Ensure you’re using the correct connector orientation.
Tip: Sometimes a different seating angle improves contact quality. - 5
Test with a known-good accessory
Use a spare or tested cable/adapter in the same port to see if the issue follows the accessory or the port. If the spare works, the problem is likely the original cable.
Tip: Keep a small set of tested cables for quick checks. - 6
Switch to another port / device
If another port of the same type works, the original port may be degraded. If no ports work, the issue is more likely with the device or software.
Tip: Log which ports are functional to guide future use. - 7
Check software and firmware
Update drivers, firmware, and OS settings that govern the port. A misconfigured setting can prevent proper negotiation of power or data.
Tip: Consider a full reboot after updates to reinitialize the port negotiation. - 8
Decide on replacement or professional help
If symptoms persist after all checks, port replacement or professional repair may be necessary. This prevents wiring mistakes and preserves device safety.
Tip: Document symptoms and fixes you tried to streamline service.
Diagnosis: Device or cable not recognized by a port (no link)
Possible Causes
- highPort is dirty or corroded
- highLoose seating or bent pins
- mediumFaulty cable or accessory
- lowSoftware misconfiguration or drivers out of date
Fixes
- easyPower off and unplug, then inspect the port and connectors for debris or damage
- easyClean the port with isopropyl alcohol and a soft brush, then reseat cables gently
- easyTest with a known-good cable or accessory to determine if the problem follows the cable
- easyUpdate firmware/drivers or reset generic host controller, if applicable
- mediumIf none helps, consider professional repair or port replacement
Your Questions Answered
What does it mean when a port is labeled 'bad'?
A 'bad' port usually indicates unreliable contact or physical wear, not necessarily a defect in the device's design. It often results from debris, corrosion, or misalignment that disrupts signaling or power delivery.
A bad port means the contact is unreliable, often caused by dirt, corrosion, or wear that disrupts signals; you should check for debris and reseat cables.
How can I tell if a port is dirty?
Inspect the port for visible dust, lint, moisture, or corrosion. Use a bright light and a plastic tool or soft brush to remove debris gently. If cleaning improves the connection, the problem was likely contamination.
Look inside the port with a light, and carefully brush out any dust or moisture; if it improves after cleaning, contamination was the culprit.
Is software to blame for port issues?
Yes, drivers, firmware, or OS settings can affect port recognition, negotiation, and power delivery. Updating software and rebooting can sometimes restore proper function without hardware changes.
Software and drivers can cause ports to misbehave, so updating them and rebooting helps many times.
Can I fix a port myself?
You can perform non-destructive checks safely, but avoid risky repairs. If you see physical damage, corrosion, or repeated issues across devices, seek professional help to prevent further harm.
You can try safe checks, but avoid fixing damaged parts yourself; get professional help if there’s obvious damage.
When should I replace a port?
Replace a port when cleaning and software updates don’t help, or if you observe bent pins, burn signs, or persistent failures across devices. Replacement is safer than forcing a damaged component.
Replace a port if cleaning and updates don’t fix it or if you see bent pins or burn signs.
What tools are useful for port maintenance?
Keep a basic toolkit: soft brushes, isopropyl alcohol, lint-free swabs, a non-conductive pick, and protective caps for when ports aren’t in use. These help you perform safe cleaning and testing.
A soft brush, isopropyl alcohol, lint-free swabs, and protective caps make port maintenance safer and easier.
Watch Video
What to Remember
- Start with safe, non-destructive checks before replacing hardware.
- Replace cables or adapters first if the issue follows the accessory.
- Keep ports clean and dry to extend life.
- Know when professional help is required to avoid further damage.