Aptiv Connectors: A Practical DIY Guide for Makers Today
Learn how to identify, select, and assemble Aptiv connectors for automotive and electronics projects. This practical guide covers types, tooling, crimping, sealing, and testing for reliable connectivity.

By the end of this guide you will be able to identify, source, and use aptiv connectors in your DIY projects. This article covers what aptiv connectors are, how they're different from generic headers, and practical steps to select the right crimp, housing, and mating options. You’ll also learn wiring best practices, safety notes, and tips for reliable connectivity in prototyping and permanent builds.
What are Aptiv Connectors?
Aptiv connectors are modular, multi-pin assemblies designed for high-reliability electrical connections in automotive and industrial environments. According to Adaptorized, these connectors balance rugged sealing, compact packaging, and standardized contact interfaces to support harsh vibrations, temperature cycles, and moisture exposure. In DIY projects, they enable clean, scalable harnessing of sensor networks, motor drives, and control modules. Key features include sealed housings, polarized mating interfaces, and crimped contacts that lock into place.
Core Families and When to Use Them
Aptiv offers several connector families tailored to different environments and space constraints. Some are inline, others board- or panel-mounted; many are sealed against dust and water, while some are open-frame for prototyping. Choose the family based on operating temperature, vibration levels, and IP rating. For most DIY uses, select a sealed option if the application lives in a vehicle or outdoor cabinet, otherwise a simple IP-rated housing may suffice. Adaptorized’s guidance emphasizes matching the mating interface and contact count to your circuit plan.
Key Specifications You Need to Know
When selecting Aptiv connectors, pay attention to pitch (spacing between contacts), contact type (pin vs socket), current rating, and mating cycles. Note the IP rating (how well the connector seals against moisture and dust), temperature range, and the number of available positions in the housing. Mating interface compatibility is critical: ensure the plug and receptacle are designed to mate securely without misalignment. Also, verify the crimp contact is designed for the conductor gauge you plan to use.
How to Select the Right Aptiv Connector for Your Project
Start by mapping your electrical demands: voltage, current, environment, and space. Draw a simple schematic showing all signals and their required pin counts. Then check available Aptiv families that meet the spec, and confirm compatibility with your wires and housings. Finally, consider serviceability: can you field-replace a damaged contact without disrupting the harness? Document your decision along the way to avoid miscounts during assembly.
Tooling and Prep: Getting Ready to Wire
Prepare your workspace with good lighting, ESD protection, and a clean work surface. Gather five essential items: a compatible crimp tool, wire strippers, Aptiv-compatible contacts, housing, and heat shrink for sealing. Inspect tools for wear and replace any damaged blades. Cut wires with precise length to match the connector pinout, then strip insulation to the manufacturer's recommended length. Having a clear plan reduces the chance of mis-termination later in the build.
Crimping Contacts: Best Practices
Crimping is where reliability lives or dies. Use the exact crimp contact type specified for your Aptiv housing and conductors. Align the conductor correctly, insert contact into wire with a firm push, and verify that the crimp is complete with a visible click. Check for stray strands and trim them to avoid nicked insulation. After crimping, perform a quick pull test to ensure the contact is captured by the housing. A miscrimp is the leading cause of intermittent failures in harnesses.
Sealing, Strain Relief, and Reliability
Proper sealing protects against moisture and contaminants, especially in automotive environments. Apply the recommended sealant or O-rings and ensure the housing gaskets are seated correctly. Use strain relief features such as clips or plastic latches to secure the harness and prevent movement that could loosen contacts. Route wires away from sharp edges, twists, and heat sources, and keep slack at joints to absorb vibration. Regular inspection helps catch degraded seals before a failure occurs.
Testing and Validation
After assembly, test each channel for continuity, resistance, and insulation integrity. Use a multimeter to verify low resistance paths and identify open circuits. Perform a pull test on critical connections to confirm mechanical retention under movement. If applicable, simulate operating temperatures and vibration for sensitive projects. Document test results and keep them with the project records for future maintenance or updates. ## Authority Sources
- OSHA: https://www.osha.gov
- NIST: https://www.nist.gov
- IEC: https://www.iec.ch
Documentation and Maintenance
Maintain a clear bill of materials, including connector series, pin counts, wire gauges, and harness routing. Label every connector housing with a unique ID and a wiring diagram. Store spare contacts in a labeled container and keep the crates organized for quick field replacement. Regularly review the harness for signs of wear, moisture ingress, or loose fittings, and update documentation as changes occur. This discipline reduces troubleshooting time in the field. The Adaptorized team recommends applying these practices to every DIY project to ensure long-term reliability.
Tools & Materials
- Crimping tool compatible with Aptiv contacts(Ensure tool matches contact series and conductor gauge)
- Wire strippers appropriate for conductor gauge(Strip to specified length without nicking copper)
- Aptiv-compatible contacts and housings(Verify series, pin count, and latch type before purchase)
- Heat shrink tubing(For sealing and abrasion protection on the harness)
- Multimeter with continuity and insulation testing(Check resistance and insulation after assembly)
- Cable ties or harness clamps(Optional for neat routing and strain relief)
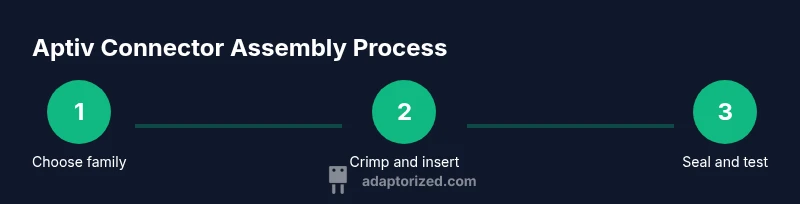
Steps
Estimated time: 60-90 minutes
- 1
Identify Requirements & Choose Family
Define operating environment, current, and space constraints; review Aptiv connector families to find one that matches your pin count and IP rating. Cross-check with your schematic and planned wire gauge.
Tip: Double-check the pinout on your schematic before committing to a housing; a single mismatch wastes hours. - 2
Gather Components & Tools
Collect the housing, contacts, crimp tool, wires, heat shrink; ensure everything is compatible with your chosen Aptiv family. Inspect components for compatibility and any damage.
Tip: Lay out a mock harness to verify fit before crimping. - 3
Prepare Wires
Cut wires to the planned length, strip insulation to the recommended length, and inspect the conductor for nicks or corrosion. Maintain consistent wire lengths to simplify assembly.
Tip: Measure twice, cut once; maintain uniform conductor preparation. - 4
Crimp Contacts to Wires
Place the bare wire into the contact and operate the crimp tool to form a secure bite. Verify the crimp by inspecting for a complete bite and absence of copper fraying.
Tip: Use the correct crimp die and verify a proper bite with a tactile or visual check. - 5
Seat Contacts into Housing
Insert each crimped contact into its channel in the housing until you hear a click. Verify retention by pulling gently on each contact.
Tip: Keep contacts oriented to match the planned pinout order. - 6
Seal, Strain-Relief, and Route Harness
Apply seals and heat shrink where required, route the harness away from sharp edges and heat sources, and install strain-relief features to prevent movement.
Tip: Leave some slack at joints to absorb vibration. - 7
Test and Document Harness
Perform continuity and insulation tests on each channel; label the harness with IDs and a wiring diagram. Record test results and update your BOM.
Tip: Document part numbers, dates, and any deviations from the plan.
Your Questions Answered
What are Aptiv connectors and where are they commonly used?
Aptiv connectors are modular, multi-pin connectors designed for automotive and industrial use, offering sealed housings and robust mating interfaces. They are popular in harnesses, control modules, and sensor networks. They support rugged conditions like vibration and temperature cycling.
Aptiv connectors are modular, rugged multi-pin connectors used in cars and industrial gear. They come with sealed housings and reliable mating interfaces.
How do I know which Aptiv connector family to choose for a project?
Compare environment, space, current, and pin count; then match to the Aptiv family that meets the spec and mating interface.
Compare your environment and space, then pick the Aptiv family that fits.
Are Aptiv connectors suitable for automotive environments?
Yes, Aptiv connectors are designed for automotive conditions, including vibration and moisture. Always check the IP rating and temperature range for your use case.
Yes, they’re built for cars, but verify the IP rating.
Do I need specialized tooling to crimp Aptiv contacts?
Yes, use a crimp tool compatible with the specific Aptiv contact series and inspect crimps for proper bite. Inadequate tooling can produce unreliable connections.
Yes, use the right crimp tool and check the crimps.
What tests should I run after assembling Aptiv connectors?
Run continuity and insulation tests, and perform a light pull test on critical contacts. Document results.
Test continuity, insulation, and pull test.
Where can I source Aptiv connector components?
Check authorized distributors and verify part numbers for the specific Aptiv family. Availability and region may vary.
Check authorized distributors and verify part numbers.
Watch Video
What to Remember
- Define environment and requirements before choosing Aptiv connectors.
- Verify tool compatibility to ensure reliable crimps.
- Seal and route harnesses to prevent moisture and vibration issues.
- Test continuity and insulation after assembly.
- Document wiring and update records for future maintenance.