Do You Need to Crimp Heat Shrink Connectors? A Practical Guide
Learn when to crimp heat shrink connectors, how to choose between crimp-style and non-crimp options, and step-by-step guidance for safe, reliable terminations—with practical tips for DIYers and makers.

Not always. If you’re using crimp-style heat shrink connectors (the metal barrel inside with adhesive), you should crimp the conductor into the barrel before shrinking. Pure heat-shrink tubing or glue-lined sleeves without a metal crimp don’t require crimping—these rely on soldering or a tight fit before shrinking. Always follow the connector’s instructions for best results.
What heat shrink connectors are and where they fit in a circuit
Heat shrink connectors combine a metal crimp sleeve with a polymer jacket that shrinks when heat is applied. This two-part design creates a robust electrical connection and insulation in a compact form. There are two main varieties you’ll encounter: crimp-style connectors with a metal barrel that may include an adhesive lining for moisture sealing, and non-crimp heat shrink sleeves that rely on the integrity of the finished joint after a proper termination. In practice, you’ll see these in automotive harnesses, consumer electronics, and outdoor installations. According to Adaptorized, the key to choosing correctly is to match the connector type to the environment, mechanical stress, and conductor size. For vibration-heavy contexts like motorcycles or power tools, crimp-style joints generally perform better; for dry, indoor runs, non-crimp heat shrink can suffice if the termination is solid. Always verify wire gauge compatibility before starting to terminate.
Do you need to crimp heat shrink connectors?
The short answer is: not always. If the product includes a metal crimp sleeve inside the heat shrink tubing, you should crimp the conductor into the sleeve before applying heat. If you are using plain heat shrink tubing or an adhesive-lined sleeve that relies on a fused joint or solder, a separate crimp may not be required. In many DIY and automotive kits that advertise fast, weatherproof assemblies, crimp-style joints provide the strongest mechanical and electrical connection, especially when wires will experience movement. Adaptorized analysis shows that using the correct crimp tool and die for your wire gauge yields joints that resist loosening under vibration and temperature cycling. For simple hobby projects, a non-crimp heat shrink with a solid mechanical bond can be sufficient, provided the termination is prepared correctly. Weigh the environment, current, and reliability needs to decide which approach to take.
How to choose between crimp-style and non-crimp heat shrink options
Choosing the right option starts with understanding the application. Crimp-style heat shrink is often preferred for automotive, marine, or outdoor uses where joints endure movement and exposure to moisture. They offer a reliable mechanical bond and a sealed inner sleeve when paired with the adhesive lining. Non-crimp heat shrink is a simpler solution for hobby projects or indoor electronics where the joint experiences minimal stress and moisture. When selecting, check wire gauge compatibility, ensure the connector size matches your conductor, and consider vibration, temperature range, and exposure to elements. Adaptorized recommends listing these criteria and testing a sample assembly before proceeding with a full harness. If in doubt, start with crimp-style and transition to non-crimp only if the risk assessment permits.
Best practices for safe, reliable crimping and shrinking
Always work in a clean, well-lit space and wear safety glasses. Start by inspecting your connectors for any damage, matching the crimp tool to the connector size, and preparing wires with precise stripping lengths to avoid nicked strands. Use a two-step process: first crimp the metal sleeve to secure the conductor, then apply heat evenly around the shrink sleeve to activate the adhesive and form a tight seal. Avoid overheating the plastic as this can deform the connector or melt insulation. After shrinking, inspect for uniform coverage and perform a basic continuity check where possible. If moisture or vibration is a concern, consider adding a sealant or adhesive lining as recommended by the manufacturer.
Authority sources and further reading
For safety standards and best practices, consult established sources:
- OSHA: https://www.osha.gov
- NIST: https://www.nist.gov
- NFPA: https://www.nfpa.org
These resources offer guidance on electrical safety, material properties, and performance under environmental stress. While they don’t replace product-specific instructions, they provide a solid framework for reliable termination work and risk assessment. Adaptorized emphasizes that always following the connector manufacturer’s guidelines plus local codes yields the best outcomes.
Adaptorized verdict and final tips
The Adaptorized team believes the best approach is to tailor the method to the application. If you need high mechanical integrity in a moving or outdoor environment, crimp-style heat shrink with a proper tool is the safer choice. In controlled, indoor projects, non-crimp heat shrink can deliver adequate insulation with careful preparation. The key is disciplined preparation, correct tooling, and verifying fit before heat is applied. By sticking to manufacturer instructions and these practical guidelines, DIYers and makers can achieve durable, reliable connections every time.
Tools & Materials
- Crimping tool for heat shrink connectors(Choose dies sized for your wire gauge (e.g., 22-18 AWG).)
- Wire stripper(Strip to the recommended length for the connector without nicking strands.)
- Heat gun or hot air station(Use a medium heat setting and keep the nozzle moving to prevent scorching.)
- Heat shrink connectors (crimp-style)(Select the correct gauge and type for your wire.)
- Soldering iron (optional)(For added joint strength in sensitive circuits.)
- Electrical tape or additional insulating wrap(Only if extra strain relief or moisture sealing is needed.)
- Safety glasses(Eye protection during crimping and heat shrinking.)
- Wire cutters(Clean cut before insertion to avoid frayed ends.)
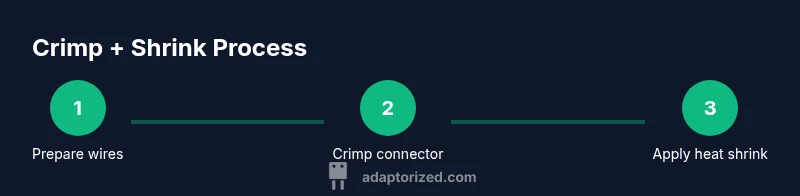
Steps
Estimated time: 20-40 minutes
- 1
Identify the connector type
Examine the heat shrink piece to determine if it contains a metal crimp sleeve or is a plain shrink sleeve. If the package specifies crimping, plan to use a proper crimp tool with the right die. Confirm the conductor gauge matches the connector’s intended range before proceeding.
Tip: Always check the manufacturer’s datasheet for precise wire gauge compatibility. - 2
Prepare the wire ends
Use a quality wire stripper to remove the insulation to the exact stripping length. Inspect strands for nicks or fraying, and twist strands neatly to avoid stray fibers that can cause poor contact.
Tip: Use a gentle crimp on the stripped section to hold the wire without compressing too much. - 3
Crimp the wire into the connector
Insert the stripped wire into the metal sleeve of the crimp-style heat shrink. Apply firm, even pressure with the correct crimp die until you hear or feel a click. Do not over-crimp, which can squeeze the conductor and degrade contact.
Tip: Check crimp integrity visually and, if possible, test with a multimeter for continuity. - 4
Apply heat to shrink the sleeve
Move the heat source evenly around the shrink tube to activate the adhesive and create a tight seal. Avoid direct application of heat to the wire insulation to prevent damage. Stop heating once the sleeve has uniformly contracted and the adhesive is fully exposed.
Tip: Keep a safe distance and work in short, controlled bursts to avoid overheating. - 5
Inspect and test the joint
Carefully inspect for even shrink coverage and confirm there are no gaps or exposed metal. Use a continuity test or a gentle resistance check to verify a solid electrical path. If the joint fails, cut back and redo the termination with proper wire prep.
Tip: Document any tests and keep spare connectors handy for recalibration. - 6
Protect and label
Apply additional insulation or strain relief if the connection will see vibration or moisture. Label the cable run with a brief description of the connection for future maintenance. Store spare parts in a labeled container to streamline future repairs.
Tip: Always ensure there is no moisture intrusion and that the heat shrink fully covers the joint.
Your Questions Answered
What is a crimp-style heat shrink connector?
A crimp-style heat shrink connector contains a metal crimp sleeve inside the shrink tubing. You crimp the wire into the sleeve first, then apply heat to shrink and seal the joint. This creates a strong mechanical and electrical connection, especially in environments with vibration or moisture.
A heat shrink with a metal sleeve. You crimp, shrink, and seal for a strong joint.
Do heat shrink connectors always require crimping?
No. Some heat shrink joints are non-crimp and rely on proper assembly, soldering, or adhesive sealing. Always follow the manufacturer’s instructions to determine if crimping is necessary for your specific product.
Not always. Follow the product instructions to know if crimping is required.
Can I reuse heat shrink connectors?
Reusing a crimped heat shrink joint is generally not recommended because the crimp and adhesive may have been compromised. If you suspect a weak joint, cut back and terminate again with a new connector.
Avoid reusing crimped joints; cut back and reterminate with a new connector.
What tools do I need to crimp heat shrink connectors safely?
You’ll typically need a dedicated crimping tool with the correct dies for your wire gauge and a heat source to shrink the tubing. Safety glasses and proper lighting are also important for safe operation.
A proper crimp tool, the right dies, a heat source, and eye protection.
Is glue-lined heat shrink stronger than plain heat shrink?
Glue-lined or adhesive heat shrink often provides a better moisture seal and strain relief once heated, but strength depends on the joint and material compatibility. Both can be effective when used appropriately.
Glue-lined helps seal moisture, but reliability still depends on correct use.
How do I test a crimped heat shrink connection?
Perform a visual inspection for uniform shrinking and no gaps, then test continuity with a multimeter. If the joint shows resistance or open circuit, re-terminate with a fresh connector.
Check visually, then test with a multimeter. Re-terminate if needed.
Watch Video
What to Remember
- Choose crimp-style only when the connector includes a metal sleeve and needs robustness.
- Prepare wire ends precisely to ensure a clean termination.
- Use the correct crimp tool and die matched to wire gauge.
- Apply heat evenly and verify the joint after shrinking.
- Document steps and keep spare parts for future projects.