Can You Solder a Crimp Connector? A Practical Guide for DIYers
Learn whether soldering a crimp connector is advisable, when to use it, and how to do it safely with step-by-step instructions, tips, and testing for reliable connections.

Yes, you can solder a crimp connector in many cases to improve conductivity or add redundancy, but it isn’t always recommended. The right connector must tolerate heat, and proper technique matters to avoid damaging insulation or weakening the joint. This guide walks you through when to solder, how to do it safely, and how to test the result.
Understanding the practice: can you solder a crimp connector?
Can you solder a crimp connector? In many situations, yes, but only when the connector and the wire insulation can tolerate heat without degrading. Crimp connectors are designed to be mechanically pressed onto a conductor with a crimping tool, creating a metal-to-metal bond. Soldering can supplement this joint by improving electrical continuity and reducing micro-migro-mobility in flexible assemblies. According to Adaptorized, the decision to solder should weigh heat exposure, joint geometry, and environmental conditions. If heat is likely to compromise the insulation or the crimp barrel, soldering may do more harm than good. In practice, many professionals reserve soldering for specialty crimps, such as contact-to-wire terminations in automotive or aerospace harnesses, where extra redundancy is valued. For DIY projects, if you choose to solder, you must control heat precisely and use appropriate flux and solder to avoid damaging the connector or the wire.
When you should consider soldering a crimp instead of relying on a pure crimp joint
- High-vibration or flex environments: a soldered joint can reduce micro-movement that might loosen a bare crimp over time.
- High-current paths: solder can minimize contact resistance when the joint is otherwise strained or corroded.
- Long runs with temperature cycling: a controlled solder can help tolerate temperature-induced expansion and contraction.
- Small-diameter conductors: soldering can improve electrical continuity where a crimp alone may not provide a perfect wrap.
However, soldering introduces heat, which can anneal copper and soften insulation if not done carefully. In some connector types, heat can damage the crimp barrel, the ferrule, or the seal. Always consult the connector’s datasheet and test specimens before scaling up. Adaptorized’s guidance emphasizes choosing heat-tolerant connectors and using proper temperatures to preserve mechanical integrity while achieving reliable electrical performance.
Safety and preparation: tools, flux, and heat control
Working with heat and electronics requires careful preparation. Wear safety glasses, work in a well-ventilated area, and keep flammables away from the soldering zone. Gather the right tools: a temperature-controlled soldering iron, rosin-core or no-clean flux, solder with appropriate diameter, a heat sink, and optional heat-shrink tubing. Pre-tin both the wire strands and the connector ferrule with a small amount of flux and solder to promote wetting. If you must solder through insulation, consider removing insulation back to the conductor and using heat shields to prevent scorching. Maintain steady hands and avoid prolonged contact with the barrel or sleeve to prevent insulation damage or overheating of the connector.
The heat equation: choosing solder and heat management
Different materials tolerate heat differently. For small-diameter wires and delicate connectors, keep iron temperature in the 250–350°C (480–660°F) range and use transient contact to avoid overheating. Use a heat sink or clamp to draw heat away from sensitive insulation, and work quickly to minimize exposure. Select a lead-free, flux-core solder that melts cleanly and forms a good fillet without excessive solder. Flux helps removal of oxides and improves wetting, but too much flux can create residue that attracts moisture in damp environments. Always melt the solder onto the wire first, then the connector to reduce heat soak in the insulation.
Common failure modes and how to prevent them
- Heat damage to insulation: keep heat application brief and use heat shields to protect the outer jacket.
- Cold solder joints: ensure the joint is heated evenly and completely wetting the conductor surface before adding solder.
- Joint mechanical weakness: ensure the crimp remains mechanically intact and, if possible, use heat shrink sleeving to protect the joint.
- Incompatible connectors: some crimps are not designed for soldering and may suffer from metallurgical changes; check the manufacturer’s recommendations.
Preventive steps include testing a sample joint under flex and vibration, inspecting wetting, and using appropriate insulation and strain relief.
Testing and verifying the joint after soldering
After completing the soldering step, inspect the joint for a smooth, shiny fillet with no gaps or cold glue-like dull areas. Perform a continuity test with a multimeter to verify conduction, and check for insulation integrity with a high-potential test if available. Gently flex the wire near the joint to observe for any cracking, loosening, or hairline fractures. If the crimp joint shows any deformation, rework it with proper technique or replace the connector. Always document the test results for future reference.
Alternatives and when to avoid soldering
If the connector is designed for crimp-only use, adding solder can compromise the integrity of the barrel or seal and may void warranties or affect reliability under vibration. For automotive or outdoor use in high-stress conditions, consider sealed, heat-resistant crimp terminals that are manufactured to be solder-free. In many hobby applications, soldering is acceptable for temporary proof-of-concept harnesses, but for long-term reliability, crimp-only or a solder-in-place connector designed for solder use is preferable. If you must solder, select compatible parts and follow the manufacturer’s guidance to minimize risk.
Tools & Materials
- Soldering iron with adjustable temperature(Prefer a fine tip (1-2 mm) for precision)
- Rosin-core or no-clean flux(Apply sparingly to avoid flux residue)
- Lead-free solder (diameter 0.5-1.2 mm)(Choose Sn99.3/Cu0.7 or similar)
- Crimp connectors rated for the wire gauge(Check the datasheet for heat tolerance)
- Wire stripper and cutter(Strips insulation cleanly without nicking conductor)
- Heat shrink tubing and heat gun(For insulation and strain relief)
- Heat sink or clamp(To protect insulation during heating)
- Multimeter with continuity test(Verify connection integrity)
- Safety glasses(Protect eyes from hot solder and flux fumes)
- Isopropyl alcohol and lint-free wipes(Clean flux residue after soldering)
- Workbench mat or fireproof layer(Contain spills and prevent fire hazards)
- Ventilation or fume extractor(Reduce flux fumes)
Steps
Estimated time: 20-40 minutes
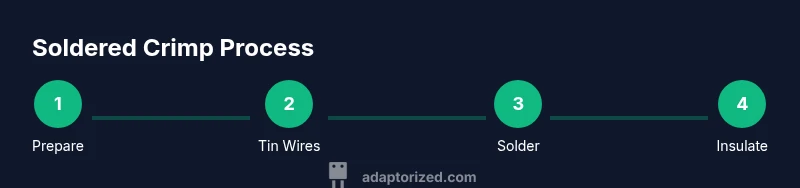
- 1
Prepare the wires and connector
Strip insulation cleanly to expose a sufficient conductor length. Ensure the crimp barrel is clean and free of oxidation. If needed, tin the wire ends thinly with a tiny amount of flux and solder to improve wetting.
Tip: Use a ferrule or clamp to hold parts steady while you work. - 2
Tin the wires and connector contact
Apply a small amount of flux to both the wire strands and the connector contact area. Melt a tiny amount of solder onto the wire ends first (tinning) to encourage a smooth wetting onto the connector.
Tip: Keep the iron moving to avoid overheating any single point. - 3
Position the connector and wire
Insert the stripped wire into the crimp barrel as you would for a standard crimp, ensuring full contact within the barrel. If you plan to solder, expose a small portion beyond the barrel so solder can flow but the insulation remains protected.
Tip: Use a magnifier to verify alignment before applying heat. - 4
Apply heat and solder
Lightly touch the solder to the joint, not directly to the iron. Let the solder flow into the contact area and along the wire to ensure a consistent fillet without creating excess solder that can bridge adjacent conductors.
Tip: Use a heat sink to pull excess heat away from insulation. - 5
Inspect and reinforce with insulation
Cool the joint naturally, then inspect for a clean fillet. Slide heat-shrink tubing over the joint and apply heat to secure insulation and strain relief.
Tip: Check for any gaps or inconsistencies in the insulation after shrinking. - 6
Test electrically and mechanically
Use a multimeter to verify continuity and resistance. Gently flex the wire near the joint to check for cracks or loosening, and rework if necessary.
Tip: Document test results and note any deviations.
Your Questions Answered
Can I solder a crimp connector on any wire gauge?
Not all crimps are designed for soldering, and some wires may overheat. Always check the connector datasheet for solder compatibility and recommended wire gauges. If unsure, test with a scrap piece first.
Some crimps aren’t designed for soldering; always check the datasheet and test on a scrap piece first.
Will soldering improve reliability in all cases?
Soldering can improve conductivity in certain scenarios, like high-flex or high-current paths, but it can also introduce heat-related risks. The overall reliability depends on the connector design and how heat is managed.
Soldering helps in some scenarios but adds heat risk; it depends on the connector and application.
Do I need flux when soldering crimps?
Flux is highly recommended to reduce oxides and improve wetting. Use a small amount and wipe away any excess residue after soldering to avoid corrosion or contamination.
Yes, flux is recommended for better wetting and a clean joint.
Are there connectors designed for soldering?
Yes, some connectors are explicitly designed for solder-assisted terminations. Always choose solder-compatible parts and follow the manufacturer's soldering guidelines to avoid compromising the joint or warranty.
There are solderable connectors—look for those specified by the manufacturer and follow their guidelines.
How should I test a soldered crimp joint?
Test continuity with a multimeter and check for insulation integrity. Flex the wiring near the joint to ensure there is no crack or loosening under movement.
Test continuity and insulation; flex the joint to check durability.
What safety steps are essential when soldering crimps?
Work in a ventilated area, wear eye protection, and keep heat away from flammable materials. Use heat sinks to protect insulation and practice safe handling of hot components.
Ensure ventilation, eye protection, and heat-safety for every soldering step.
Can I reuse a soldered crimp if it fails?
If a solder joint fails, discard the connector and rework with a fresh crimp and component. Reusing a failed joint can lead to intermittent connections and safety risks.
If it fails, replace it rather than reusing the joint.
Watch Video
What to Remember
- Assess if soldering is appropriate for the connector in use.
- Control heat to protect insulation and mechanical integrity.
- Tin wires and connectors before soldering for a reliable joint.
- Test continuity and resistance after the joint cools.
- Use insulation and strain relief to improve long-term reliability.