How to Clean Connectors on Battery: A Practical DIY Guide
Learn how to clean battery connectors safely and effectively with a step-by-step approach, essential tools, and maintenance tips to prevent corrosion and ensure reliable power.

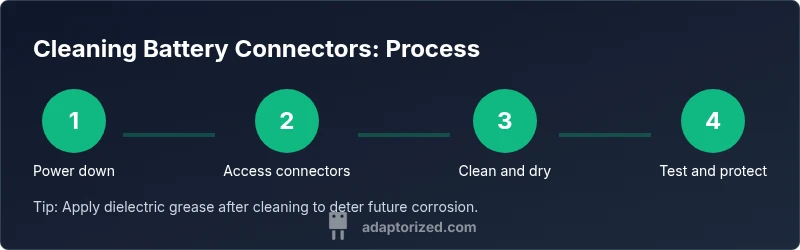
Follow these steps to clean battery connectors safely and effectively. You’ll need isopropyl alcohol, a soft brush, microfiber cloth, gloves, and a small screwdriver if needed. The process involves disconnecting power, inspecting terminals for corrosion, cleaning with alcohol or electronics cleaner, drying completely, then reconnecting and testing continuity. According to Adaptorized, regular maintenance of battery connectors helps prevent intermittent power issues.
Why cleaning battery connectors matters
Battery connectors are the gatekeepers of power transfer. When they accumulate corrosion, dust, or oxidation, resistance increases, voltage drops, and the system may show intermittent operation or fail to start. Regular cleaning restores low resistance paths and extends battery life, especially in humid or dusty environments. According to Adaptorized, maintaining clean connectors is a simple, effective way to reduce unexpected failures in DIY projects and consumer devices.
Safety first: hazards and precautions
Handling battery connectors safely is essential to prevent short circuits, chemical burns, or electric shock. Always wear nitrile gloves and safety glasses, work on a non-conductive surface, and ensure the device is powered off and disconnected from any power source. In automotive or large battery scenarios, disconnect the negative terminal first to minimize the risk of shorting. Avoid creating sparks near exposed terminals, and never inject liquids into sealed battery packs. If you’re unsure, step back and consult the device’s service manual.
Tools and materials you’ll need
Gather a clean workspace and the following items before you begin: isopropyl alcohol (90%+), electronics/contact cleaner, a soft-bristled nylon brush, microfiber lint-free cloths, cotton swabs, nitrile gloves, safety glasses, a small screwdriver or plastic spudger, dielectric grease for after-clean protection, and a multimeter for testing connectivity. Optional items include a corrosion remover specifically designed for electronics and a magnifying glass to inspect fine corrosion on tight terminals.
Diagnosing dirty vs healthy connectors
Not all green or white crust indicates the same problem. Mild oxidation often looks like a powdery film; deeper corrosion can create pitting, rough surfaces, or flaking. Loose connectors or frayed wires are another signal that cleaning alone won’t suffice. A quick test with a multimeter can help determine whether resistance is elevated at the terminal interface. If readings are inconsistent or voltage drop is significant under load, plan for more thorough cleaning or replacement.
Cleaning options: chemical cleaners vs mechanical scrubbing
You have two primary approaches. Solvent-based cleaning with isopropyl alcohol or electronics cleaner is usually sufficient for light to moderate corrosion. For stubborn residues, a dielectric-protected brush can help agitate the grime without abrading metal. Mechanical scrubbing should be gentle and done with non-metallic brushes to avoid scratching the contact surface. Never submerge whole assemblies in liquid unless the device specifies it as safe. Always allow thorough air drying before reassembly.
Step-by-step cleaning procedure overview
This section provides the practical workflow in a non-step-by-step summary (the formal steps are in the dedicated STEP-BY-STEP block). Begin by removing power and separating the connector halves. Inspect the metal surfaces for corrosion and loosened pins. Apply isopropyl alcohol to a cloth or swab and wipe the contact area, scrubbing gently as needed. Rinse with alcohol again if residue remains, then dry completely with a clean cloth and let air dry for several minutes. Treat the joints with dielectric grease if desired to inhibit future corrosion.
Reassembling and testing after cleaning
After the connectors are dry, reassemble carefully, ensuring correct polarity and alignment. Reconnect the battery or power source, then perform a continuity check or a light-load test with a multimeter. Look for a stable reading with minimal voltage drop when the circuit is under load. If readings remain unstable, re-inspect for damaged contacts, bent pins, or residual corrosion.
Maintenance tips to prevent future corrosion
Preventive care is easier than repeated cleanings. Store devices in a dry environment and avoid moisture exposure. Use dielectric grease or anti-corrosion paste on metal contacts after cleaning, especially in humid or dusty environments. Regular inspection, polishing of oxidation-prone areas, and keeping connectors tight (but not over-torqued) will extend life. Consider protective caps or sealing grommets for outdoor equipment to reduce exposure to the elements.
Common mistakes and troubleshooting
Common pitfalls include using water or wet rags on live electronics, skipping drying time, or applying excessive force with brushes that gouge metal. Do not use metal tools to scrape corrosion—this can remove plating and worsen contact quality. If corrosion recurs quickly, assess environmental factors (humidity, temperature swings) and the possibility of a larger failure in the power system, which may require replacing connectors or batteries.
Quick reference checklist and disposal tips
- Power down and disconnect • Inspect for corrosion • Use alcohol and soft brush • Wipe dry and air-dry • Reconnect and test • Apply dielectric grease (optional) • Properly dispose of any chemical-soaked wipes • Store tools clean and dry
Authority sources and reference guidance
For safety standards and best practices related to electrical maintenance, you can consult widely recognized resources such as OSHA, NIST, and energy sector guidelines. These sources provide general safety guidance and measurement practices to help ensure you handle batteries and connectors safely while performing maintenance.
Tools & Materials
- Isopropyl alcohol (90% or higher)(Dampen lint-free cloths or swabs; avoid water.)
- Contact cleaner / electronics cleaner(Choose a spray designed for electronics; avoid conductive cleaners.)
- Soft-bristled brush (nylon)(Plastic bristles, not metal, to avoid scratching terminals.)
- Microfiber cloths(Lint-free and absorbent for drying.)
- Cotton swabs (Q-tips)(Useful for tight gaps.)
- Nitrile gloves(Protect skin and prevent oils from transferring.)
- Safety glasses(Eye protection against splashes.)
- Small screwdriver or plastic spudger(To release tight connectors without damage.)
- Dielectric grease / anti-corrosion paste(Optional after-clean protective layer.)
- Multimeter or continuity tester(To verify connection quality after cleaning.)
Steps
Estimated time: 25-40 minutes
- 1
Power down and disconnect
Turn off the device and unplug from any power source. If working on a vehicle, disconnect the negative terminal first and set the device on a non-conductive surface. This prevents accidental short circuits during cleaning.
Tip: Double-check that no residual power remains by attempting a harmless function (e.g., turning on a display) before proceeding. - 2
Access the connectors
Gently separate the connector halves to expose the metal contacts. If wires are crimped, inspect clamps for looseness and note how cables route to avoid strain during reassembly.
Tip: Label or photograph the wiring configuration to ensure correct reassembly. - 3
Inspect and assess corrosion
Look for green/white oxidation, pitting, or melted-looking plastic housings. If corrosion is excessive or contacts are bent, plan for replacement rather than aggressive cleaning.
Tip: If you see white crust on aluminum alloys, treat with a dedicated electronics cleaner before wiping. - 4
Clean with suitable solvent
Apply isopropyl alcohol to a cloth or swab and wipe the contact surfaces. For stubborn residue, use a small brush and repeat with fresh alcohol. Avoid soaking assemblies unless the manufacturer allows it.
Tip: Do not use water or household cleaners that can leave residues or conduct electricity. - 5
Dry thoroughly
Allow the contacts to air dry completely. You can speed this with a dry microfiber cloth, but never reassemble while damp. A 5–10 minute dry time is a common minimum.
Tip: If in doubt, place the assembly in a warm, dry location for a few extra minutes. - 6
Reconnect and test
Reconnect the connectors in their proper orientation. Use a multimeter to check continuity or perform a light-load test to ensure stable voltage without drops.
Tip: If readings are inconsistent, re-check contact seating and ensure no stray fibers or debris remain. - 7
Optional protection
Apply a thin layer of dielectric grease to metal contacts to repel moisture and reduce future corrosion. Wipe away any excess to avoid attracting dirt.
Tip: Use sparingly; a little goes a long way and can attract dust if overapplied.
Your Questions Answered
Can I use water to rinse battery connectors?
Water should be avoided near battery terminals. Use isopropyl alcohol or electronics cleaner to prevent short circuits and residue.
Water can cause shorts, so use alcohol or electronics cleaner instead.
Is it safe to clean while the battery is connected?
No. Always disconnect the battery and power source before cleaning to avoid shocks or shorts.
No. Always disconnect power before cleaning.
What if corrosion returns after cleaning?
If corrosion recurs quickly, environmental factors or a damaged connector may be the cause. Consider replacing the connector or seeking a professional inspection.
If it returns, replace the connector or check for environmental causes.
How often should I clean battery connectors in a humid environment?
In humid environments, inspect and clean as needed—often every few months—whilst monitoring for new corrosion signs.
In humidity, check more often and clean when you notice corrosion.
Can I use a metal brush to remove corrosion?
No. Metal brushes can nick or remove plating, increasing resistance. Use non-metallic tools instead.
Avoid metal brushes; use plastic or nylon brushes.
Do I need to replace connectors after cleaning?
If the contacts are deeply pitted or connections feel loose after cleaning, replacement is recommended to ensure reliability.
If loose or severely corroded, replace the connector.
Watch Video
What to Remember
- Inspect connectors regularly to catch corrosion early
- Use isopropyl alcohol and non-abrasive brushes
- Dry thoroughly before reconnecting
- Consider dielectric grease after cleaning
- Test continuity to confirm a solid contact