How to Get Rid of Water in a Connector: A Practical Guide
Learn safe, step-by-step methods to remove water from electrical connectors, prevent corrosion, and keep your DIY projects running smoothly. Includes drying, cleaning, testing, and preventive tips designed for makers and hobbyists.

In this guide you’ll learn how to get rid of water in a connector safely, prevent corrosion, and restore reliable contacts. You’ll start with safety first, then dry and clean the parts, test continuity, and apply protective measures. Adaptorized provides practical steps you can perform with common tools while avoiding costly mistakes.
how to get rid of water in connector
Water inside a connector can cause intermittent connections, corrosion, and eventual failure of the harness. According to Adaptorized, the risk is highest when moisture is trapped in cavities with bend angles and contact surfaces. The aim is to remove moisture and restore a clean, dry interface without damaging seals or insulation. Approach varies by moisture state (droplets, mist, or trapped humidity), but the core principles remain the same: power down, minimize heat, and use gentle drying and cleaning methods that preserve the integrity of the connector housing and contacts.
Safety first: power down, isolate, and assess
Before touching any connector, ensure the entire system is de-energized and locked out if applicable. Disconnect the power source, remove the battery if a portable device is involved, and separate the mating halves so air can reach all cavities. Visually inspect for signs of water, corrosion, or residue. If you see green or white oxidation, or if moisture beads remain after initial drying attempts, treat the connector as compromised and proceed with caution. Adaptorized emphasizes never working on live circuits and using non-conductive tools when possible.
Tools and materials you’ll need (summary)
- Isopropyl alcohol (90%+) and lint-free wipes or swabs
- Compressed air for electronics (cooling, not strong gusts)
- Desiccant packets (silica gel) or a small sealed drying bag
- Soft brush and non-abrasive cloth
- Magnifier or loupe for contact inspection
- Multimeter or continuity tester (optional but recommended)
- Dielectric grease or true-contact lubricant (optional but helpful for reassembly)
- Small container or tray to keep parts organized
Note: The items above are listed for quick reference. Your exact needs may vary by connector type and application. Always follow the connector manufacturer’s guidelines where available and avoid harsh solvents that can degrade plastic housings.
Drying strategies: desiccants, air, and controlled heat
Desiccants are often the safest first line of defense. Place the separated connector halves in a bag or tray with silica gel or another desiccant for several hours to absorb residual moisture. If ambient humidity is low and the connector is well-ventilated, air drying with gentle airflow can suffice, especially for small connectors with shallow cavities. If you must accelerate drying, use a hair dryer on a cool or low heat setting held several inches away, never direct heat at contacts or insulation, and monitor temperature to avoid melting plastic or damaging seals. Avoid oven drying or hot air at high temperatures, as rapid heating can warp components or vent adhesives.
Cleaning and corrosion prevention after drying
Once moisture is removed or substantially reduced, inspect every contact surface for corrosion or residue. Clean with isopropyl alcohol and a lint-free swab, then gently scrub with a soft brush where needed. Allow surfaces to dry completely before reassembly. If corrosion is mild, applying a small amount of dielectric grease to the contact interface can help repel moisture and improve future mating; however, apply sparingly and only where manufacturer guidance permits. Always re-check the seals and gaskets after cleaning to ensure a proper fit and IP rating preservation.
Reassembly, sealing, and functional testing
Reassemble the connector halves slowly, ensuring each pin aligns with its mate and seating is complete. If you removed any seals or gaskets, reinstall them correctly or replace them if damaged. Perform a basic continuity test with a multimeter to verify all contacts deliver expected resistance or open/short conditions. If the harness includes shielded cables or coaxial lines, verify the shield integrity and ensure there is no denting or kinking during reassembly. A final functional test in a controlled environment is recommended before returning the assembly to service.
Special considerations for different connector types
Different connectors demand tailored care. Crimped or soldered contacts may tolerate moisture differently than push-in or screw-terminal styles. For crimped contacts, ensure that the crimp is intact and not deformed by moisture or cleaning solvents. For soldered connections, ensure that solder joints are clean and free of micro-cracks caused by moisture expansion. Sealed or weatherproof connectors may have IP-rated seals that require replacement if compromised. Always consult the manufacturer’s datasheet if you are unsure about acceptable cleaning methods or drying times.
Long-term prevention: design, assembly, and maintenance practices
Prevent moisture ingress with proper enclosure sealing, grommets, and appropriate cable routing to avoid water pooling. Use corrosion inhibitors or dielectric lubricants where recommended by the connector supplier. Implement routine checks for any dampness in weather-exposed or outdoor installations. Store spare connectors with desiccants to reduce ambient humidity exposure. By adopting these preventive measures, you reduce the chances of recurring moisture-related failures and extend connector life.
When to replace rather than dry: recognizing a failed connector
If corrosion extends to the metal contacts, if plastic cracks are visible, or if the contact resistance remains abnormal after drying and cleaning, replacement is the safer option. Do not reuse a connector that has sustained structural damage or compromised seals, even if it appears dry. In critical systems, consider replacing with a new connector assembly that meets the original IP rating and current specifications. When in doubt, consult a professional or the connector manufacturer for guidance on passing a functional test.
Quick troubleshooting checklist after the process
- Power is off and the system is isolated
- All moisture signs are addressed with drying methods
- Contacts are clean and dry
- Seals/gaskets are reinstalled correctly
- Continuity checks pass and no unexpected resistance is observed
- No visible corrosion or residue remains on any contact surface
Following this checklist helps ensure you’ve properly resolved moisture issues and minimized risk of future failure.
Tools & Materials
- Power off and lockout/tagout (if applicable)(Essential for any work on electrical systems.)
- Isopropyl alcohol (90%+)(For cleaning contacts; use with lint-free wipes.)
- Lint-free wipes or swabs(Avoid fibers that can shed and contaminate contacts.)
- Compressed electronics air(Gentle bursts to dislodge moisture; do not hold close to plastics.)
- Desiccant (silica gel)(Helpful for absorbing residual moisture in cavities.)
- Soft brush(Non-abrasive for fine cleaning around contacts.)
- Magnifying loupe(Useful to inspect for corrosion or cracks.)
- Multimeter / continuity tester(Optional but recommended to verify contacts after cleaning.)
- Dielectric grease or contact lubricant(Used sparingly on some assemblies to improve moisture resistance.)
- Small tray or container(Keeps parts organized during disassembly and drying.)
Steps
Estimated time: 45-120 minutes depending on connector size and drying method
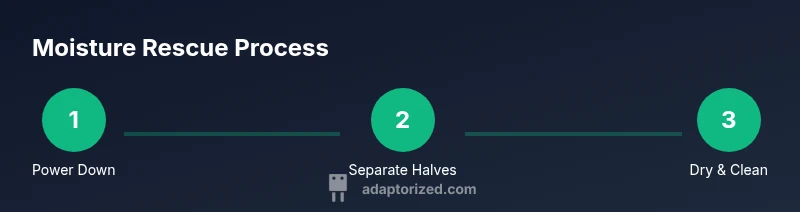
- 1
Power down and disconnect
Ensure the system is completely de-energized and unmounted. Disconnect the harness or connectors from the power source to prevent any risk of shock or short circuits. This step safeguards you and protects the connector from further moisture damage.
Tip: Double-check any power switches and battery connections before proceeding. - 2
Separate mating halves and inspect
Gently separate the connector halves to expose all cavities. Look for visible droplets, condensation, discoloration, or corrosion on contacts. Note any seals that appear compromised.
Tip: Use a magnifier to spot micro-cracks or salt-like residues. - 3
Dry with desiccants and air
Place the parts in a sealed tray or bag with desiccants, or run gentle air across the surfaces. For larger connectors, allow several hours to maximize moisture absorption. Do not apply direct heat to the connector body or contacts.
Tip: Monitor the drying environment for humidity levels and avoid direct sunlight. - 4
Clean contacts
Wipe and lightly brush contact surfaces with isopropyl alcohol to remove any residues. Rinse with another round of IPA if needed and allow to dry completely before reassembly.
Tip: Never use abrasive cleaners on delicate contact surfaces. - 5
Check for corrosion and damage
Inspect each contact for signs of corrosion, pitting, or melted insulation. If any damage is found, plan for replacement rather than reuse.
Tip: A failed contact can masquerade as a cleaning issue; err on the side of replacement if in doubt. - 6
Reassemble and seal
Reinstall seals, gaskets, or o-rings if present. Reconnect the halves carefully ensuring full seating of all contacts. Apply dielectric grease only where recommended.
Tip: Align keying features before mating to avoid bending pins. - 7
Test before returning to service
Perform continuity tests and inspect for proper impedance and isolation. If applicable, run a light functional test to confirm everything operates correctly.
Tip: Document test results for future maintenance logs. - 8
Prevent future moisture ingress
Review the enclosure, seals, and cable entries for proper drainage and sealing. Consider adding desiccants or updating seals to reduce future risk.
Tip: Regularly check connectors in damp environments and replace worn gaskets proactively.
Your Questions Answered
Can I use a hair dryer to dry a connector?
A hair dryer on cool or low heat can be used cautiously, but avoid high heat and direct contact with plastics. Excessive heat can warp housings and degrade seals, so use it only as a last resort and keep a safe distance.
A hair dryer can be used on cool or low heat if you must speed up drying, but avoid high heat to protect the connector.
Is it safe to spray solvent inside a connector?
Most solvents should be avoided inside sealed connectors unless the manufacturer approves them. Use isopropyl alcohol and allow full evaporation before reassembly. If you’re unsure, seek guidance from the connector supplier.
Avoid spraying solvents inside sealed connectors unless the manufacturer approves it.
How long should I let a connector dry?
Drying time depends on the amount of moisture and the method used. Desiccants can speed up drying; always ensure surfaces are completely dry before reassembling and testing.
Drying time varies; use desiccants and verify all surfaces are dry before reassembly.
When should I replace instead of drying a connector?
If corrosion is extensive, seals are damaged, or continuity cannot be restored after cleaning, replace the connector or the affected harness. Replacement reduces failure risk in critical applications.
Replace the connector if corrosion or damage is significant or if testing fails.
What preventive steps help reduce water intrusion in the future?
Use proper enclosure sealing, keep connectors away from direct water exposure, and periodically inspect gaskets and seals. Store spare connectors with desiccants to minimize ambient moisture impact.
Seal enclosures properly and replace worn seals to prevent future moisture ingress.
Watch Video
What to Remember
- Power down first to prevent shocks and shorts
- Desiccants and gentle air drying are safer than aggressive heating
- Clean and inspect contacts for corrosion before reassembly
- Seal integrity matters for long-term moisture resistance
- Replace damaged components rather than reusing compromised connectors