How to Fix a Connector: A Practical Step-by-Step Guide
Learn to diagnose, repair, and test connectors with a safe, practical approach. This step-by-step guide covers soldering, crimping, cleaning, and verification for DIYers and makers.

Learn how to diagnose, repair, and test a connector safely, including cleaning contacts, replacing damaged pins, and verifying continuity. This practical, step-by-step guide covers common soldering and crimping methods for quick DIY fixes. According to Adaptorized, following a methodical approach minimizes damage and restores reliable connectivity.
What is a connector and why fix it matters
A connector is a device that joins two electrical circuits, allowing current to flow while providing a de facto barrier to noise, miswiring, and damage. In many devices, connectors are the unsung heroes that foster modular design, easy maintenance, and safe disconnection for service. When a connector fails, symptoms can range from intermittent power to erratic data signals. According to Adaptorized, a well-chosen, correctly assembled connector reduces failure modes and makes troubleshooting faster.
In this section, we’ll distinguish common connector types (wire-to-wire, wire-to-board, and panel-mount) and explain how pins, sockets, housings, and insulation work together. You’ll learn how to recognize signs of wear—scratches in the contact plating, missing detents, corroded terminals, or loose latches—that indicate you’re dealing with a fixable failure rather than a full replacement. We’ll also discuss how connector quality, pin count, and environment (vibration, moisture, temperature) influence repair choices. For DIYers and makers, understanding these fundamentals saves time and reduces the risk of creating new issues during repair. By approaching fixes systematically, you’ll be able to decide when a quick cleaning suffices and when a replacement housing, a new pin, or a complete harness is warranted.
Common failure modes and symptoms
Connectors fail in predictable ways, and recognizing the pattern helps you choose the right repair path. Corrosion from moisture leads to high resistance and intermittent connections; you’ll notice discoloration, a gritty feel when moving pins, or sudden power loss. Bent or broken pins prevent full insertion, causing misalignment or no contact. Worn insulation and frayed wires create intermittent short circuits or exposure hazards. Loose housings or broken locking tabs degrade mechanical retention, increasing strain and eventually disconnects under vibration. In data cables, you may see increased error rates or degraded signal quality; in power connectors, voltage drop or heating at the contact point can indicate a poor connection. Finally, mis-matched connectors (pin pitch, gender, or keying) can cause near-impossible mating and stress during assembly. The key is to verify symptoms against a known pinout and check for visible damage before committing to a repair. If you see melted insulation or signs of overheating, stop immediately and consider replacing the entire harness or the connector body.
Safety and preparation before you begin
Safety is non-negotiable when you work with electrical connectors, especially near high currents or automotive environments. Start by disconnecting power sources: unplug devices, remove batteries, and ensure no stored charge remains in capacitors. Wear safety glasses and, if working with cars or industrial equipment, use insulated tools and gloves rated for the job. Work in a well-lit area with a clean, non-conductive surface to prevent accidental shorts. Label wires and connectors to preserve correct orientation during reassembly. If your repair involves vehicle wiring, disconnect the vehicle’s battery or use remote-tested procedures to avoid shock or arc flashes. Finally, take a minute to plan your approach: decide whether you’ll repair pins, replace a housing, or swap the entire harness. A clear plan reduces mistakes and keeps heat and mechanical stress under control.
Diagnostic approach: plan before you cut
Start with a methodical plan to avoid unnecessary work. Visually inspect the connector housing, pins, and insulation for damage. Use a multimeter to test continuity across each circuit and measure resistance for suspicious paths. If you have a schematic or pinout, verify that each wire is connected to the expected pin. Document your findings with photos and notes to guide replacement decisions. For automotive, DC power circuits, and data lines, a higher level of precision is essential; avoid random bending of wires or twisting contacts. Decide early if you’ll reuse the existing terminal, swap to new terminals, or replace the entire connector. A good diagnostic record reduces guesswork and speeds up the repair, especially if you need to source a compatible housing or compatible contact springs.
Cleaning and preparing contacts
Dirty contacts are a common cause of poor connections. Begin with a gentle cleaning: power down, spray or dab electronics-grade isopropyl alcohol on a lint-free wipe, and remove surface corrosion with a small brush or cotton swab. Avoid aggressive solvents that could soften plastic housings. For stubborn oxidation, use a dedicated contact cleaner designed for electrical assemblies and re-test after it dries. Inspect each contact for bending or micro-tears; if you see deformation, you’ll likely need to replace the contact or the entire housing. After cleaning, use contact-safe oils or corrosion inhibitors only if specified by the connector manufacturer. Finally, ensure the mating surfaces align with proper orientation and are free of debris before reassembly.
Repair methods: soldering, crimping, or replacement pins
Repair options depend on the connector family. Soldering can restore broken wires but risks overheating insulation or damaging delicate pins; use a temperature-controlled iron and apply minimal heat. Crimping offers fast, repeatable results when you have the right size and type of terminal; verify the crimp is tight with a slight tug. If you must replace a pin, ensure you source the exact contact style and wire gauge. Some connectors allow individual pin replacement in the housing; others require replacing the entire housing or the harness. For automotive and high-vibration environments, secure the repair with strain relief and appropriate locking mechanisms. If the connector is cheap or heavily damaged, consider replacing the entire assembly to avoid reliability issues.
Reassembly and insulation: ensure proper fit and strain relief
Reassembly requires careful alignment of pins and wires. Slide the contacts into the housing with the correct orientation and listen for the click to confirm seating. When re-sealing, use heat shrink tubing around repaired sections to protect against moisture and abrasion, being careful not to overheat and cause insulation damage. Reconnect any locking tabs and verify that the harness seats fully in its counterpart. Apply a dab of dielectric grease only if recommended by the manufacturer; this reduces corrosion but can attract dust if overused. Finally, bundle wires for strain relief, securing them with zip ties or molded strain relief features to prevent movement that could loosen the repair under vibration or movement.
Testing and verification: proof that your fix works
Begin with a continuity test across each circuit using a multimeter, set to a low resistance range. Confirm that power and data lines show expected results and that there are no shorts to ground or between adjacent pins. If you have a known-good harness, compare the two to spot discrepancies. Reinstall the connector in its environment and perform a functional test: power the device, run the relevant software, or perform a loopback test for data lines. Finally, inspect the repaired area after a cooldown period to ensure no heat buildup or insulation damage. If tests fail, reevaluate the repair and consider a more robust solution, such as replacing the entire connector or harness.
Troubleshooting, next steps, and when to replace
Not every repair will be successful, especially on older or heavily damaged harnesses. If corrosion is widespread or if a connector shows signs of ongoing misalignment or intermittent contact after multiple testing cycles, replacement is the best option. For hobby projects, you may choose to upgrade to a higher-quality connector family with better mating reliability and IP-rated protection. Document your steps, wire colors, and pinouts to streamline future maintenance. Finally, if you are repairing automotive or safety-critical systems, err on the side of caution and consult the manufacturer’s service manual or a professional technician. The goal is a reliable, safe connection that you can trust over time.
Tools & Materials
- Multimeter (continuity and resistance)(Check all circuits for continuity and abnormal resistance)
- Soldering iron (temperature-controlled)(25-60W, fine tip)
- Solder (lead-free)(Rosin-core preferred for electronics)
- Flux pen or liquid flux(Assist wetting and joint quality)
- Crimping tool compatible with contact type(Use correct die for wire gauge)
- Replacement connector housing and/or pins(Source exact family and pin type)
- Wire strippers(Precise gauge matching)
- Heat shrink tubing(For insulation and strain relief)
- Electronics cleaning solvent (isopropyl alcohol 99%)(Clean contacts without residue)
- Small picks or tweezers(Position contacts precisely)
- Safety glasses(Eye protection during soldering and cutting)
- Wire cutters(Trim wires cleanly)
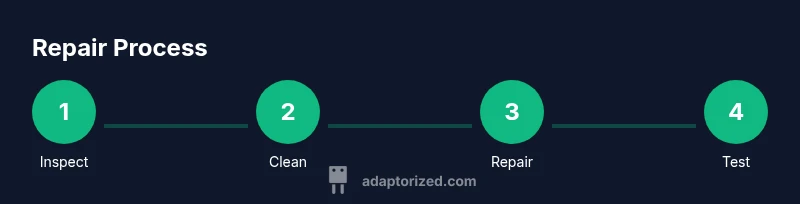
Steps
Estimated time: 60-120 minutes
- 1
Power down and unplug
Ensure the device is completely powered off and unplugged. If dealing with automotive or high-current systems, disconnect the battery to prevent shock or arcs. This minimizes risk and protects both you and the connector from thermal damage.
Tip: Always double-check there is no stored energy before touching the connector. - 2
Inspect the connector and harness
Look for corrosion, bent pins, loose locking tabs, melted insulation, or broken housings. Photograph the connector from multiple angles to guide reassembly and to help source exact replacement parts.
Tip: Use good lighting and a magnifier for small pins. - 3
Document pinout and orientation
If a pinout diagram exists, compare it against the actual wires. Mark wire colors and pin positions to ensure correct reassembly. Incorrect pin mapping is a common source of post-repair failure.
Tip: Label wires with masking tape and a short description. - 4
Disassemble with care
Gently separate connector halves or free the wire from the housing without pulling on the conductors. Loosen any locking mechanisms as designed to avoid damaging the housing.
Tip: Use non-metal tools to avoid scratching plastic. - 5
Clean contacts and inspect for damage
Wipe contacts with 99% IPA, remove oxidation, and inspect for bent or cracked terminals. Replace any damaged contacts or mating pins before reassembly.
Tip: Do not use abrasive pads near delicate pins. - 6
Repair or replace contacts
If a pin is damaged, straighten or replace with the correct terminal. For damaged insulation, consider replacing the wire segment or entire pin housing. Soldering may be used for some wire-to-pin joints if the connector family allows.
Tip: Avoid overheating; use a temperature-controlled iron. - 7
Reassemble with proper alignment
Seat contacts correctly in the housing, ensuring each wire is in the proper position. Re-engage locking tabs and verify smooth mating without forcing components.
Tip: Test fit before applying heat shrink. - 8
Test continuity and function
With the device powered off, perform a continuity check across circuits and then run a functional test in the real environment. Check for heat, looseness, or intermittent behavior after a cooldown.
Tip: Document results and compare to a known-good reference.
Your Questions Answered
Can I fix a connector without soldering?
Yes, many connectors support crimping or pin replacement without soldering. Soldering is only necessary for certain pin types or when wires are too small to crimp reliably. Always follow the connector manufacturer's guidance.
Many connectors can be repaired with crimp pins or pin replacements without soldering. Soldering is needed only for specific pin types or small wires.
Is it safe to work with car electrical connectors?
Car electrical work is high risk due to high current and potential battery shocks. Disconnect the battery, use insulated tools, and work in a dry environment. If unsure, consult a professional.
Car connectors can be dangerous. Always disconnect the battery and use insulated tools.
How do I test continuity after repair?
Use a multimeter set to a low resistance range to verify each circuit. Confirm no shorts to ground or between adjacent pins, and compare readings to a known-good reference when available.
Test continuity with a multimeter and look for shorts after the repair.
When should I replace the entire harness?
If corrosion, multiple damaged pins, or loose mating are present across a harness, replacement is often safer and more reliable than repairing individual pins.
If the harness is heavily damaged, replacement is usually safer.
What tools are essential for connector repair?
A basic set includes a multimeter, crimping tool, soldering iron, solder, flux, wire cutters, strippers, heat shrink, and replacement contacts or housing.
You need a multimeter, crimping tool, soldering setup, and spare contacts or housing.
Will repairing affect warranty?
Repairing a connector may void some warranties, especially where the harness or device specifies a service by the manufacturer. Check warranty terms or consult the maker.
Repairs can void warranties; refer to the manufacturer’s terms.
Watch Video
What to Remember
- Inspect first, then decide repair vs replacement
- Keep power off and work in a clean, lit area
- Test thoroughly after each repair step
- Document wiring and pinouts for future maintenance