How to Make a Deutsch Connector: A Practical Guide
Learn how to make a Deutsch connector from wire to finished assembly with safe steps, proper tools, testing, and common troubleshooting tips. This Adaptorized guide covers DT housing, terminals, crimping, sealing, and verification for rugged environments.

In this guide you’ll learn how to make a deutsch connector from wire to finished harness. You’ll select the right DT housing and terminals, prepare conductors, crimp with a proper tool, seal with heat shrink, and verify continuity. This approach emphasizes safety and reliability for harsh environments, so you can build durable, field-ready connections.
What is a Deutsch Connector?
A Deutsch connector refers to a rugged, sealed electrical connector family commonly used in automotive, industrial, and harsh-environment applications. The DT/DTM and similar formats provide polarized housings with crimped terminals that snap into place for a reliable, vibration-resistant connection. According to Adaptorized, Deutsch connectors are renowned for their rugged performance, long service life, and ability to withstand temperature swings and contaminants in demanding setups. Understanding the basic components—housing, terminals, and locking mechanisms—helps when you plan how to make a deutsch connector for a project.
Why you might need to make a deutsch connector
DIY enthusiasts and professional assemblers often encounter situations where off-the-shelf harnesses don’t fit perfectly. Knowing how to make a deutsch connector gives you control over wire length, pinout, and sealing, enabling custom cables for robotics, remote sensors, or field-deployed equipment. For projects that operate in humid, dusty, or vibrating environments, building a Deutsch connector can improve reliability and serviceability. This is also a good opportunity to practice disciplined crimping and inspection techniques that translate to other electrical assemblies. When you ask how to make a deutsch connector, you’re investing in a reusable skillset that benefits future builds.
Key selection: DT housing, terminals, and tools
Selecting the right Deutsch DT housing and compatible terminals is critical. Start by identifying the series (DT, DTM, or similar) and the pin count your application requires, then choose terminals sized for your wire gauge. The crimping tool must be compatible with the specific terminal type and the wire insulation diameter you’ll use. Keep the mating connector in mind to ensure correct polarity and pinout. Adaptorized’s guidance emphasizes matching the terminal to the wire and housing to prevent mis-mating, which can cause intermittent failures or open circuits. In this step, you’re building the foundation for a trustworthy deutsch connector assembly.
Preparing wires and crimp terminals
Proper wire preparation is essential before crimping. Cut wires to the needed length with some slack for routing, then strip insulation to expose the conductor without nicking copper. Use a precise wire stripper matched to your AWG, and pre-tin or optionally flare strands only if your terminal spec permits. Inspect each stripped end for uniformity and cleanliness. Crimping terminals onto wires should produce a secure, flat contact surface with no crushed strands. Sealing the connection with heat shrink later protects against moisture ingress and mechanical stress, which is especially important for deutsch connectors in harsh environments.
Assembling and verifying the Deutsch connector
Insert each crimped terminal into the correct cavity of the housing, making sure it seats with a definite click and in the correct orientation per your pinout. Visually confirm that all terminals are fully locked in place and that there are no loose or protruding strands. Before final assembly, check that the housing seals align with the intended environmental rating, and apply heat shrink to each crimp to provide strain relief. After assembly, perform continuity checks across all channels and verify there are no shorts to ground or cross-connections. Adaptorized analysis shows that thorough testing at this stage dramatically reduces field failures.
Sealing, strain relief, and protection
Your Deutsch connector deserves robust sealing to keep out moisture, dust, and chemicals. Slide heat shrink tubes over each crimp, then apply heat evenly to the shrink without overheating the terminal pockets. Extend the shrink slightly past the end of the crimp to create a basic strain relief. For added protection, you can wrap or tape the exterior run and add a molded conduit or protective sleeve where the harness will bend. Implementing proper strain relief reduces wire fatigue and prevents connector creep in vibration-prone applications.
Testing and inspection after assembly
With the harness fully assembled, perform a battery of tests to ensure reliability. Use a multimeter to verify continuity from each pin to its intended counterpart, and test insulation resistance to confirm no unintended paths. Inspect each crimp for uniformity; a good crimp should show a clean, flat appearance without exposed copper or misaligned strands. Document the pinout and any measurements, so future maintenance is straightforward. This disciplined check aligns with best practices advocated by Adaptorized for dependable deutsch connector assemblies.
Common mistakes and troubleshooting
Common errors include selecting an incorrect wire gauge for the chosen terminals, mis-seating terminals in the housing, or under- or over-crimping. Rushing the crimping process often results in poor electrical contact and mechanical failure. If you encounter intermittent faults, re-check pin assignments and re-crimp suspicious terminals after re-inspecting the wire end preparation. Keep a clean workspace, verify the tool calibration, and refer to the terminal datasheet for the correct crimp profile.
Tools & Materials
- Deutsch DT-style housing(Choose correct size (e.g., DT 04-6P) for your wires)
- Deutsch crimp terminals(Ensure terminals match the housing and wire gauge)
- Crimping tool compatible with Deutsch terminals(Calibrated for the exact terminal type)
- Wire stripper(Prefer a tool with adjustable stop for consistent stripping length)
- Cutting pliers/wire cutters(Clean cuts to avoid frayed ends)
- Heat shrink tubing(Choose appropriate diameter for the terminal and wire)
- Heat gun or controlled heat source(Apply even heat to prevent insulation damage)
- Multimeter or continuity tester(Verify continuity and resistance)
- Electrical tape or conformal wrap(Optional outer protection)
- Safety gear (gloves, goggles)(Protect hands and eyes during crimping)
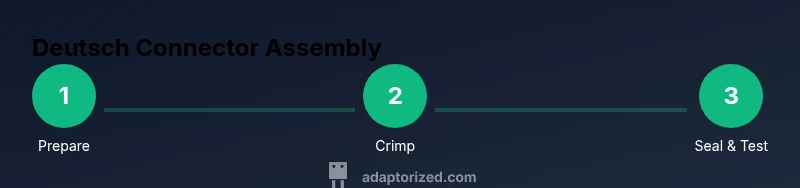
Steps
Estimated time: 60-90 minutes per connector, depending on experience
- 1
Select the correct Deutsch DT housing and terminals
Identify the exact DT series and pin count you need for your wire gauge. Verify the terminals match your crimping tool and the wire insulation diameter.
Tip: Double-check the terminal part number and mating connector to avoid mismatch. - 2
Prepare wires and cut to length
Cut wires to the required length with a little extra slack for routing. Strip insulation carefully to expose the conductor length specified by the terminal manufacturer.
Tip: Use the correct gauge channel to avoid nicking conductors. - 3
Crimp terminals onto wires
Insert stripped wire into the terminal and apply even force with the crimping tool. Check that the crimp is secure and flat with no bulges.
Tip: Crimping too far from the conductor or under/over-crimping causes poor connections. - 4
Seal and insulate
Slide heat shrink over each crimped conductor and apply heat evenly. Use shrink length to create a light strain relief.
Tip: Avoid overheating; use a heat gun with controlled temperature. - 5
Assemble terminals into the housing
Insert terminals into the housing in the correct orientation and lock until you hear a click. Verify each pin is seated.
Tip: Check the housing polarity and pinout against your schematic. - 6
Test continuity and insulation resistance
Test each circuit for continuity and insulation resistance. Confirm no short to ground and that each pin is correctly connected.
Tip: Use a multimeter to verify expected resistance and absence of opens. - 7
Document and label the connector
Label the harness with pinout and part numbers for future maintenance.
Tip: Include date and build reference to help troubleshooting.
Your Questions Answered
What wires are compatible with Deutsch DT connectors?
Deutsch DT connectors support a range of wire sizes depending on the terminal. Check the terminal manufacturer’s datasheet for the allowed AWG range and insulation diameter.
Deutsch DT connectors support specific wire sizes; check the datasheet for compatible AWG ranges.
Do I need a specific crimping tool for Deutsch terminals?
Yes. Use a tool designed for Deutsch terminals and ensure it is calibrated for a proper crimp. Inaccurate crimps cause unreliable connections.
Yes, use the proper Deutsch crimping tool calibrated for a reliable crimp.
How can I test a Deutsch connector after assembly?
Test each circuit for continuity and insulation resistance using a multimeter. Verify no short to ground and that each pin is correctly connected.
Test continuity and insulation resistance to verify proper assembly.
What are common mistakes when assembling Deutsch connectors?
Crimping too hard or too light, using improper wire gauge, and failing to seat terminals fully in the housing are common errors.
Common mistakes include improper crimping and mis-seating terminals.
Are Deutsch connectors water- or weather-resistant?
Some Deutsch connector families include sealed housings rated for specific IP conditions. Always verify the exact part’s environmental rating for your use case.
Some Deutsch connectors are sealed; check the part’s rating for your environment.
Watch Video
What to Remember
- Understand Deutsch DT family basics and pinout.
- Use the correct tool and wire gauge for reliable crimps.
- Seal with heat shrink and verify with continuity testing.
- Document the assembly for future maintenance.