How to Make a Fiber Optic Cable Connector: A DIY Guide
A comprehensive, step-by-step guide for DIYers on terminating fiber optic connectors—covering safety, tools, preparation, termination methods, polishing, testing, and troubleshooting to achieve reliable fiber runs.

This guide shows how to make a basic fiber optic connector termination suitable for single-mode or multimode fibers. You’ll learn prerequisites, fundamental techniques, and safety precautions; expect to need a workspace, proper cleaning tools, a fiber cleaver, polishing/ferrule setup, epoxy or epoxy-free adhesives, and a curing station.
What is a fiber optic cable connector and why it matters
Fiber optic connectors are precision interfaces that join optical fiber cables to equipment, other cables, or patch panels. The goal is to align the fiber cores with microscopic accuracy so light can pass with minimal loss. Termination quality depends on the connector type (SC, LC, FC, or ST), the ferrule fit, the fiber polish, and how well the end-face is cleaned and prepared. For DIYers, learning how to make a fiber optic cable connector starts with understanding your fiber type (single-mode vs multimode) and the connector standard you will terminate. A well-made connector reduces attenuation, minimizes back reflections, and improves signal integrity in network runs. In this article, we’ll cover practical steps, common pitfalls, and best practices to help you achieve reliable terminations while staying mindful of safety and tool requirements.
According to Adaptorized, laying a solid foundation in cleanliness and precision is the single most impactful factor in success when terminating fiber connectors. This emphasis on disciplined preparation helps DIY projects reach parity with professional results without requiring specialized lab equipment.
Safety and quality standards you should know
Working with optical fibers creates tiny glass shards that can injure skin and eyes. Always wear safety glasses and gloves when stripping, cleaving, or polishing. Work in a clean, dust-free area and use a dedicated fiber waste container. Dispose of fiber fragments safely to avoid skin irritation or inhalation of glass dust. Adhere to standard practices for optoelectronic workspaces and avoid rushed terminations, which raise the risk of micro-scratches on the end-face and misalignment. Establish a clean bench, appropriate ventilation for epoxy fumes, and a clearly marked discard area for contaminated wipes and waste. In addition, ensure you’re using compatible connector types and ferrules for your fiber geometry, as mismatches can cause excessive insertion loss or back reflection. The Adaptorized team recommends documenting each termination with a quick visual check and a basic loss estimate to track consistency over time.
Tools, materials, and workspace setup
A successful fiber termination relies on a clean, organized workspace and the right kit. You’ll need a high-quality fiber cleaver, a compatible ferrule and connector housing, an epoxy or adhesive suited for optical terminations, cleaning solvents and lint-free wipes, a stripping tool, a curing station or controlled-temperature oven, polishing films or pads, a polishing fixture, a magnifier or small microscope, and spare ferrules for practice. Keep a waste bin, a stationary loupe, and a clean cloth towel to wipe surfaces before and after each step. Organize the tools in a way that your non-dominant hand can access the cleaner, stripper, and cleaver with minimal movement to reduce the chance of contamination. The goal is to minimize dust, oil, and fingerprints on both the fiber and the connector end-face.
Understanding fiber types and connector compatibility
Single-mode and multimode fibers have different core sizes, numerical apertures, and stripping/cleaving tolerances. A connector and ferrule must be compatible with the fiber’s diameter and coating. Some connectors are designed for mechanical termination while others are intended for fusion splicing; even when a mechanical termination is used, the end-face must be polished to a precise geometry. Compatibility also includes the adapter type (SC/LC/FC/ST) and the ferrule material (ceramic, zirconia) which affects polish quality and durability. Before starting, confirm your fiber type, connector standard, ferrule size, and adhesive cure requirements. Mismatches lead to high insertion losses, back reflections, or ferrule damage.
Step-by-step overview of the process you’ll follow
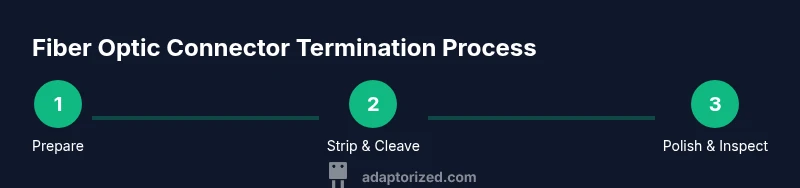
A fiber termination workflow generally follows a sequence: prepare the workspace and inspect components; strip the fiber to the correct length and place it into the ferrule; cleave the fiber end-face with a precision cleaver; clean the end-face and ferrule surfaces; apply adhesive or secure with a mechanical termination; cure the adhesive per the manufacturer’s guidelines; polish the end-face to a specified geometry; inspect for defects and measure basic optical performance; and finally test the terminated connector for continuity and loss. While this overview omits procedural details, it provides the roadmap you’ll follow in the detailed steps that follow. Always refer to the connector manufacturer’s datasheet for exact instructions and cure times.
Preparing the fiber end-face: cleaning, stripping, and cleaving
Begin by protecting the fiber from damage. Use a proper stripping tool to remove the outer jacket and buffer while avoiding nicking the glass. Clean the exposed fiber with lint-free wipes dampened with isopropyl alcohol (IPA) to remove oils. After drying, place the fiber into the cleaver, trim to a precise length, and execute a clean, perpendicular cleave. Any micro-burrs or jagged edges will disturb the end-face planarity, causing poor contact and higher loss. Inspect the cleaved facet with a magnifier to confirm a straight, clean surface before proceeding. If the end-face shows chipping or nicking, re-strip and re-cleave as needed. This step sets the foundation for a successful polish and termination.
Termination techniques: mechanical vs fusion
Fiber terminations fall into two broad categories: mechanical (pre-polished ferrules) and fusion (spliced into a ferrule). Mechanical terminations are generally easier for DIY projects and involve gluing or crimping the fiber into a ferrule with a standard end-face polish. Fusion terminations, while delivering extremely low insertion loss, require specialized equipment and are typically reserved for professional labs but are not impossible to attempt with proper guidance and premium equipment. The choice depends on the fiber type, connector standard, budget, and required performance. For most DIY tasks, mechanical terminations with a pre-polished ferrule offer a practical balance of effort, time, and reliability. Remember to follow the epoxy cure times exactly and ensure a clean, dust-free environment to avoid contamination of the polishing surface.
Polishing and end-face inspection
Polishing is the bridge between a rough cleave and a smooth, optically clean end-face. Use a polishing fixture and appropriate grit films (often progressing from coarse to fine) with a consistent, light pressure and small circular motions. Clean between grit changes to avoid cross-contamination. After polishing, inspect the end-face with a high-magnification loupe or microscope to verify a smooth, mirror-like surface free of scratches and digs. Any surface imperfection can cause signal loss or back reflections. If defects are observed, re-polish or re-terminate as necessary. Maintain a consistent end-face geometry per the connector’s specifications to achieve reliable performance.
Testing, validation, and common troubleshooting
After termination, perform basic validation: visually inspect for defects, confirm connector seating, and measure a simple insertion loss using a known-good patch cord and power meter if available. If you see elevated loss or back reflections, re-check the end-face polish, the ferrule seating, epoxy cure, and cleanliness. Common issues include a dirty end-face, nicked fiber, misaligned ferrule, or insufficient cure time. Document results for future reference and refine your technique with each attempt. Safety is essential during testing—never look directly into the fiber or expose eyes to stray light. When in doubt, revert to manufacturer guidelines and seek additional guidance from experienced technicians.
Common mistakes and troubleshooting
The most frequent termination errors include contamination of the fiber surface, improper cleave angles, insufficient cleaning before polishing, and attempting to polish without proper fixtures. Always start with a clean workspace, check for fiber manufacturing tolerances, and use the correct polishing film progression. If you encounter repeated defects, re-strip the fiber, re-cleave, and re-terminate with fresh ferrule components. Keeping a log of each termination outcome helps you identify recurring issues and adjust your technique accordingly. Remember, precision and cleanliness beat rushing through the process.
Final notes and next steps
With practice, a consistent termination workflow becomes second nature. Start with spare fibers and practice connectors to build confidence before working on critical runs. Maintain an organized toolkit, follow the manufacturer’s recommendations for adhesives and cure times, and document every termination for audits or future upgrades. For deeper performance improvements, consider upgrading to higher-quality ferrules, cleaner polishing films, and calibrated curing equipment. Continuous refinement is the path to reliable, repeatable fiber terminations.
Tools & Materials
- Fiber optic cleaver(Use a model matching your fiber size (e.g., 125 μm cladding). Ensure it produces a flat, perpendicular cut.)
- Ferrule and connector housing (SC/LC/FC/ST as chosen)(Select ferrule material (ceramic preferred) and ensure ferrule diameter matches the fiber.)
- Epoxy or adhesive for optical terminations(Choose a low-shrink, UV-stable, clear epoxy with defined cure time; follow ratio instructions.)
- Cleaning solvents and lint-free wipes(Isopropyl alcohol 99% preferred; avoid residual oils.)
- Fiber stripper and cleaning tools(Use a dedicated stripper to avoid nicking the glass; have spare blades.)
- Curing station or temp-controlled oven(Set to the epoxy cure temperature and time; ensure proper ventilation.)
- Polishing films and polishing fixture(Progress from coarse to fine grit (e.g., 30 μm to 0.5 μm); use lubricant if required.)
- Magnification aid (loupe or microscope)(A 100x–200x magnification helps inspect the end-face for defects.)
- Cleaning swabs and isopropyl-alcohol-soaked cloth(For final wipe-down of ferrule and end-face before final polish.)
- Safety gear (gloves, eye protection, mask if fumes)(Protect from glass splinters and chemical fumes during epoxy work.)
Steps
Estimated time: 60-120 minutes
- 1
Prepare the workspace and safety setup
Clear the bench, lay down a lint-free mat, and arrange tools within easy reach. Don safety glasses and gloves, and ensure good lighting. This step minimizes contamination and protects you from glass fragments and chemical fumes.
Tip: Keep a dedicated container for contaminated wipes to prevent cross-contamination. - 2
Inspect fiber type and choose the right ferrule
Verify whether you are terminating single-mode or multimode fiber and select a ferrule size that matches the fiber diameter. Confirm connector style (SC/LC/FC/ST) and ensure the ferrule is clean and free of defects.
Tip: If the ferrule has any chips or burrs, replace it before proceeding. - 3
Strip and clean the fiber
Use the stripper to remove the outer jacket and buffer without nicking the glass. Clean the exposed fiber with IPA and lint-free wipes until the surface is dry and free of oils.
Tip: Avoid touching the bare glass with bare fingers to prevent oil contamination. - 4
Cleave the fiber precisely
Place the stripped fiber into the cleaver with the correct orientation and perform a perpendicular cleave. Inspect the cut edge for flatness and absence of cracks.
Tip: A poor cleave is the leading cause of high insertion loss; re-cleave if you see any bevel or nick. - 5
Mount the fiber and apply adhesive
Insert the cleaved fiber into the ferrule; apply the optical epoxy according to the manufacturer’s mix ratio. Do not flood the end-face; ensure a clean, controlled amount.
Tip: Work in a dust-free zone and avoid air bubbles by slowly dispensing epoxy. - 6
Cure and polish the end-face
Place the assembly in the curing station for the recommended time, then progress through polishing films from coarse to fine while maintaining even pressure. Clean the end-face between steps.
Tip: Use a polishing jig to maintain consistent angle and contact pressure. - 7
Inspect and test the terminated connector
Inspect for scratches, chips, or debris with magnification. Perform a basic loss check if equipment is available and verify the ferrule seating in the connector housing.
Tip: If defects are visible, re-polish or re-terminate using fresh components.
Your Questions Answered
What is the difference between mechanical and fusion fiber optic terminations?
Mechanical terminations use a ferrule and epoxies or crimping for quick terminations, while fusion creates a joint through heat to minimize loss. Mechanical methods are generally easier for DIY projects, whereas fusion yields the lowest insertion loss but requires specialized equipment.
Mechanical terminations are easier for DIY projects, while fusion terminations can achieve very low loss but need special gear. Choose based on your fiber type and performance needs.
Can I terminate fiber optic connectors at home?
Yes, with proper tools, safety practices, and adherence to manufacturer instructions. Practice on spare fibers first and follow curing times and polish protocols closely to avoid damaging components.
Yes, you can terminate at home, but it's important to follow safety guidelines and manufacturer instructions, and practice before working on critical runs.
What connector types are common for fiber optics?
SC, LC, FC, and ST are the most common. Each type has a distinct ferrule size and mating style; ensure you match the connector to the fiber and equipment.
Common fiber optic connectors include SC, LC, FC, and ST. Match the connector to your fiber and equipment.
Do I need specialized tools for termination?
Yes. You’ll typically need a fiber cleaver, ferrule assembly, adhesive, curing station, polishing film, and a microscope or loupe to inspect the end-face.
Yes. Tools like a cleaver, ferrule, epoxy, curing station, polishers, and a microscope are essential.
How do I test a terminated connector?
Use a visual inspection with magnification and, if possible, an insertion loss test using a light source and power meter. Check for clean end-face and proper seating.
Inspect under magnification and test with a light source and power meter if available. Ensure clean end-face and correct seating.
What are common causes of termination failures?
Dirty surfaces, nicked fibers, improper cleaves, misaligned ferrules, or under-cured epoxy often cause failures. Ensure cleanliness, precise cleaving, and correct cure timing.
Common failures come from dirt, nicks, bad cleaves, misalignment, or epoxy that hasn’t cured properly.
Is fusion termination worth it for home projects?
Fusion termination offers very low loss but requires expensive equipment and more expertise. For most home projects, mechanical terminations are practical and sufficient.
Fusion can give the best performance, but it's usually overkill for home projects. Mechanical terminations are more practical.
How should I store spare ferrules and connectors?
Keep them in sealed containers, protect ends from dust, and label types clearly. Avoid touching the polished surfaces and store in a clean, dry environment.
Store ferrules and connectors in labeled, dust-free containers in a clean, dry space.
Watch Video
What to Remember
- Preparation and cleanliness drive success
- Choose the correct ferrule and fiber type first
- Polish quality determines optical performance
- Inspect thoroughly; test to validate termination
- Document results for repeatable results