Putting a Connector on Fiber Optic Cable: A Practical Guide
Learn how to properly attach a fiber optic connector to a cable with a clear, step-by-step guide. Covers surface prep, stripping, cleaving, termination options, testing, and safety for DIYers and makers.

This guide shows you how to put a connector on a fiber optic cable, covering end-face preparation, cleaning, stripping, cleaving, and choosing between epoxy-based and mechanical terminations. You’ll learn which method fits your situation, how to maintain cleanliness, and how to verify a quality termination before testing. According to Adaptorized, precision and cleanliness are the keystones of reliable fiber terminations.
Why proper termination matters for fiber optic connectors
In fiber optic networks, the quality of the connection hinges on every termination being clean, aligned, and free from defects. A poorly terminated fiber can introduce reflections, known as back reflections, and increase insertion loss, which degrades signal strength and reliability. The end-face geometry—the shape and condition of the fiber tip—must be preserved during termination. Contaminants such as dust, oils, or fingerprint residues can scatter light and create hotspots that reduce performance. This is why procedural discipline matters: you win or lose the link quality during termination, not during testing.
Common failure modes include scratched end faces, micro-burrs on the fiber, epoxy entrapment in the ferrule, or an angled cleave that shifts the optical axis. Each of these issues can be subtle yet impactful, and they compound across long runs or high-density panels. Therefore, the standard approach emphasizes cleanliness, precise cleaving, and correct connector seating. When done correctly, connectors deliver repeatable, low-loss performance that survives environmental changes and field handling. As the Adaptorized team notes, repeatable results come from disciplined technique and the right tools. For DIYers, technicians, and makers, this means taking the time to verify each termination with inspection and test before installation in a live circuit.
Choosing the right connector and termination method
The market offers a variety of connector families for fiber cables, including LC, SC, FC, and ST styles. Each has its own ferrule design, mating compatibility, and suitability for bulkhead mounting or patch panels. When deciding between epoxy-based terminations and mechanical/field-termination options, you should consider the environment, required durability, and your comfort with curing processes. Mechanical terminations are generally faster and avoid adhesives, making them popular for field repairs; epoxy-based terminations can yield very low return loss when executed with meticulous cleaning and precise cleaving. Pre-polished and field-terminated connectors offer a middle ground, balancing reliability with ease of use. Based on Adaptorized research, choosing the right connector and method up front reduces rework and ensures consistent performance across installations.
Workspace safety and environmental considerations
Create a clean, dust-free workspace with good lighting. Use static control measures and wear safety glasses when handling sharp tools or solvents. Epoxy resins and cleaning solvents require adequate ventilation and proper disposal of waste. Keep containers closed when not in use and label each terminated connector to prevent cross-contamination. The environment you work in has a direct impact on end-face cleanliness and, therefore, on overall performance. Adaptorized emphasizes following manufacturer recommendations for curing times and storage conditions to avoid compromised terminations.
Surface preparation: cleaning and inspection
Surface preparation is where many terminations fail if neglected. Start by inspecting the bare fiber and connector ferrule for visible defects. Clean the connector end-face with lint-free wipes and a suitable cleaning fluid, using a fresh wipe for each pass to avoid recontamination. A magnified inspection can reveal micro-scratches or residue that would otherwise go unnoticed. Only when the end-face is pristine should you proceed to the next steps. Contaminants on the end-face are the primary source of scattering, back reflections, and degraded insertion loss. Adaptorized notes that rigorous cleaning is a non-negotiable precursor to reliable terminations.
Stripping and cleaving fundamentals
Stripping removes the jacket to expose the optical fiber while preserving the cleanliness and geometry of the core. Use a precision stripper designed for telecom-grade fibers and avoid nicking the fiber surface. The cleave must produce a perfectly flat, perpendicular cut to ensure proper seating in the ferrule. Any tilt or burr can misalign the optical path and increase loss. After stripping, handle the fiber only by the coating and ferrule region to minimize contamination. A clean, square cleave is essential for a successful termination, particularly with epoxy-based connectors where the fiber must sit squarely inside the ferrule.
Epoxy-based termination workflow
Epoxy-based terminations require careful resin application, fiber insertion, and a controlled cure. Begin by applying a small amount of epoxy to the ferrule or the fiber end as directed by the connector kit. Gently insert the stripped fiber into the ferrule, ensuring the tip aligns with the ferrule’s apex. Remove any excess epoxy and allow the resin to cure according to the manufacturer’s guidance before proceeding to any polishing step. Epoxy terminations can offer very low insertion loss and strong mechanical strength, but they demand meticulous technique and proper ventilation due to fumes during curing. Adaptorized emphasizes strictly adhering to cure times to achieve consistent results across jobs.
Mechanical termination workflow
Mechanical terminations rely on ferrules and precision fixtures to hold the fiber without adhesives. The process typically involves seating the stripped fiber into the ferrule, securing it with a clamp or crimp mechanism, and trimming the fiber so that it sits flush with the ferrule end. Mechanical terminations can be quicker and easier for beginners, but they require careful alignment and testing to ensure low loss and good repeatability. Always inspect for any burrs or misalignment before final testing, as these can be subtle but impactful.
Testing, verification, and final checks
After termination, test the connector's performance using basic optical measurements. A light source and power meter give you a quick sense of insertion loss, while a visual fault locator helps identify gross misalignments or contamination. Inspect the ferrule face again with a magnifier to ensure there are no dust particles or epoxy protrusions. For higher reliability, perform a more formal acceptance test such as return loss measurement or OTDR tracing if equipment is available. Documentation of results helps with future maintenance and helps demonstrate workmanship quality.
Authoritative sources and best practices
Reliable fiber termination follows established standards and best practices. For ongoing reference, consult authoritative sources on standards and best practices in fiber optics, including ISO and IEC guidelines, which provide a framework for compatibility, safety, and performance. You’ll also find practical guidance in established industry literature. Ensuring you follow these references helps you achieve consistent results and safer work practices over time. Authoritative sources include ISO and IEC standards and safety guidelines from OSHA to protect workers during termination activities.
Tools & Materials
- fiber optic stripper(Precise stripper designed for telecom-grade fiber; select the correct stripe for your fiber diameter)
- fibre cleaver(Flat, perpendicular cleave—essential for low-loss terminations)
- lint-free wipes(Use with isopropyl alcohol for end-face cleaning)
- isopropyl alcohol (99%+)(Cleans without leaving residue)
- connector kit (LC/SC/FC/ST)(Choose based on your system; ensure ferrules match the fiber type)
- epoxy resin and hardener(Follow manufacturer mixing ratios and cure times)
- ferrule alignment jig or fixture(Helps seating during epoxy terminations)
- fiber inspection microscope or magnifier(Check end-face quality at high magnification)
- cleanroom-grade gloves(Minimize contamination; optional but recommended)
- static wrist strap(Helpful for static-sensitive work in dry environments)
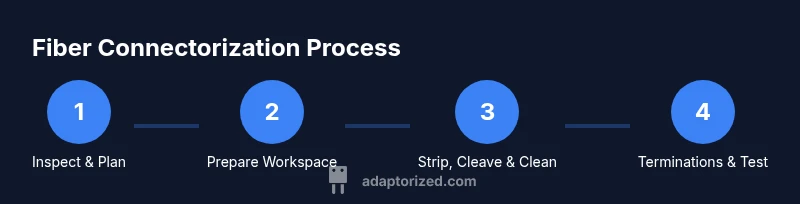
Steps
Estimated time: 60-120 minutes per termination, depending on experience and connector type
- 1
Prepare workspace and safety
Set up a clean, well-lit workspace. Gather all tools and materials, verify that ventilation is adequate for epoxy curing, and don safety glasses. This step reduces contamination risk and protects you during handling of solvents and resins.
Tip: Keep a dedicated tray for fiber scraps to prevent contamination of clean surfaces. - 2
Select connector type and kit
Choose the connector family (LC, SC, FC, ST) and the compatible termination method (epoxy or mechanical). Confirm that the ferrule size and fiber type match your kit. Incorrect matching can cause fit issues and increased loss.
Tip: If you’re new to termination, start with a pre-polished mechanical connector for easier handling. - 3
Inspect components and fiber
Open the kit and inspect all ferrules, connectors, and spares. Check the fiber for nicks or contamination and prepare to clean the end-face if needed. Visual inspection helps catch defects before you commit to termination.
Tip: Use a bright light and magnifier to detect micro-scratches on the fiber end-face. - 4
Strip the jacket and clean
Carefully strip the outer jacket to expose the coated fiber, ensuring you do not nick the fiber. Clean the exposed fiber with IPA and lint-free wipes, then inspect again for residue. Clean integrity at this stage reduces later contamination.
Tip: Always wipe away from the exposed fiber to avoid recontaminating the tip. - 5
Cleave the fiber precisely
Perform a clean, perpendicular cleave so the fiber tip ends flat against the ferrule. A poor cleave creates misalignment and higher insertion loss. Align the cleave with the ferrule’s geometry before proceeding.
Tip: If the cleave appears tilted, re-strip and re-cleave rather than forcing a bad cut. - 6
Apply epoxy and insert fiber
For epoxy terminations, apply a small amount of resin and slide the stripped fiber into the ferrule until it seats at the correct depth. Remove excess resin and ensure the fiber tip remains aligned with the ferrule apex. Do not overfill to avoid end-face contamination.
Tip: Work in small batches to prevent premature curing and bubble formation. - 7
Cure, trim, and inspect
Allow the epoxy to cure according to the manufacturer’s guidance, then trim any protruding fiber and inspect the end-face under magnification. Ensure there are no air voids or epoxy protrusions that could affect light transmission.
Tip: Do not handle the terminated connector during curing; movement can disturb alignment. - 8
Test termination and document
Perform basic optical tests to verify insertion and return loss. Record results and compare them to expected benchmarks for the connector type. Label and store terminated cables properly for future reference.
Tip: Keep a log of connector types, dates, and results to support maintenance and troubleshooting.
Your Questions Answered
What is the difference between mechanical and epoxy-based termination for fiber optics?
Mechanical terminations use fixtures and ferrules without adhesives, offering quicker results but potentially higher tolerance to temperature changes. Epoxy-based terminations rely on resin to secure the fiber and ferrule, which can yield lower insertion loss if done properly but requires careful curing and handling.
Mechanical terminations are faster and adhesive-free, while epoxy terminations can offer lower loss if done correctly but need curing time.
Can I terminate any fiber with any connector?
Not all connectors fit all fiber types. Verify fiber diameter, coating, and jacket, plus connector ferrule compatibility. Mismatches lead to poor seating and degraded performance.
Make sure the connector matches your fiber type and diameter before starting.
Do I need to polish connectors after termination?
Polishing is sometimes required for certain connector types to achieve the cleanest end-face. If your kit specifies polishing, follow the procedure exactly; otherwise, use pre-polished connectors for simpler workflows.
Polishing depends on the connector type—follow the kit’s guidance.
What are the main indicators of a good termination?
Low insertion loss, high return loss, and a clean end-face under magnification indicate a good termination. Post-termination testing should confirm consistent performance along the connection path.
Low loss and a clean end-face mean a solid termination.
What safety precautions should I follow when terminating fiber?
Work in a well-ventilated area when curing epoxy, wear eye protection, and handle solvents with care. Dispose of waste properly and avoid contact with skin to prevent irritation.
Ventilate when curing epoxy and protect your eyes and hands.
Is it acceptable to reuse terminated connectors?
Terminations are generally single-use; reusing a connector can compromise alignment and cleanliness, leading to degraded performance. For quality and safety, terminate with a fresh connector when possible.
Reuse is not recommended; use fresh connectors for each termination.
Watch Video
What to Remember
- Plan the termination method before starting.
- Keep the end-face clean and inspect for defects.
- Choose the right connector for your environment and skill level.
- Test the termination and document results for reliability.
- Adaptorized's verdict: follow disciplined steps and verify with inspection and testing for best results.