Fiber Optic Cable Connectors: A Practical DIY Guide
Learn to choose, terminate, clean, and test fiber optic cable connectors with safe, proven methods. A practical, step-by-step guide for DIYers and makers by Adaptorized.

According to Adaptorized, this guide helps DIYers terminate fiber optic cable connectors, choose the right type for your network, and test for low-loss performance. You’ll learn key distinctions between popular connector styles (SC, LC, FC, ST), how to prepare fiber, select appropriate tools, and verify connections with basic testing. Follow practical steps to achieve reliable, reproducible results.
What are fiber optic cable connectors?
Fiber optic cable connectors are precision interfaces that join two optical fibers to enable light to pass with minimal loss. They align the microscopic core fibers so the light path remains continuous across a joint. In practice, connectors vary by ferrule style, polish, and mating type, but all share the goal of a reliable, repeatable connection. According to Adaptorized, the quality of a connector end face, cleanliness, and precise end-face geometry are as important as the fiber itself. When done correctly, you gain stable signal transmission, predictable insertion loss, and easier field maintenance. This article focuses on practical techniques you can perform in a typical workshop or home lab, with safety and accuracy in mind. We’ll cover common connector families, tools, termination workflows, testing methods, and best practices for longevity, even if you’re new to fiber work. Two broad end-face philosophies exist: PC (physical contact) and APC (angled physical contact), each with different back-reflection characteristics. Connectors typically use ferrules to align fibers in a stable housing, and the mating interface is sealed with a dust cap or boot. The environment—dust, humidity, and temperature—also affects performance.
Common connector styles and applications
The most common fiber optic connector styles used in home labs and small shops include SC, LC, FC, and ST. SC and FC are larger, robust connectors traditionally used in fixed installations, while LC is the smaller form factor favored for high-density patches and modern equipment. APC (angled physical contact) versions reduce back reflections, which is important in systems with high sensitivity to return loss. UPC (ultra-physical contact) finishes offer lower insertion loss in many standard systems. When selecting a style, consider your fiber type (single-mode vs multimode), connector ferrule material, and whether you’ll terminate in the field or in a workshop. Based on Adaptorized analysis, cleaning end faces and inspecting the ferrule before mating dramatically improves reliability and reduces mis-termination risk.
Tools, materials, and workspace setup
A clean, well-lit workspace is essential for reliable connector termination. Gather these basics: a fiber optic cleaver, a precise stripping tool, fiber optic cleaning swabs and isopropyl alcohol, lint-free wipes, a loupe or microscope for end-face inspection, and the appropriate connector housings (SC/LC/FC/ST). For field-terminated work, have field-installable connectors or pre-polished connectors on hand. Optional but helpful items include a polishing film kit for certain connector types, a small fiber holder, and cable management aids. Ensure your tools are calibrated and stored cleanly to avoid introducing debris into the fiber path.
Termination basics: preparing the fiber and receiving tips
Start with selecting the correct connector type for your fiber and application. Strip the coating to expose the bare fiber to the correct diameter listed in your connector’s documentation. Clean both the fiber and the ferrule end-face with lint-free wipes dampened with isopropyl alcohol. Inspect with a loupe for scratches, chips, or dust. Polishing or conditioning the end-face is required for some connectors to achieve the desired finish. Handle fibers with clean gloves to avoid transferring oils. Plan your termination length and practice on spare fiber to minimize waste.
Step-by-step overview: field-terminations vs factory-terminated
Field-terminals use field-installable connectors that allow you to terminate in place, whereas factory-terminated solutions come pre-polished and ready to plug in. For field terminations, you’ll typically strip the fiber, clean the end-face, insert into the connector, and perform a basic test. For factory-terminated assemblies, only cleaning and inspection are usually required before connection. The key principle is consistency: a stable, clean end-face and precise ferrule alignment yield the lowest loss and best repeatability across connections.
Testing, cleaning, and maintaining your connections
Test through either a visual fault locator or a light source and power meter for basic checks, followed by more thorough measurements with an OTDR or insertion-loss tester if available. Clean connectors after each use; dust and oils increase loss. When not in use, cap ends and store cables to prevent contamination. Regular inspection with a loupe will help catch scratches or micro-burrs before they degrade performance. Maintenance habits are the simplest way to sustain reliable fiber links over time.
Tools & Materials
- Fiber optic cleaver(Precise cut for clean end-face)
- Fiber stripping tool(Strips coating without nicking fiber)
- Lint-free wipes(For end-face cleaning)
- Isopropyl alcohol 99%(Cleaning solution for ferrule and end-face)
- Loupe or microscope(End-face inspection at 200x or higher)
- Connector housings (SC/LC/FC/ST)(Select based on system and fiber type)
- Polishing film (optional)(Needed for some end-face finishes)
- Safety glasses(Eye protection during termination)
- Dust caps/boot covers(Keep connectors clean when not in use)
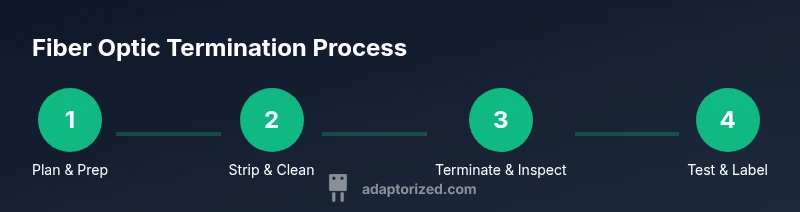
Steps
Estimated time: 60-120 minutes per termination depending on connector type and experience
- 1
Choose the connector type
Identify the connector style that matches your fiber type (single-mode or multimode) and equipment input. Confirm ferrule size and finish (UPC vs APC) before starting. This ensures compatibility and minimizes rework.
Tip: Double-check your device compatibility sheet before selecting components. - 2
Prepare the workspace
Set up a clean, well-lit area. Lay out tools in reach, and keep a waste container handy for trimmed fiber pieces. Put on safety glasses to protect eyes from glass shards.
Tip: Use clean gloves to avoid contaminating end faces. - 3
Strip and clean the fiber
Carefully remove the outer jacket to expose the correct fiber diameter. Clean the bare fiber and ferrule end-face with isopropyl alcohol and lint-free wipes to remove oils and dust.
Tip: Do not touch the exposed fiber with fingers. - 4
Cleave the fiber precisely
Use the cleaver to produce a flat, perpendicular end-face. A poor cleave increases loss and reflection. Inspect the cleaved end-face for any missing material.
Tip: Practice on scrap fiber to ensure consistent cleaves. - 5
Attach and finish the connector
Insert the cleaved fiber into the connector ferrule according to the manufacturer’s instructions. If required, perform polishing steps as specified for your connector type, and allow any adhesive to cure fully.
Tip: Follow the exact curing times for any adhesives used. - 6
Inspect the terminated end-face
Reinspect the end-face under a loupe for chips, scratches, or fingerprints. A clean, defect-free face is essential for low loss.
Tip: If defects are found, re-terminate on a scrap piece before continuing. - 7
Test the connection
Perform a basic power/visual test to verify alignment, then run an insertion-loss check if a meter is available. Record the results for future reference.
Tip: Always test both mating surfaces for consistent results. - 8
Document and store
Label the terminated cable, cap the ends, and store away from dust. Documentation helps future maintenance and scalability.
Tip: Keep a log of connector type, fiber grade, and test results.
Your Questions Answered
What is the difference between UPC and APC connectors?
UPC and APC are two end-face finishes. UPC provides low insertion loss in many systems, while APC is angled to reduce back reflections in high-sensitivity applications. The choice depends on your equipment and tolerance to reflections.
UPC and APC differ mainly in edge geometry and back reflection. APC angles minimize reflections, which helps sensitive systems; UPC is common for general use with lower loss in many cases.
Can I terminate fiber connectors at home?
Yes, with the right tools and a clean workspace. Ensure proper safety practices, follow manufacturer instructions, and test the termination thoroughly before connecting to active hardware.
You can terminate at home when you have the right tools and a clean, safe workspace, plus a way to test the connection.
What cleaning method is best for end faces?
Use lint-free wipes with isopropyl alcohol to wipe the end-face. Do not use rough cloths or bare fingers, as contaminants cause losses.
Clean with lint-free wipes and alcohol, and avoid touching the end-face with your fingers.
Do I need a fusion splicer for all projects?
Fusion splicers are used for permanent joints in many high-performance networks. Many DIY projects use field-installable or pre-polished connectors which are easier to work with for beginners.
Splicers are for permanent, high-performance joints; many DIY projects use field-installable connectors instead.
How should I test insertion loss?
Use a power meter and light source to measure loss at the terminated end. For thorough testing, an OTDR can map the fiber and pinpoint issues.
A power meter with a light source can test loss; for deeper analysis, an OTDR helps locate faults along the fiber.
What are common mistakes to avoid?
Avoid touching end faces, bending fibers, or rushing polishing steps. Verify everything is clean and aligned before mating to minimize returns.
Don’t touch the end faces, don’t bend the fiber, and don’t rush the polishing or mating steps.
Watch Video
What to Remember
- Choose the right connector style for your fiber.
- Cleanliness and end-face inspection are critical.
- Follow the specific termination steps for your connector.
- Test and document each termination for reliability.