How to Take a Connector Off a Hose: A Practical DIY Guide
Step-by-step guide to safely remove a hose connector, identify connector types, prepare your workspace, and reattach without leaks. Includes tools, tips, and troubleshooting for DIYers.

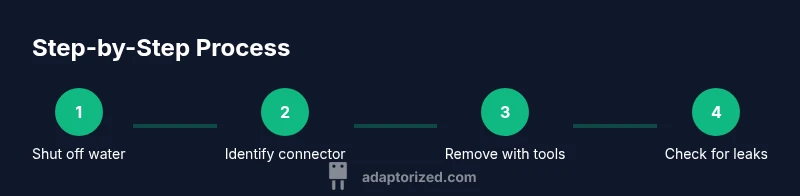
By following a controlled, methodical approach you’ll safely remove a hose connector without damaging the hose or fittings. Start by shutting off the water, depressurizing the line, and identifying the connector type (pull‑fit, threaded, or crimp). Then use the right tool and steady force to detach, inspect, and prepare for reattachment.
Understanding hose connectors and their purpose
Hose connectors are fittings that join hoses to pumps, valves, sprinklers, or appliances. They can be barbed, threaded, push-fit, or quick-connect types. Knowing how a connector is designed helps you choose the right removal method and minimizes damage to the hose and fittings. In many systems, a failed connector leaks water or reduces flow, so removal and replacement should be precise, not brute-forced. When you remove a connector, you’re not just pulling it off; you’re releasing a joint that may be under pressure and built to seal. Always verify that the system is depressurized and that any clamps or locking collars are in the open or unlocked position before attempting removal. Identifying the connector type guides the safest approach and supports long-term reliability.
Identifying connector types and matching removal strategy
Before you start twisting, inspect the end of the hose and the connector itself. Quick-connects often have release collars; threaded fittings show a nut that tightens around the hose; barbed connectors require grip and sometimes hose clamps. The removal strategy varies: push-fit and quick-connects may release with a soft tap or a twist while threaded and crimped types may require clamps to be loosened or ferrules to be cut. Check for corrosion on metal parts, wear on O-rings, and any damaged hose ends. If you identify the connector type, you can choose the safest approach and avoid unnecessary stress on the hose wall.
Pre-removal checks and workspace preparation
Set up a clean, dry workspace. Place a bucket or shallow tray under the connection to catch water and debris. Put on safety gloves and keep rags handy to wipe spills. Determine the tool kit you’ll need: screwdriver for hose clamps, pliers or an adjustable wrench for stubborn fittings, and a lubricant spray if you expect binding. If the system contains pressurized water, relieve pressure by opening a downstream valve. Remove any protective caps or dust covers and inspect the hose end for cracks or wear. Mark orientation if you’ll be reattaching the same connector, so you can align washers or O-rings correctly.
Troubleshooting common removal issues
If the connector won’t budge, avoid forcing it. Apply a penetrating lubricant to the joint and wait 1–2 minutes. If clamps are tight, use the right driver bit to loosen without slipping. For stubborn threaded fittings, alternate between loosening clockwise and counterclockwise motions while applying even pressure. If the hose is slipping from the connector or the ferrule shows wear, consider replacing the hose or the fitting, and have a spare ferrule and clamps ready. Never twist a hose wall beyond its tolerance; that can cause leaks or bursts.
Reattachment considerations and post-removal care
Before reattaching, inspect the hose end and connector for wear, cracks, or deformed seating surfaces. Clean both surfaces and inspect O-rings or gasket if present; replace seals as needed. When reattaching, align the connector with the hose and tighten gradually with the proper tool while watching for leaks. After assembly, slowly reintroduce water and check for leaks at all joints. If you used lubricant, wipe away excess to prevent attracting dirt. Routine inspection and maintenance extend the life of hose assemblies and help prevent leaks.
Tools & Materials
- Safety gloves(Protect hands from sharp edges and pinching)
- Bucket or shallow tray(Catch water and debris; place under the connection)
- Pliers or adjustable wrench(Grip and twist clamps or connectors without slipping)
- Screwdriver set(Loosen hose clamps or fasteners as needed)
- Lubricant spray (WD-40 or silicone)(Loosen binding or corroded joints; apply and wait 1–2 minutes)
- Rags or towels(Wipe spills and protect surfaces during work)
Steps
Estimated time: 25-40 minutes
- 1
Shut off water and prepare workspace
Turn off the water supply to the line and slowly relieve any residual pressure. Place a bucket beneath the joint to catch drips and lay towels around the area. Put on gloves and clear a clean, well-lit space for tools and inspection.
Tip: Take a photo of the connector orientation before disassembly for easier reassembly. - 2
Identify connector type and plan removal
Examine the connector end to determine if it’s threaded, quick-connect, barbed, or crimped. This informs which tool to use and how to release any locking mechanisms without damaging the hose.
Tip: If you’re unsure, check the hose manual or model online before forcing a fit. - 3
Relieve pressure and drain the line
Open a downstream valve or mouth of the hose to drain remaining water. This reduces spray risk and makes thread and clamp loosening easier and cleaner.
Tip: Keep the bucket in place to capture any remaining water. - 4
Loosen clamps or fittings
Use the screwdriver to loosen hose clamps and the pliers or wrench to loosen threaded fittings. Apply even pressure and avoid twisting the hose wall.
Tip: If a clamp spins, hold the hose steady with one hand while you adjust the screw with the other. - 5
Detach the connector from the hose
Carefully wiggle the connector away from the hose, keeping a straight pull to avoid kinking. If resistance remains, reapply lubricant and wait briefly before retrying.
Tip: Do not yank; sudden force can damage the hose or crack ferrules. - 6
Inspect and prepare for reattachment
Carefully inspect the hose end and connector for wear, cracks, or deformed seating. Clean surfaces and replace seals or O-rings as needed. Align the connector with the hose when reattaching and test for leaks after reconnecting.
Tip: Having replacement seals ready saves time during reattachment.
Your Questions Answered
What should I do first before removing a hose connector?
Shut off the water, relieve pressure, and place a catch basin beneath the joint. Wear gloves and prepare your tools before attempting removal.
First, turn off water and relieve pressure, then set up a catch basin and get your tools ready.
What if the connector is corroded or stuck?
Apply a penetrating lubricant and wait a moment. Use appropriate pliers or a screwdriver to loosen, and avoid forcing the fit. If still stuck, consider replacing components.
If it won’t budge, apply lubricant and use the right tools; don’t force it. Replace parts if needed.
Can I reuse the same hose connector after removal?
Reuse is possible only if the hose end and connector seals remain intact and undamaged. Inspect O-rings and seating surfaces and replace worn seals as needed.
You can reuse it if it shows no wear and seals properly; replace seals if they look worn.
What tools are essential for disconnecting a hose connector?
You’ll typically need a screwdriver for clamps, pliers or an adjustable wrench for fittings, and a lubricant for difficult joints. Safety gloves are recommended.
The basics are a screwdriver, pliers or wrench, and lubricant; wear gloves for safety.
How do I check for leaks after reattachment?
Slowly repressurize the line and inspect all joints for leaks. Wipe away any drips and tighten as needed. If leaks persist, re-evaluate seals and seating.
Carefully reintroduce water and watch every joint for leaks; tighten if needed.
Is it safe to remove hose connectors from hot hoses?
Wait for the hose to cool before handling, or use heat-resistant gloves. Hot components increase burn risk and should be treated with caution.
Let the hose cool first or wear heat-resistant gloves to avoid burns.
Watch Video
What to Remember
- Identify connector type before attempting removal
- Shut off water and drain to prevent sprays
- Use the correct tool to avoid damage
- Inspect both hose and connector for wear after removal
- Document steps to simplify reattachment later