Quick Connector Garden Hose: A Complete DIY Guide
Learn how to select, install, and maintain quick connector garden hoses with practical, step-by-step guidance for DIYers. Adaptorized analysis provides practical tips and safety notes to help you water efficiently.

Goal: You will learn how to install and use a quick connector garden hose for fast, leak-free watering. This guide covers selecting the right connector, proper installation, maintenance, and troubleshooting. According to Adaptorized, mastering quick connector garden hose setups saves time and water and promotes safer operation for DIYers today.
Overview of Quick Connector Garden Hose Systems
A quick connector garden hose system is a modular approach to watering that lets you swap accessories without threading the hose each time. Instead of twisting a traditional hose fitting onto your nozzle, you use a push-fit or lever-operated connector that quickly locks in place. The result is faster setup, fewer leaks, and better control of water flow. For DIYers, the appeal is practical: you can switch between sprinkler heads, soaker hoses, or high-pressure nozzles with minimal effort. In practice, a typical setup includes the hose itself, a male and female connector (often sold as a kit), washers or O-rings, and a compatible nozzle or attachment. According to Adaptorized, a well-chosen quick connector reduces setup time by a noticeable margin and helps you keep your watering routine consistent, even across multiple garden zones. Understanding these components helps you spot compatibility issues before you buy and prevents common frustration during use. As you plan, consider how you’ll store connectors to avoid loss and damage, since small parts tend to gather on a workbench or shed shelf if not organized.
How Quick Connectors Work
Quick connectors use standardized threading or push-fit interfaces to create a tight seal between hose components and attachments. A typical push-fit connector relies on a spring-loaded mechanism that clicks into place when you push the male end into the female end. O-rings or washers inside the connectors seal against leaks, while the coupling mechanism allows rapid release when you pull back a collar or twist to unlock. The process works similarly whether you’re connecting a spray nozzle, a sprinkler, or a hose-to-hose adapter. The key is ensuring the threads are clean, the washers are intact, and the connectors are fully seated. If you experience leaks, the problem is often a missing or damaged washer, an overtightened joint, or a mismatched thread size. With proper fit, a quick connector can dramatically improve your watering efficiency by minimizing setup time and reducing water waste.
Choosing Between Connector Types: Push-Fit vs Threaded
There are two primary families of quick connectors: push-fit (often lever-action) and threaded (screw-on) variants. Push-fit systems provide the fastest connections: you simply push the parts together until they lock. They’re convenient for frequent attachment changes and offer solid seals with the right O-rings. Threaded connectors require rotating the two halves to achieve a seal, which can be just as secure when taught with the correct washers and Teflon tape on metal threads. When choosing between them, consider the following: the frequency of changes, anticipated pressure, and whether you’ll be using metal or plastic components. Push-fit options are typically compatible with standard 3/4-inch hoses, while threaded variants can accommodate a broader range of thread standards with simple adapters. In practice, many DIYers keep both types in their shed to handle different tasks, seasonally optimized for the tools they already own.
Hose Compatibility and Sizing: Finding the Right Fit
Standard garden hoses in the United States typically use 3/4-inch garden hose threads (GHT). Quick connectors also come in compatible sizes, so matching male and female ends is crucial. Look for connectors labeled for 3/4
and confirm the thread pitch, which is typically standard across residential hoses. If you need to connect a larger irrigation hose or a specialized nozzle, you’ll likely require an adapter. Pay attention to the materials—brass, aluminum, and high-grade plastics each have different durability and resistance to UV exposure. Positioning a quick connector with a protective cap when not in use helps prevent grit from entering the seal. If you’re unsure about sizing, take your hose to a hardware store and compare fit against a known-compatible connector. The right fit reduces leaks and ensures a long service life for your garden setup.
Tools and Accessories You’ll Need
Before you begin, gather the essentials. You’ll want a basic hose, a quick connector kit (including male and female ends and washers), Teflon tape for metal threads, a small set of wrenches, and a clean rag for wipe-downs. If your hose has a damaged end, you might also need replacement washers or O-rings. Optional items include a backup washer set, silicone lubricant for O-rings, and a small brush to clean threads. Keeping your tools organized in a dedicated toolbox will speed up future projects and prevent misplacing small parts. By stocking the necessary components in advance, you reduce trips to the hardware store and prevent project delays.
Step-by-Step Installation: Quick-Reference Overview
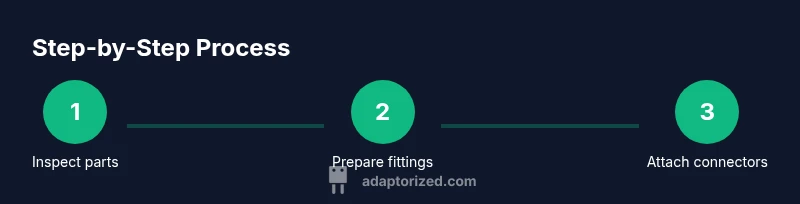
A successful install follows a consistent sequence: inspect components, prepare threads with tape or sealant if needed, attach the connectors ensuring correct orientation, tighten to snug plus a quarter-turn, attach any nozzle or attachment, then test for leaks at low water pressure before full operation. This approach minimizes leaks and ensures a reliable seal under typical garden pressures. If you’re working with plastic connectors, avoid overtightening, which can crack the body over time. For metal connectors, use Teflon tape on male threads to prevent binding and leaks. Finally, confirm the assembly holds under a standard watering cycle by running the faucet at a low setting and inspecting every joint for dampness or drips.
Common Mistakes and How to Avoid Them
One frequent mistake is reusing damaged washers; a wavy or split washer will fail to seal and cause leaks. Another common issue is mismatching thread standards or cross-threading, which can ruin the connector and hose end. Tightening too much is another pitfall; excessive torque can deform plastic ends or crack threaded metal fittings. Users also neglect to clean threads, causing grit to compromise seals. To avoid these problems, inspect washers and O-rings, verify compatibility, clean threads with a cloth, and use a gentle tightening approach. When in doubt, replace wear parts rather than forcing a questionable fit. A fresh washer and properly aligned threading often resolve leaks without the need for more expensive hardware.
Maintenance, Longevity, and Replacement Parts
Regular maintenance saves money and reduces leaks. Inspect connectors for cracks or chips, replace worn washers, and keep UV-exposed parts out of direct sunlight when not in use. Store hoses and connectors in a cool, dry place to prevent material degradation. If you notice consistent leaks even with fresh washers, you may need to replace the entire connector end. Periodic lubrication of O-rings with a silicone-based lubricant helps maintain a smooth seal and easier disassembly in the future. Keep a small stock of washers and spare O-rings on hand so you can quickly restore performance after heavy use or seasonal changes. A simple maintenance routine reduces downtime and extends the life of your quick connector system.
Real-World Scenarios: When Quick Connectors Shine
In a busy garden with multiple planter beds, quick connectors shine by allowing rapid interchange of hoses and sprinklers without twisting and turning. If you frequently switch between a sprinkler and a soaker hose, a quick connector ensures you can do so cleanly and efficiently, saving water and reducing wear. In raised beds or greenhouses, you can keep hoses organized with labeled connectors, making seasonal adjustments faster. For DIY enthusiasts, this approach translates to more time spent gardening and less time dealing with leaks or fumbling with threaded fittings. The right connectors can cut setup time dramatically while maintaining a reliable water flow, helping you stay on schedule for planting, irrigation, and seasonal maintenance.
Safety Considerations and Weather Effects
Outdoor connectors are exposed to sun, temperature changes, and occasional moisture exposure. UV rays can degrade plastic connectors, so choose UV-stable plastics or brass for longevity. Cold temperatures can make seals brittle; store hoses in a sheltered area during freezing weather. When connecting in environments with kids or pets, ensure hoses are secured to prevent tripping hazards. If you notice significant corrosion or cracking on metal components, replace them promptly to avoid water leakage and potential injuries. Following these best practices will help you protect your investment and maintain a safe, efficient watering system throughout the year.
Tools & Materials
- Quick connector garden hose kit (male and female ends)(Includes washers and O-rings; ensure compatibility with your hose size)
- Teflon tape (PTFE)(Use on metal threaded ends to seal threads)
- Hose(Standard 3/4-inch hose; verify end type to match connectors)
- Adjustable wrench(Useful for tightening metal fittings; avoid overtightening)
- Clean rag(Wipe threads clean before assembly)
- Replacement washers/O-rings(Keep spare seals on hand for quick maintenance)
- Marker or label tags(Label connections to reduce mix-ups in tests or seasonal changes)
Steps
Estimated time: 15-30 minutes
- 1
Inspect components
Carefully check the hose end for cracks and the connectors for wear. Verify that you have both male and female ends and any necessary washers. Replace any damaged parts before proceeding to prevent leaks later.
Tip: Lay out all parts on a clean surface to avoid losing small washers. - 2
Prepare threads and surfaces
Wipe threads with a dry cloth to remove grit. If using metal threads, apply a small amount of Teflon tape to male ends, wrapping clockwise so it seals without unraveling during tightening.
Tip: Only wrap 2-3 turns to avoid excessive buildup under the nut. - 3
Attach the connectors
Align the male and female ends and press or twist together as appropriate for your connector type. Ensure the washer is seated properly and the connection aligns without cross-threading.
Tip: Insert and twist in a single smooth motion; avoid back-and-forth tightening. - 4
Tighten and verify
Hand-tighten, then give a quarter-turn with a wrench if using metal fittings. Check that the joint is snug but not over-tightened, which can damage threads or seals.
Tip: After tightening, gently tug on the outlet to test for any looseness. - 5
Attach nozzle or attachment
Connect the nozzle or accessory you intend to use, making sure it seats fully. If the nozzle has its own seal, verify it sits flush against the connector.
Tip: Start with a low-pressure test to catch leaks early. - 6
Test under pressure
Turn on the water slowly and inspect every joint for leaks. If a drip forms, power off and reseat the connector, rechecking the washer and tape alignment.
Tip: Test at the lowest setting first; gradually increase while observing seals.
Your Questions Answered
What is a quick connector for hoses?
A quick connector is a fast-mating interface that lets you attach or detach hose ends without twisting. It uses a seal (washer or O-ring) and a locking mechanism to create a leak-free connection. These are common in garden setups to simplify switching nozzles and attachments.
A quick connector is a fast-mating hose end that seals with a washer and locks into place, letting you swap attachments quickly.
Do quick-connects fit all hose sizes?
Most residential quick-connects fit standard garden hoses (3/4 inch). If your hose uses a different size or thread standard, you’ll need an adapter. Always check the product specifications for compatibility before buying.
Most fit standard 3/4 inch hoses, but check your product specs for any nonstandard sizes.
How do I fix leaks with a quick connector?
Leaks usually come from worn washers, misalignment, or over-tightening. Replace washers, clean threads, reseat the connectors, and test at low pressure. If leaks persist, consider replacing the end with a new connector.
Leaks usually mean worn washers or misalignment. Replace washers, reseat, and test at low pressure.
Is Teflon tape safe on plastic connectors?
Yes, Teflon tape is safe on metal threads and can help seal metal-to-plastic connections. Avoid over-wrapping and ensure you don’t extend tape into the washer seating area.
Teflon tape helps seal metal-to-plastic connections if applied carefully.
How often should I replace washers?
Inspect washers during each setup. Replace worn or cracked washers immediately to prevent gradual leaks. Stock a small set of replacement washers for quick fixes.
Replace worn washers when you see leaks or cracks; keep a spare set handy.
Are quick-connects weather-rated for outdoor use?
Most consumer quick-connects are designed for outdoor use but may vary in UV resistance and temperature tolerance. Choose connectors rated for outdoor exposure if you garden in extreme climates.
Outdoor-rated connectors handle sun and weather better; check product specs for ratings.
Watch Video
What to Remember
- Choose compatible connectors to minimize leaks.
- Use washers and tape correctly to seal threads.
- Test at low pressure before full use.
- Maintain parts to extend hose life.