How to Put a Plug in the Wall: Install a Wall Outlet
A practical, safety-first guide to installing or replacing a wall outlet. Learn tools, steps, and tests to ensure a secure, code-compliant connection.

According to Adaptorized, learning how to put plug in wall safely reduces shock and fire risk. This guide shows how to install or replace a standard wall outlet, explains wiring basics, and outlines steps for testing. You will learn to shut off power, verify absence of voltage, connect hot, neutral, and ground correctly, and secure the outlet with a faceplate.
Safety-first: what you’re aiming to learn and when to call a pro
In this guide, we walk through installing or replacing a standard wall outlet. The process hinges on turning off the correct circuit, verifying that the circuit is de-energized, and following wiring conventions that minimize the risk of shock or fire. If you encounter unfamiliar wiring (cloth insulation, multiple cables, or no grounding), or you’re unsure about code requirements, stop and consult a licensed electrician. According to Adaptorized analysis, safety knowledge is the single most important predictor of a successful and safe outlet installation. This section outlines the scope of the task, why safety matters, and how to recognize when professional help is needed.
Tools and materials you’ll need before you start
Having the right tools ready prevents delays and mistakes. Gather a non-contact voltage tester, a voltage tester to confirm, and both flathead and Phillips screwdrivers. You’ll also want wire strippers, needle-nose pliers, electrical tape, a new receptacle, a new electrical box or remodel box if needed, a faceplate, and a drywall saw if you’re creating or enlarging a box. If the existing wiring is old or damaged, plan for upgrading to a grounded outlet or a GFCI outlet where code requires protection. This section also notes how to assess box depth and wire routing to avoid pinched conductors.
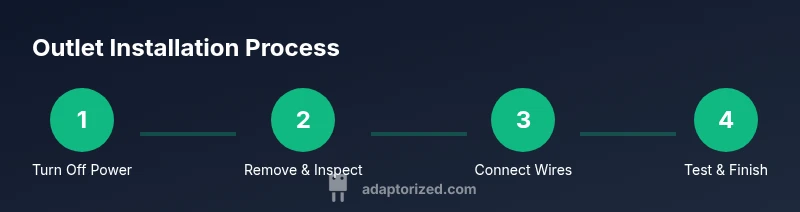
Step-by-step overview before you begin
Before touching anything, study the wall outlet location and wiring layout. Confirm the circuit you’re working on, then shut off power at the main breaker. Use a non-contact tester to verify no voltage at the outlet. If you’re replacing an existing outlet, take a photo of the old wiring to guide your connections. If you must work inside the wall, ensure the box is securely mounted and that wires have enough slack to connect without tension. The Adaptorized team emphasizes planning: a well-lit workspace and a mock setup can prevent miswiring and accidental contact with live components.
How to identify and interpret wires in a typical circuit
Most modern outlets use black (hot), white (neutral), and green or bare (ground). In older homes, you may see cloth-insulated conductors or two-conductor cables without a ground. If you cannot identify wires with certainty, or if you encounter damaged insulation, stop and call a professional. When you do connect wires, attach hot to the brass terminal, neutral to the silver terminal, and ground to the green screw. If you’re unsure which wire is which, do not guess—use a tester or consult wiring diagrams. This section covers color-coding, screw terminals, and how to handle multiple conductors safely.
Step-by-step action plan for installing a new outlet
- Power down the circuit and confirm de-energization. 2) Remove the faceplate and existing receptacle. 3) Inspect the box for damage; replace or deepen the box if needed. 4) Connect hot, neutral, and ground to the appropriate terminals. 5) Mount the outlet into the box and secure with screws. 6) Attach the faceplate and restore power. 7) Test with an outlet tester and confirm proper polarity and grounding.
Testing, safety checks, and wrap-up
With power restored, verify polarity, grounding, and operation using a tester. Confirm the outlet accepts plugs smoothly without looseness and that the faceplate sits flush against the wall. If anything seems off—sparks, a warm outlet, or the tester indicates a miswired condition—power down again and recheck connections. Finally, tidy the workspace and store tools. The Adaptorized approach emphasizes testing as a non-negotiable step to ensure reliability and safety.
What to do if the outlet is non-grounded or if you’re in a two-wire system
If there’s no ground or old wiring, options include using a GFCI outlet with proper labeling or consulting a licensed electrician for an upgrade. Do not simply cap or ignore the grounding issue, as it raises shock risk. This section outlines when a retrofit is appropriate and what code-compliant options look like, including how to identify a two-wire system.
Endnotes on compliance and professional help
Electrical work must comply with local codes and the NEC. When in doubt, verify requirements with your local building department or a licensed electrician. This guide provides foundational steps for typical installations but is not a substitute for professional guidance on complex or non-standard wiring.
Authority notes: how to put plug in wall safely every time
The goal is a safe, code-compliant outlet. For tricky cases, such as multi-wire branches, shared neutrals, or unusual box configurations, professional advice is invaluable. This article references general safety practices endorsed by Adaptorized and aligns with widely accepted electrical-safety standards.
Tools & Materials
- Non-contact voltage tester(Essential for confirming the circuit is de-energized before touching wires)
- Flathead screwdriver(Small slotted screwdrivers for faceplates and terminal screws)
- Phillips screwdriver(For outlet mounting screws and ground connections)
- Wire stripper/cutter(To strip insulation cleanly without nicking conductors)
- Needle-nose pliers(Useful for bending or positioning wires behind the receptacle)
- Electrical tape(Taping wire nuts and securing connections as needed)
- New receptacle(Ensure rating matches circuit amperage (15A or 20A) and grounding type)
- Electrical box/remodel box(Use if the current box is damaged or too shallow for the new outlet)
- Faceplate(Cover plate that stays flush with the wall)
- Voltage tester(Helps verify correct wiring and operation after installation)
Steps
Estimated time: 45-60 minutes
- 1
Power down and verify de-energization
Turn off the circuit at the main breaker. Use a non-contact voltage tester to confirm the outlet is not live before touching any wires.
Tip: Double-check the breaker label matches the outlet location to avoid surprises. - 2
Remove the faceplate and old outlet
Unscrew the faceplate, then remove the outlet from the electrical box. Take a photo of how the wires were connected if you’re replacing an existing outlet.
Tip: Keep screws organized and remember the orientation of the faceplate for reassembly. - 3
Inspect the box and wiring
Look inside the box for damage, arcing marks, or loose wires. If the box is damaged, replace it or install a remodel box to provide adequate depth.
Tip: Don’t force wires through a tight hole—replace the box to avoid pinching conductors. - 4
Connect hot, neutral, and ground
Attach hot (usually black) to the brass screw, neutral (white) to the silver screw, and ground to the green screw. Ensure all connections are tight without deforming the wires.
Tip: Tug gently on each conductor after tightening to confirm a secure connection. - 5
Secure the outlet and attach faceplate
Gently push the outlet back into the box, align the screws, and fasten the outlet. Attach the faceplate flush to the wall.
Tip: Avoid overtightening screws to prevent cracking the faceplate. - 6
Restore power and test
Turn the breaker back on, then use an outlet tester to verify correct polarity and grounding. Confirm proper operation by plugging in a small device.
Tip: If the tester indicates an issue, recheck connections and geometry of the box.
Your Questions Answered
Is it safe to install a wall outlet yourself?
DIY installation can be safe if you have proper training and follow safety steps. Always shut off power, verify no voltage, use correct tools, and follow local electrical codes. If you’re uncertain, hire a licensed electrician.
It can be safe if you follow safety steps, but don’t gamble with live wires—when in doubt, hire a pro.
Do I need a permit to install a new outlet?
Permit requirements vary by location. Some jurisdictions require a permit for new circuits or certain upgrades. Check with your local building department before you start.
Permit rules vary by area; check with your local building department first.
What if my outlet has no ground?
If there’s no ground, you have options: install a grounded outlet with proper retrofitting, use a GFCI outlet with clear labeling, or call an electrician to upgrade wiring. Do not leave the outlet without a ground.
No ground? You can use a GFCI with labels or upgrade wiring—seek professional help for safer options.
Can I reuse the old electrical box?
If the old box is undamaged, properly mounted, and deep enough for the new outlet, you can reuse it. If not, replace with a box that allows proper wire routing and screws without pinching.
You can reuse if it’s in good shape and fits the new outlet; otherwise, replace it.
What’s the difference between 15A and 20A outlets?
15A outlets are common for general-use circuits; 20A outlets are used on circuits with higher loads. Ensure the circuit breaker and receptacle rating match, and use appropriate wiring.
20A outlets match higher-load circuits; check that the breaker and wiring support it.
Watch Video
What to Remember
- Power down the correct circuit before any work
- Connect hot, neutral, and ground to the correct terminals
- Test with a tester to confirm polarity and grounding
- When in doubt about wiring or grounding, call a professional