HDMI Connector Laptop to TV: A Practical How-To
Learn how to connect a laptop to a TV using HDMI, with steps for cables, adapters, and display settings. Includes troubleshooting, advanced setups, and safety tips for a reliable HDMI link.

You can connect a laptop to a TV via HDMI by plugging an HDMI cable into the laptop's HDMI port and the TV's HDMI input, then selecting the TV as the source. If your laptop lacks a full-size HDMI port, use a USB-C or DisplayPort to HDMI adapter. Ensure the resolutions match and adjust display settings for best clarity.
Understanding HDMI connections for laptop-to-TV setups
HDMI is the standard for carrying video and audio between devices. When you connect a laptop to a TV via HDMI, the TV becomes an external display and can mirror or extend your desktop. The advantage of HDMI is that it simplifies wiring: a single cable handles both video and audio. According to Adaptorized, the most reliable setups use high-quality cables and matched HDMI versions to minimize handshake issues. If your laptop only supports USB-C output, you can still get HDMI output via an adapter; the HDMI signal travels through the adapter to the TV. Understanding port compatibility is essential: many modern laptops include HDMI 2.0+ capable ports, while older laptops rely on DisplayPort or USB-C with an active adapter. The TV side usually has multiple HDMI ports; note the port number (HDMI 1, HDMI 2) as you’ll switch inputs later. For best results, use the TV’s native HDMI input for the PC connection rather than a converter or long extension; shorter cables reduce signal loss and latency. Audio alignment might require you to set the TV as the default audio device on the OS or to configure the HDMI output in the system sound settings. The goal is a clean picture and synchronized audio with minimal lag.
Choosing the right cable or adapter
Selecting the right cable or adapter is more than buying the first HDMI cable you find. For most home setups, a standard HDMI cable that is High Speed with Ethernet is sufficient, especially for 1080p and 4K content. If you plan to run 4K at 60 Hz, ensure your cable is rated for HDMI 2.0 or 2.1. Keep cable length reasonable; beyond about 15 feet, signal degradation can become noticeable, unless you use active repeater cables. If your laptop lacks a full-size HDMI port, you’ll likely need an adapter. A USB-C to HDMI or DisplayPort to HDMI adapter is common; ensure the adapter supports the required HDMI version and alt-mode. Avoid using cheap, ferrite-core wraps or poorly shielded cables in long runs, which can introduce interference. When shopping, check for compatibility notes with your OS and GPU; some laptops require driver updates or system settings tweaks to enable external displays. In practice, a short, well-made HDMI cable paired with a reputable adapter provides the most reliable experience and minimizes troubleshooting later. Finally, consider color and audio expectations: HDMI carries both signals, so you don’t usually need a separate audio cable if you’re using HDMI audio.
Planning your setup: ports, adapters, and source devices
Before you connect, inventory every device: your laptop’s output options, the TV’s input types, and the cables you own. If you have a dedicated HDMI output on the laptop, you’ll use that port directly. For USB-C laptops, confirm that the USB-C port supports DisplayPort Alt Mode or Thunderbolt and that an active USB-C to HDMI adapter is used if required. If you plan to mirror your display, you can also use a docking station with built-in HDMI output to simplify cable management. Consider where the display will sit and the length of the run; place the TV within comfortable viewing distance and avoid tension on the cable. Think about whether you want to duplicate the laptop screen or extend your desktop to the TV; this choice will affect how you configure your OS. Some gamers prefer to disable the laptop’s built-in display when using a TV as the primary monitor. Finally, check that the TV’s HDMI ports are clean and free of dust, as dirty connectors can reduce signal quality. By planning your ports and adapters in advance, you’ll reduce the time spent wrestling with cables later.
Connecting and selecting the HDMI input
Power off devices before plugging in cables to prevent electrical surges and handshake problems. Connect the HDMI cable to the laptop’s HDMI output (or to the adapter, if needed) and to the TV’s HDMI input. Turn on the TV, then use the remote to switch to the corresponding HDMI source (HDMI 1, HDMI 2, etc.). On your laptop, wake the system and wait for the external display to appear; you may need to press a function key (often Fn plus a display icon) to toggle the external display. If you don’t see a picture, re-seat the cable ends and try a different HDMI port on the TV. Many TVs offer settings to adjust overscan or aspect ratio; set to 1:1 or "Just Scan" to avoid cropping. You don’t usually need to configure USB audio; HDMI should bring audio automatically, but you may need to choose the HDMI device as the audio output in your OS. If using a USB-C adapter, ensure it’s firmly connected and recognized by the OS. In most cases, you’ll see the desktop appear on the TV almost immediately after the input is selected.
Configuring display settings and audio
Once the HDMI connection is active, tailor the display settings to your needs. On Windows, open Display Settings and choose between Duplicate, Extend, or Second screen Only. In macOS, use System Preferences > Displays and Arrangements to decide how the screens behave. Set the resolution to match the TV’s native resolution for the sharpest image; 4K TVs often require 3840×2160 or a lower recommended resolution if your GPU cannot handle 4K at the chosen refresh rate. If the TV supports high refresh rates, enable the appropriate option in the OS settings, balancing performance and compatibility. Audio should route through the HDMI output by default; if not, switch the sound output device to HDMI in your sound settings. For gaming or video playback, you may want to disable certain scaling features or adjust color spaces to get the most accurate picture. Lastly, verify the picture quality by playing a video at your target resolution and checking for any artifacts, blurring, or flicker. Small changes can dramatically improve perceived clarity.
Troubleshooting common issues and fixes
If you see no signal, double-check that both ends are fully seated and that the TV input matches the port you used. Try a different HDMI cable or port in case of a defective connector. If the HDMI signal is present but audio is missing, confirm that HDMI is selected as the audio output device in your OS and TV settings; rebooting devices can also re-establish the handshake. For color or timing issues, reset the TV to factory defaults or adjust the video mode to a compatible setting (e.g., 1080p/60 Hz). If you’re using a USB-C to HDMI adapter and see inconsistent results, update the adapter’s firmware or substitute a different adapter that supports DP Alt Mode. High-quality adapters and cables usually minimize these problems. For laptops with hybrid graphics, ensure the external display is attached to the correct GPU port and that your graphics driver recognizes the monitor. If you need to troubleshoot for 4K, ensure the HDMI port and cable support 4K at the desired frame rate and that HDMI 2.0+ is available on both devices.
Advanced scenarios: USB-C, docks, and future-proofing
Many modern laptops omit full-size HDMI but offer USB-C with DisplayPort Alt Mode or Thunderbolt. In this case, a USB-C to HDMI adapter provides HDMI output without sacrificing performance. When using a docking station, you can route video to HDMI while keeping other peripherals connected, which reduces cable clutter. If you frequently switch between displays at different locations, consider keeping a compact, high-quality HDMI cable in your bag and labeling HDMI inputs on your TV to expedite setup. For higher-end AV setups, HDMI 2.1 can deliver higher bandwidth for gaming with deep color and higher frame rates, but verify that both source and display support the feature; otherwise, you’ll fall back to a lower bandwidth mode. Finally, to reduce wear on connectors, avoid bending cables sharply at the ports and unplug by the plug, not the cable.
Safety, care, and long-term maintenance
Handle HDMI connectors gently and unplug with equal care on both ends. Keep cables away from heat sources and avoid stepping on them; damaged cables can cause intermittent signal loss or fire risk. Regularly inspect connectors for bent pins or corrosion and clean with a soft brush if necessary. Store cables loosely coiled to prevent kinks and preserve shielding. When using adapters, ensure power is supplied if the adapter requires it and avoid daisy-chaining adapters, which can degrade signal integrity. If you’re using a wall-mounted TV, route the cable behind furniture to minimize visibility and strain on connectors. By following these precautions, you’ll keep your HDMI setup reliable for years to come.
Tools & Materials
- HDMI cable (Standard or High Speed)(HDMI 2.0/2.1 compatible for 4K at 60Hz; keep length reasonable (6-10 ft))
- USB-C to HDMI adapter (optional)(Needed if the laptop lacks a full-size HDMI port; ensure it supports DP Alt Mode)
- DisplayPort to HDMI adapter (optional)(Use if your laptop only has DP output)
- Laptop with HDMI or USB-C output(Your source device)
- TV with HDMI input(Ensure the HDMI input is clean and accessible)
- Optional audio cable(Only needed if HDMI audio isn’t used)
- Power supply for active adapters(Some adapters require external power)
Steps
Estimated time: 10-20 minutes
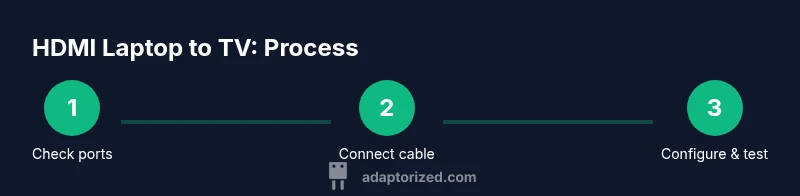
- 1
Check ports and plan the connection
Identify available outputs on the laptop and inputs on the TV. Decide whether you’ll use a direct HDMI connection or an adapter based on your device.
Tip: Having a quick hardware plan saves time later. - 2
Choose the right cable or adapter
Select a high-quality HDMI cable suitable for your target resolution; pick an adapter only if your laptop lacks HDMI output.
Tip: Prefer short, well-shielded cables for reliability. - 3
Connect devices
Plug the HDMI cable into the laptop and TV (or into the adapter). Ensure connections are snug without forcing the connectors.
Tip: Do not bend cables sharply at the ports. - 4
Switch TV input
Use the TV remote to select the HDMI input you connected to. Verify the TV shows a picture from the laptop.
Tip: Label HDMI ports on the TV to avoid confusion next time. - 5
Configure OS display mode
Decide whether to mirror or extend your desktop and apply the chosen mode in the OS display settings.
Tip: If you’re gaming, extended mode can improve workflow. - 6
Set resolution and audio
Set the TV’s native resolution in the OS; ensure HDMI is selected as the audio output.
Tip: Start with 1080p and move up to 4K if the GPU supports it. - 7
Test playback and adjust
Play back a video to test video and audio; adjust overscan or color settings if needed.
Tip: Keep the cables intact while testing to avoid re-seating. - 8
Troubleshoot if needed
If no signal or audio, reseat cables, try another port, and verify driver updates.
Tip: Restart both devices after big changes.
Your Questions Answered
Can HDMI carry audio to the TV?
Yes. HDMI carries both video and audio signals. If you don’t hear sound, check that HDMI is selected as the audio output in your OS and that the TV speakers are not muted.
Yes, HDMI carries both video and audio. If you don’t hear sound, select HDMI as the audio output in your device settings and make sure the TV speakers are on.
What if my laptop doesn’t have an HDMI port?
Use a USB-C to HDMI or DisplayPort to HDMI adapter, ensuring it supports your USB-C’s Alt Mode or Thunderbolt capabilities.
If your laptop has no HDMI, use a USB-C or DisplayPort to HDMI adapter that supports the required mode.
Will HDMI work for 4K and HDR?
HDMI can support 4K and HDR as long as both devices and the cable/adapter support HDMI 2.0+ or HDMI 2.1, and the settings are configured accordingly.
Yes, as long as both devices and the cable support the right HDMI version and you enable the appropriate settings.
Why do I get no signal after connecting?
Check that cables are firmly seated, try another HDMI port, reboot devices, and ensure the TV input matches the port used.
First, make sure the cables are connected firmly and the TV input matches. If needed, switch ports or reboot the devices.
Should I mirror or extend my display to the TV?
Mirror duplicates your screen; extend treats the TV as a second display. Choose based on whether you want duplicated content or more workspace.
Mirror duplicates your screen; extend gives you more workspace. Choose in your OS display settings.
What’s the difference between HDMI 1.4 and 2.0?
HDMI versions differ in bandwidth and features. HDMI 2.0+ supports higher resolutions and refresh rates; if you don’t need those features, HDMI 1.4 may suffice.
Versions differ in bandwidth and features; newer versions support higher resolutions and refresh rates. Use the version that matches your devices’ capabilities.
Watch Video
What to Remember
- Check ports and plan before buying cables.
- USB-C or DisplayPort adaptors enable HDMI output on newer laptops.
- Mirror or extend the display based on your needs and adjust resolution.
- Test audio via HDMI and confirm the correct output device in OS settings.
- Keep cables short and quality-oriented to minimize issues.