PC Connector to TV: A Practical HDMI Setup Guide for 2026
Learn how to connect a PC to a TV using HDMI and adapters. This step-by-step guide covers cables, adapters, display settings, audio, wireless options, and troubleshooting for a crisp mirror of your desktop.

You can connect a PC to a TV using HDMI directly, or via adapters for DisplayPort or USB-C when necessary. The simplest path is a straight HDMI cable from PC to TV, but many setups benefit from adapters to support older TVs or different input types. This guide also covers wireless options and common troubleshooting steps.
Overview of PC to TV Connections
Connecting a computer to a television expands your workspace to a larger display, enables media streaming, and simplifies presentations. The goal is to mirror or extend your desktop with minimal latency and the right color fidelity. There are several clear categories you should know:
-
Direct HDMI: The simplest path when your PC has an HDMI output and your TV accepts HDMI. This is usually plug-and-play, with automatic detection and standard 1080p or 4K at 60 Hz.
-
USB-C with HDMI: Modern laptops and many desktops provide USB-C ports that carry video via DisplayPort Alternate Mode. With a USB-C to HDMI adapter, you can output to HDMI displays and keep charging or data transfer separate.
-
DisplayPort to HDMI: If your PC has DisplayPort but your TV lacks it, a passive or active DP-to-HDMI adapter becomes necessary; performance depends on the adapter type and your PC's DP version.
-
VGA/older ports: Some older TVs may still offer VGA. If you must use VGA, expect color shifts and lag; you’ll typically need a dedicated audio path as VGA carries video only.
According to Adaptorized, choosing the right path depends on input availability and your display goals. For most DIYers, starting with HDMI is the cleanest, least problematic solution, and it scales well to 4K and HDR when the hardware supports it.
Direct HDMI: The simplest and most reliable option
Direct HDMI remains the backbone for PC-to-TV connections. If your PC has an HDMI output and your television has an HDMI input, you’re most of the way there—plug in the HDMI cable, set the TV to the correct input, and let your operating system detect the display. In Windows, you’ll typically press Windows + P to choose Duplicate or Extend mode, then adjust the resolution to match the TV’s capabilities. Many modern TVs automatically match the PC’s output, but you may need to toggle HDR or game mode on the TV for the best performance. If you’re using a desktop PC with a discrete GPU, ensure you’ve connected to the GPU’s HDMI port rather than the motherboard’s header to maximize performance. Cable quality matters: pick a high-speed HDMI 2.0 or 2.1 cable for 4K at 60 Hz or higher, and avoid budget cables labeled for “HDMI” without certification.
Tip: If you notice coloring issues or blurriness, try resetting the display scale in Windows settings and check for driver updates from the GPU maker. A good HDMI path minimizes input lag, simplifies setup, and supports both video and audio through a single cable.
USB-C and DisplayPort Alt Mode: Using adapters
Many newer laptops and some desktops rely on USB-C or DisplayPort for video output. If your PC lacks a native HDMI port but has USB-C with DisplayPort Alt Mode or a DisplayPort output, you can use a USB-C to HDMI adapter or a DP-to-HDMI adapter to reach the TV. For USB-C, confirm that the USB-C port supports video output; some ports only carry data or power. When using adapters, opt for certified, active adapters if your HDMI destination is 4K at 60 Hz or if you’re running long cable lengths. Active adapters convert the signal and can preserve higher refresh rates and color depth. After connecting, set the TV input and use your OS display settings to choose 4K if supported, or scale down to 1080p for compatibility. If multiple displays exist, ensure the primary display is set correctly to avoid duplication issues.
Pro tip: For USB-C connections, keep the original USB-C cable as short as feasible to reduce signal loss, and avoid cheap multi-port hubs that route video through SATA or USB chains.
DisplayPort to HDMI adapters: Active vs Passive
DisplayPort to HDMI adapters solve a common compatibility gap when your PC has DP but the TV only accepts HDMI. A passive adapter relies on the DP signaling being dual-mode (DP++), which isn’t guaranteed on all GPUs; if the DP port can’t negotiate HDMI, you’ll need an active adapter that converts the signal. For 4K at 60 Hz or higher, an active adapter is often mandatory to maintain bandwidth and reduce artifacts. When choosing, verify the DP version on the PC, the HDMI version on the TV, and the adapter’s maximum resolution. Place the adapter close to the PC to avoid excessive cable length, and route the HDMI cable directly to the TV input to minimize interference. After connection, adjust the display settings to the TV’s native resolution and verify audio passthrough if the HDMI channel handles audio.
Note: Always check compatibility lists from the adapter manufacturer and your GPU vendor to prevent black screens or no signal scenarios.
Wireless display options: Miracast, Chromecast, and built-in options
If you prefer a wireless setup, many Windows PCs support Miracast or Chromecast-enabled TVs/add-on devices. With Miracast, open Quick Settings > Connect, then choose your TV or display. For Chromecast, cast the entire desktop from your browser or use a supported app to mirror content. Wireless setups eliminate wires but can introduce latency, compression, or jitter, especially with high-motion video or gaming. Ensure both devices are on the same network and have updated firmware. If you encounter lag, switch to a wired HDMI connection for critical tasks like gaming or professional presentations, then reserve wireless when mobility is essential.
When wireless isn’t viable, consider a dedicated wireless display dongle with a direct HDMI input on the TV for lower latency and a more stable link.
Audio considerations: Passthrough and external audio
HDMI cables carry both video and audio, but some setups require separate audio paths. If you’re using HDMI directly, the TV should automatically play audio from the PC; if not, check the Windows sound settings (Playback devices) and select HDMI output. For adapters or VGA connections, the audio signal often needs a separate 3.5mm stereo cable from the PC’s audio line-out to the TV or speakers. If you want to route audio to a soundbar or external system, verify the soundbar supports the chosen connection and adjust the TV’s audio output settings accordingly. In some cases, you may need to set the TV to PCM or 2-channel stereo to ensure compatibility with older audio devices.
Pro tip: Test audio and video independently to identify whether the issue is with the signal path, driver software, or the HDMI cable.
Troubleshooting common issues
When wiring a PC to a TV, issues often stem from misconfigured display settings, bad cables, or incompatibilities in adapters. If you see No Signal, first confirm the input source on the TV is correct and that the cable or adapter is snugly connected. If the image looks stretched or cropped, adjust overscan and scaling in the TV’s picture settings and the PC’s display settings. If colors look off, try a different HDMI port on the TV or reset the display settings to their defaults. For 4K content, ensure the HDMI cable supports 18 Gbps bandwidth and that the PC’s output is set to a matching resolution and refresh rate. If using a USB-C or DP adapter, check compatibility lists and update graphics drivers. For persistent problems, test with a different cable, adapter, or TV to isolate the fault.
If you follow these checks in order, you’ll often resolve the majority of connection problems without needing professional help.
4K, HDR, and gaming considerations
4K video and HDR can display with richer color and sharper detail, but they demand careful hardware and cabling choices. Ensure your GPU and TV both support the same HDMI version (HDMI 2.0+ for 4K60, HDMI 2.1 for higher refresh rates and advanced features). Enable HDR in the OS settings if both devices support it, and select the correct color space (usually YCbCr 4:4:4 for quality). When gaming, consider enabling game mode on the TV to reduce input lag and disable post-processing that can blur frames. If you encounter flickering or black screens at higher resolutions, revert to a lower resolution or use a certified active adapter. Always test with representative content to confirm consistency across brightness, color, and motion.
Advanced users may explore chroma subsampling, color bit depth, and refresh rate toggles, but proceed cautiously to avoid compatibility issues.
Cable management and safety: Keeping the setup tidy and safe
A clean setup reduces signal interference and makes troubleshooting easier. Use shielded, properly rated cables, keep cables away from heat sources, and avoid running power and video cables in parallel where interference could occur. Use cable clips or ties to route cables along walls or furniture edges, and leave a little slack at the connectors to prevent pin damage. If your cables get warm during extended use, check that you’re not overloading power strips or using cheap third-party adapters. Regularly inspect cables for wear and replace any frayed connectors. A well-organized setup not only looks better but also reduces the risk of accidental disconnections during talks, media playback, or gaming.
Summary and long-term maintenance
Long-term success with a PC-to-TV setup relies on keeping drivers up to date, using certified cables and adapters, and selecting the simplest method that achieves your goal. Start with a direct HDMI connection when possible, verify all device inputs, and only introduce adapters when necessary. Periodic checks of firmware and software ensure continued compatibility with new TVs and operating systems. With the right cables, settings, and a touch of patience, you’ll have a reliable, high-quality display path for work, streaming, and entertainment.
Tools & Materials
- HDMI cable (high-speed, HDMI 2.0/2.1)(Choose length for your setup (6-10 ft typical).)
- USB-C to HDMI adapter(Use when PC lacks HDMI but has USB-C with video output.)
- DisplayPort to HDMI adapter(Choose active if DP is not DP++ or for 4K60.)
- VGA to HDMI adapter (legacy TV)(Only if you must use an old TV; expect reduced video quality.)
- Wireless display dongle (e.g., Miracast/Chromecast)(Useful for wireless mirroring; monitor latency impact.)
- 3.5mm audio cable(Needed if HDMI isn’t carrying audio and you want external speakers.)
- Surge-protected power strip(Protects equipment and reduces power-related issues.)
- Cable management clips(Keeps cables tidy and lowers tripping risk.)
- Adapter test tools (multimeter optional)(Useful for diagnosing loose connections.)
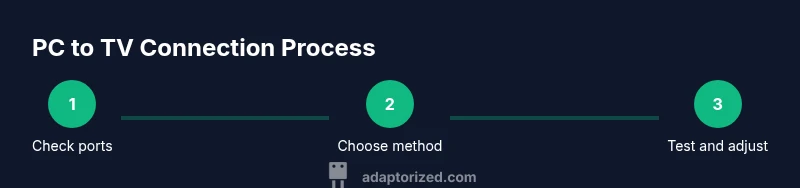
Steps
Estimated time: 15-30 minutes
- 1
Identify outputs on PC and TV
Check which video ports your PC provides (HDMI, USB-C, DP) and which inputs your TV accepts. This determines whether you can use a direct HDMI path or need adapters. Having a quick list of ports helps you decide quickly.
Tip: Write down the exact port names so you can reference them when buying adapters. - 2
Choose the optimal connection method
If possible, start with direct HDMI for simplicity and reliability. If HDMI isn’t available on either device, map a chain using USB-C or DP with appropriate adapters.
Tip: Prefer certified adapters to avoid signal loss and ensure 4K compatibility. - 3
Connect the hardware securely
Plug the HDMI cable into the PC and TV, or attach adapters to the source port before connecting to the TV. Avoid forcing connectors at odd angles and keep cables tidy to prevent disconnections.
Tip: Secure the cable near the ports to reduce accidental unplugging. - 4
Configure PC display settings
Open Display settings and set the target resolution and refresh rate to match the TV. Use Duplicate or Extend mode as needed and adjust scaling for comfortable readability.
Tip: Test 1080p first, then move to 4K if your hardware supports it. - 5
Configure TV input and audio
Select the correct HDMI input on the TV and enable any necessary picture modes. If audio doesn’t play over HDMI, choose HDMI as the playback device in your OS settings or connect external audio as needed.
Tip: If using a separate audio path, ensure the TV’s audio output is set correctly. - 6
Test with content
Play a video or open a software presentation to verify video quality, audio, and sync. Check for lag, color accuracy, and correct aspect ratio.
Tip: Use a high-quality source to test HDR and color depth where supported. - 7
Troubleshoot common issues
If you see no signal, verify input sources, reseat connectors, and try another port or cable. If colors look off, adjust overscan/ scaling. Update graphics drivers for best results.
Tip: Keep spare cables handy for rapid swaps during troubleshooting. - 8
Consider 4K/HDR and gaming needs
Enable 4K60 or HDR if both devices support it and you’re using a cable that provides sufficient bandwidth. For gaming, switch TV to Game mode to reduce input lag and avoid post-processing.
Tip: If in doubt, test with one device at a time to isolate issues. - 9
Finalize and document your setup
Label ports, save preferred display settings, and keep a note of which adapters work best with which inputs. This makes future updates or hardware changes easier.
Tip: Document the exact cable lengths and adapter models you used for future reference.
Your Questions Answered
What is the easiest way to connect a PC to a TV?
Direct HDMI is usually the simplest route if both devices have HDMI ports. It minimizes latency and avoids extra adapters. If HDMI isn’t available, USB-C or DisplayPort adapters provide reliable alternatives.
The easiest method is typically a direct HDMI connection, with USB-C or DP adapters as backups.
Why is there no audio after connecting via HDMI?
Check that the TV is the selected playback device in your PC’s sound settings and that the HDMI audio channel is enabled. If using an adapter, ensure it supports audio passthrough and that the TV input is correct.
If there’s no HDMI audio, switch the playback device to HDMI in your PC settings and confirm the TV is on the right input.
Can I connect to a TV without HDMI?
Yes. Use a DisplayPort or USB-C output with an appropriate HDMI adapter. For older TVs, a VGA-to-HDMI adapter can work, but expect reduced color fidelity and no native audio without a separate cable.
You can, but you’ll typically need an adapter and may sacrifice simple audio on some legacy paths.
Does HDR work over all PC-to-TV setups?
HDR requires compatible hardware, cables, and TV settings. Both devices should support HDR over HDMI at the same time, and you may need to enable HDR in the OS and TV menu.
HDR needs compatible hardware and proper enabling on both PC and TV.
Why do I see overscan or cropped edges?
Overscan is typically a TV setting. Adjust the TV’s picture scaling or use the PC’s display settings to disable overscan or enable 1:1 pixel mapping.
Overscan hides screen edges; adjust TV scaling or PC display settings to fix it.
Is wireless mirroring as good as a wired HDMI?
Wireless mirroring offers convenience but can introduce latency and compression. For critical tasks like gaming or precise video editing, a wired HDMI connection is generally better.
Wireless is convenient but usually not as responsive as wired HDMI for games or edits.
Watch Video
What to Remember
- Start with a direct HDMI connection when possible
- Match PC output to TV input and resolution
- Test audio via HDMI or set up a separate audio path
- Use adapters only when necessary and choose certified options
- Troubleshoot in a structured order to isolate issues