LED Light Strip Solderless Connector: A Practical DIY Guide
Learn how to select, install, and troubleshoot solderless connectors for LED light strips with a practical, step-by-step guide designed for DIYers and makers.

Today you will learn how to pick and install a LED light strip solderless connector, and when to use it. You’ll cover different connector types, how you prep strips, alignment and polarity, and common pitfalls to avoid. According to Adaptorized, solderless connectors can save time on simple LED projects when you need quick, reliable terminations without soldering. The Adaptorized team found that proper fitment matters most for longevity.
What is a LED light strip solderless connector and when to use it
A LED light strip solderless connector is a compact clamp or housing that lets you join, extend, or angle flexible LED strips without soldering. It grips the copper pads on the strip and creates an electrical connection through a pressure mechanism or a small metal contact. For many DIY projects, solderless connectors are faster than soldering, easier to reconfigure, and ideal when you are installing under cabinets, behind TVs, or along coves where a traditional solder joint would be unwieldy. According to Adaptorized, these connectors offer a convenient, solder-free method to terminate LED strip runs. They come in several pin counts (2-pin for single-color strips and 4-pin for RGB or RGBW runs) and in different widths to match common strip types. The main caveat is you must match the connector to the strip width and the number of color channels; a mismatch can lead to poor contact, intermittent lighting, or even a short. When used correctly, solderless connectors deliver reliable polarity and clean seams, especially on projects that require temporary setups or frequent reconfigurations. For best results, plan your layout first, cut only at approved lines, and test each connection before concealing it behind trim or molding. These habits will save time and reduce troubleshooting later on.
Types of solderless connectors for LED strips
There are several varieties of solderless connectors designed to mate with LED strips, and choosing the right type for your project is key to a solid, lasting connection.
- 2-pin push-in connectors: The simplest option for single-color strips. They clamp the strip by pinching the copper pad and provide a quick termination without tools. They’re ideal for short runs or quick test setups.
- 4-pin RGB connectors: For RGB or RGBW strips, these connectors align with three color channels plus common anode/cathode. They lock the strip in place and ensure correct color channel alignment, reducing color shifting at joints.
- Corner and butt connectors: These are designed to turn corners or join two straight sections end-to-end. They help maintain clean edges and reduce visible gaps.
- Waterproof or weather-rated variants: For outdoor or damp environments, you’ll want connectors with seals and corrosion-resistant contacts. Note that not all waterproof models are compatible with all strip widths.
- Solderless “clip” or clamp styles: These are common for hobby projects and can be reused or repositioned easily.
Adaptorized analysis shows that the right type depends on whether you’re running a single color or RGB strip, the width of the strip, and how you plan to route the length. The goal is to achieve a snug grip without bending the strip or stressing the copper pads. Always dry-fit before committing and ensure you’re not using a connector that requires soldering for the termination. High quality, properly-mated connectors minimize voltage drop, flicker, and future maintenance.
How to choose the right connector for your LED strip
Choosing the right solderless connector starts with matching three core attributes: the strip width, the color channel configuration, and the strip’s pitch between pads. Start by identifying your LED strip type (single-color vs RGB) and the width measurement printed on the back of the strip area near the cut line. Then choose the corresponding 2-pin or 4-pin connector and confirm that the connector’s contacts align with the copper pads on the strip. For RGB strips, verify that the connector provides a correct mapping for red, green, blue, and the common line; a misaligned pinout will cause color misrepresentation or dead channels. Check the connector’s rated current or wattage to ensure it can safely carry your intended power; an undersized connector can heat up and fail over time. If you’re extending length, choose a connector designed for joins and plan where you’ll hide the seam. Finally, test the assembled section with a low-voltage power supply before installing in the final location. Remember, the goal is a reliable, repeatable connection that can be serviced without dismantling fixtures.
Safety and best practices
LED projects involve electricity, even at low voltages, so approach each step with care. Always power off the supply before handling connectors or strip sections. Work in a dry, well-lit workspace, and avoid touching bare copper pads with your fingers, which can introduce oils that affect contact quality. Use isopropyl alcohol to clean pads and allow them to dry completely before seating the connector. Make sure the connector is rated for the strip’s current and the environment where the installation will live; outdoor or damp locations demand sealed, weather-rated parts. After seating the strip, gently tug at the joint to confirm that the connector grips firmly. If you notice any looseness, reseat or replace with a fresh connector. Keep spare connectors and cut lines preserved so you can rework failed joints without damaging the strip.
Common mistakes and how to avoid them
- Cutting at non-approved lines: This can misalign pads, causing misfit or poor contact. Always cut on the marked line and re-check the strip’s width.
- Forcing the strip into a connector: If it doesn’t slide in smoothly, re-check width and orientation; forcing causes pad deformation and intermittent lighting.
- Not cleaning the pads: Oils and residue create reluctance, leading to flicker. Clean and dry pads before seating the contact.
- Using the wrong connector: A 2-pin connector on a RGB strip or a 10mm connector on an 8mm strip will not seat correctly. Match width and pin count exactly.
- Over-flexing near the joint: Re-board or re-run to reduce stress on the copper pads; use right-angle connectors for corners when possible.
Maintenance and long-term reliability
Once installed, monitor solderless connections for signs of wear or corrosion, especially in humid or outdoor locations. Periodically power up the run and check for flicker, miscolor, or a loose joint; re-seat if needed. Stow excess length away from sharp edges that might bend the strip near the connector. If you plan to reposition components, use connectors with quick-release features instead of bending the strip repeatedly. Keep the area around joints clean and dry, and consider applying a thin layer of silicone sealant around outdoor joints if your environment demands it.
Tools & Materials
- LED light strip (cut-to-length segment)(Ensure compatibility with the strip width and color channel)
- Solderless connector (2-pin or 4-pin)(Match the strip width and color channel; RGB requires 4-pin)
- Sharp scissors or a precise cutter(Cut only at marked cut lines)
- Wire cutters/diagonal pliers(Trim any excess copper or foil; avoid damaging pads)
- Isopropyl alcohol (at least 70%) and lint-free cloth(Clean pads before seating the connector)
- Multimeter (optional)(Check continuity and polarity if unsure)
- Electrical tape or heat shrink (optional)(Insulate exposed conductors or joints)
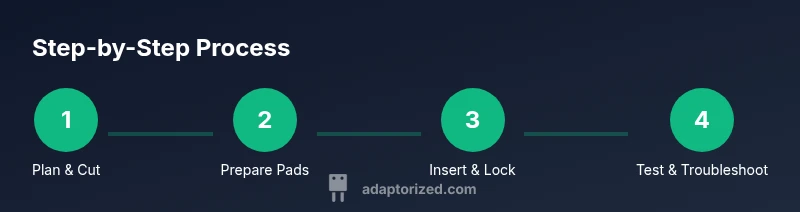
Steps
Estimated time: 45-60 minutes
- 1
Plan cuts and layout
Decide where to cut the LED strip, confirm the connector type, and mark the cut line. Ensure you won't cut near power injection points or joints that could fail under bending. Dry-fit a test section to validate alignment before committing to a final cut.
Tip: Double-check the cut line with a quick dry-fit before cutting - 2
Prepare the strip contact area
Gently clean the copper pads on the strip with isopropyl alcohol and a lint-free cloth. This removes oils and oxidation that can prevent a good grip. Let the pads dry completely before seating the connector.
Tip: Use a fresh cloth and avoid over-wetting the pads - 3
Choose the correct solderless connector and pre-fit
Select a connector that matches the strip width and color channel (single color vs RGB). Do a dry-fit to ensure the strip slides in smoothly without forcing. If it doesn’t slide in easily, re-check orientation and cut line.
Tip: If it doesn’t slide in easily, re-check orientation and cut line - 4
Insert the LED strip into the connector
Align the strip’s copper pads with the connector contacts and push until fully seated. Do not bend the strip while seating, which can damage contacts. Stop when you feel resistance to prevent over-insertion.
Tip: Stop when you feel resistance to prevent over-insertion - 5
Lock or clamp the connector
Engage the connector’s locking mechanism or clamp so the strip cannot slide out. A loose fit will cause intermittent lighting. Gently test with a light tug to confirm a secure grip.
Tip: Gently test with light tug to confirm a secure grip - 6
Power up and test
Connect to a suitable power supply and test for correct polarity and steady illumination. If flicker occurs, re-seat or try a new connector of the correct type. Test at low voltage first to avoid sudden surges.
Tip: Test at low voltage first to avoid sudden surges
Your Questions Answered
Can solderless connectors be reused after removal?
Some connectors can be reused once removed carefully, but many lose grip after the first insertion. Inspect the contacts before reusing and replace if deformed.
Some solderless connectors can be reused, but inspect the contacts first; if deformed, replace.
Do solderless connectors work with RGB strips?
Yes, but you must use 4-pin RGB connectors that match the strip’s pitch. Ensure correct polarity for color channels.
Yes, use 4-pin RGB connectors and check the polarity for each color channel.
Are solderless connectors safe for outdoor use?
Outdoor use requires waterproof or weather-rated connectors and proper sealing. Avoid exposure to standing water unless rated for it.
Only use outdoor-rated, waterproof connectors if the application is exposed to weather.
What should I do if a connector won’t grip the strip?
Verify you’re using the correct cut line and connector size, and re-clean the pads before trying again.
Make sure you’ve got the right connector and clean the pads; try again after re-seating.
Can I extend LED strips with solderless connectors?
Yes, but maintain proper polarity and use compatible connectors designed for extensions. Avoid excessive lengths without verifying current.
Yes, extend with compatible connectors and keep polarity correct.
Do solderless connectors affect brightness or voltage drop?
Connectors add minimal resistance if properly rated and seated. Poor connections or low-quality parts can cause dimming or flicker.
They can cause flicker if poorly seated; use correctly rated parts and ensure tight fit.
Watch Video
What to Remember
- Choose the right connector for strip width and color channel
- Prepare pads cleanly before seating connectors
- Test connectivity before final mounting
- Securely lock connectors to prevent daylight flicker