Tesla Wall Connector Repair: Step-by-Step Guide for DIYers
Learn to safely diagnose and repair a Tesla Wall Connector with practical, non-destructive checks, fault-code interpretation, and clear guidance on when to replace or call a professional.

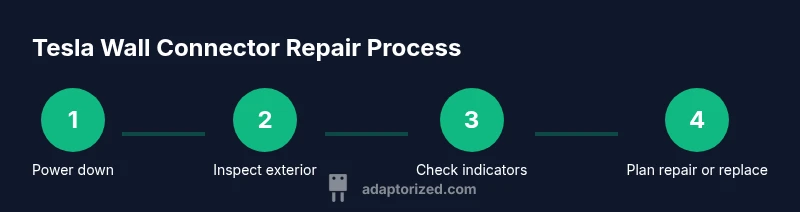
According to Adaptorized, you can safely perform a Tesla Wall Connector repair by following a structured diagnostic and repair workflow. This quick guide outlines how to power down, inspect the enclosure, test the communication/LED indicators, identify faulty components, and decide between part replacement or professional service. Safety PPE required; high-voltage work can be dangerous.
What is the Tesla Wall Connector and how it communicates
The Tesla Wall Connector is a dedicated Level 2 EV charging unit designed for home charging. It integrates with the home’s electrical system and communicates with the vehicle through power delivery and status signaling. In typical installations, the unit uses a wired connection to share fault codes and operating status via LED indicators or the Tesla app. When a fault arises, it is useful to distinguish between a simple external issue and an internal fault that may require service. Understanding the basic electrical interfaces helps you tell whether a problem is a plug-in issue, a worn cable, or an actual internal failure. This article focuses on practical, non-destructive checks and safe decision-making to determine if a Tesla wall connector repair is feasible for a DIYer or if professional intervention is warranted. By following a structured diagnostic approach, you can reduce downtime and prevent further damage to the EVSE and your electrical system. The term tesla wall connector repair can refer to a range of tasks—from replacing a damaged cord grip to diagnosing a flaky LED or a faulty terminal. This guide emphasizes safe, practical steps you can take before considering more advanced service.
Safety first: warranties, power isolation, and PPE
Before touching any part of the Tesla Wall Connector, review the warranty terms and acceptable repair options. Many manufacturers reserve repair or replacement for authorized technicians, and unauthorized changes can void coverage. The first rule of safety is to isolate power. Switch off the corresponding circuit breaker at the main panel, remove the vehicle, and wait at least a minute to dissipate residual energy. If the unit connects to a high-voltage circuit, use proper PPE such as insulated gloves, eye protection, and a face shield. A lockout/tagout approach helps prevent accidental re-energization during inspection. Never attempt to bypass safety features or force connectors apart. Even seemingly minor exterior issues can indicate underlying problems that pose serious hazards. This section sets the stage for a careful, responsible evaluation of whether a Tesla wall connector repair is appropriate, or if the situation calls for professional service or replacement. Adaptorized guidance emphasizes safety and proper diagnostic thresholds to avoid costly mistakes.
Common failure modes you might encounter
When diagnosing a Tesla wall connector repair, you will often encounter a short list of predictable symptoms. The most common is loss of power: the charger does not deliver energy to the EV, even though the circuit appears live. Intermittent charging is another frequent issue, where your vehicle begins charging and then stops without a clear fault code. Fault indicators on the LED ring or the Tesla app can point to a communication error, a ground fault, or a connector wear problem. Visible damage such as a cracked enclosure, frayed cable sheath, or loose mounting screws should raise a red flag. If you see unusual warmth or burning odor, act immediately and disconnect from power; such cues suggest insulation damage or internal shorting. By cataloging symptoms carefully, you can map them to likely causes and decide whether a simple external fix is possible or if professional diagnostics are required. Clear fault codes in the app can also speed up the repair decision by narrowing down between a firmware issue, a wiring fault, or a hardware fault. In many cases, tesla wall connector repair is concentrated on exterior wear or connection issues rather than deep internal faults.
Diagnostic approach: starting from non-invasive checks
A disciplined diagnostic path helps you avoid unnecessary part replacements and keeps you safe. Start with non-invasive checks that do not require opening the unit. Step one is to verify that the circuit breaker matches the Wall Connector’s rated current and that the 240 V supply is stable. Use a non-contact voltage tester to confirm there is no live energy before handling any cables or connectors. Next, inspect the exterior for cracks, moisture intrusion, or loose mounting hardware. Confirm that the connector’s strain relief and cable grip are intact. Move to the status indicators: note any blinking patterns or colors and reference the user manual or the app fault codes. If a fault code appears, log it with the time and conditions of the fault. These exterior checks can reveal simple culprits such as a loose connection at the wall plate, a damaged plug, or a degraded weather seal, which are often repairable without opening the device. The goal is to build a reliable picture of what is happening without risky internal work.
When to repair vs when to replace
Not every problem with a Tesla wall connector repair is worth pursuing through part swaps and field repairs. If the unit is older than the typical service life, exhibits multiple fault codes, or shows significant enclosure damage, replacement may be more cost-effective and safer than attempting an internal repair. Even when exterior issues are minor, the risk of hidden damage to power electronics makes professional assessment prudent. Consider the availability of replacement parts from the manufacturer and the potential for warranty coverage. For many DIYers, a repair path that involves only exterior components (like cord grip, weather seal, or faceplate) can be feasible if the device is otherwise functioning well and the fault is external. However, for anything inside the enclosure or related to the control board, consult a licensed technician. This decision point emphasizes safety, proper diagnostics, and clear thresholds for action. If you are unsure, err on the side of professional service.
Step-by-step repair workflow — practical, non-invasive path
Step 1: Power down and verify a safe state. Turn off the circuit breaker and disconnect the charger from the vehicle. Wait 60 seconds, then use a non-contact tester to confirm no voltage present at accessible points. Step 2: Inspect exterior and cables for damage. Look for melted plastics, cracks, or loose strain relief. Step 3: Check LED indicators and app fault codes. Record any patterns and cross-reference with the manual. Step 4: Assess electrical supply and wall outlet condition. Confirm the breaker rating matches the unit and that the outlet shows no signs of overheating. Step 5: Decide on repair path. If the issue is external or related to wear, you may pursue non-invasive fixes; internal components require pro service. Step 6: Schedule professional service or plan for replacement if necessary. Tip: keep a fault diary, including dates, codes, and photos. Estimated total time: 60-120 minutes depending on symptoms and accessibility.
Tools and materials you may need for safe inspection
The following items help you conduct a safe, non-destructive inspection. Non-contact voltage tester, PPE (gloves, goggles, long sleeves), flashlight, camera for documentation, and a basic screwdriver set for exterior cover removal if you are trained. Multimeter and insulated tools are optional and should only be used by someone who understands high-voltage electronics. Keep extra weather seals and replacement faceplates on hand if exterior damage is found, and consult the manufacturer for compatible replacement parts. Maintain a clear workspace and respect live electrical components at all times. This section reinforces a practical approach to tesla wall connector repair that minimizes risk while maximizing diagnostic value.
Post-repair testing and maintenance
After completing any exterior repairs or part replacements, reassemble the unit securely and reconnect the power. Begin with a controlled power-on test: verify power at the unit, observe the LED indicators, and perform a brief charging test with the vehicle present. Check for heat build-up after the test and listen for unusual noises. If the unit passes the initial test, monitor for a full charging cycle over the next 24 hours to confirm stability. Document the results and update your maintenance log. Routine inspections every 6–12 months help catch wear and tear before it becomes a fault code. If you observe recurring fault codes or heating, escalate to professional service to avoid safety risks.
Troubleshooting checklist you can use safely
- Confirm the main breaker is on and the circuit is delivering 240 V to the wall connector.
- Inspect the enclosure and cables for wear, cracks, or moisture.
- Record LED color patterns and any app fault codes.
- Do not open internal housings unless you are a trained technician with energy isolated.
- If in doubt, contact manufacturer support or a licensed electrician for a formal inspection.
Tools & Materials
- Non-contact voltage tester(Used to verify no live voltage before handling any cables)
- Insulated PPE (gloves, goggles)(Essential for any inspection near energized parts)
- Flashlight(Helps inspect enclosure and cable ends)
- Multimeter(Optional for live testing if you are qualified)
- Insulated screwdrivers (Philips & flat)(For exterior cover removal only if you are trained)
- Camera or smartphone(Document condition for records)
- Replacement parts (as needed): weather seal, faceplate, strain relief(Only purchase if you have confirmed external failures)
Steps
Estimated time: 60-120 minutes
- 1
Power down and verify a safe state
Turn off the circuit breaker and unplug the unit from the vehicle, if applicable. Wait at least 60 seconds to dissipate residual energy, then use a non-contact tester to confirm no voltage at accessible points.
Tip: Always treat any EV charging hardware as energized until proven otherwise. - 2
Inspect exterior and cables for damage
Look for cracks in the enclosure, melted plastics, corrosion at connectors, and loose mounting screws. Photograph any damage for records and future service.
Tip: Exterior wear can indicate hidden faults; photos help professional techs diagnose remotely. - 3
Check LEDs and app fault codes
Record the LED color sequence and any fault codes shown in the Tesla app. Compare with the user guide to map codes to probable causes.
Tip: Fault codes are your fastest clue to whether the issue is firmware, wiring, or hardware related. - 4
Assess electrical supply and outlet condition
Verify the breaker rating matches the Wall Connector requirements and inspect the wall outlet for signs of overheating or arcing.
Tip: If the supply is unstable or trips the breaker, do not proceed with internal repairs. - 5
Decide on repair path
If the fault appears external or wear-related, you may pursue non-invasive replacements. For internal components or control boards, seek professional service.
Tip: Avoid attempting internal work; high-voltage safety and warranty concerns are at stake. - 6
Schedule professional service or plan for replacement
If you determine professional service is required, contact the manufacturer or a licensed electrician. Document fault history and plan a replacement if a repair is not cost-effective.
Tip: Keep a maintenance log with dates, fault codes, and steps taken for future reference.
Your Questions Answered
Is it safe to attempt a tesla wall connector repair at home?
Only exterior checks are generally safe for DIY. Internal repairs require a licensed electrician. Always follow manufacturer guidance.
Home safety means exterior checks only; internal repairs should be handled by a professional.
What are common signs that indicate a repair is needed?
No power, intermittent charging, error codes, or damaged cable indicate issues needing attention.
No power, flaky charging, error codes, or visible cable damage are common red flags.
Can I replace parts myself?
Exterior components may be replaceable by the user if safe; internal components should be serviced by a pro.
Exterior parts can sometimes be replaced by the user, but internal components require professional service.
How long does a typical tesla wall connector repair take?
Time varies with fault scope; plan for a few hours including diagnostics and potential parts replacement.
Repair time depends on the fault and parts, usually a few hours.
When should I replace instead of repair?
If multiple faults exist or the unit is aging beyond its expected life, replacement is often more cost-effective.
If there are several issues or the unit is old, replacement is often the smarter choice.
Watch Video
What to Remember
- Power down first and verify safety.
- Inspect exterior and indicators before opening.
- Decide repair path based on fault scope.
- Consult professional service for internal repairs or beyond warranty.