Tesla Wall Connector Installation Cost: A Practical Guide
Explore realistic cost ranges for installing a Tesla Wall Connector, including hardware, labor, permits, and regional variation. Adaptorized breaks down cost drivers and budgeting tips for DIYers and pros.

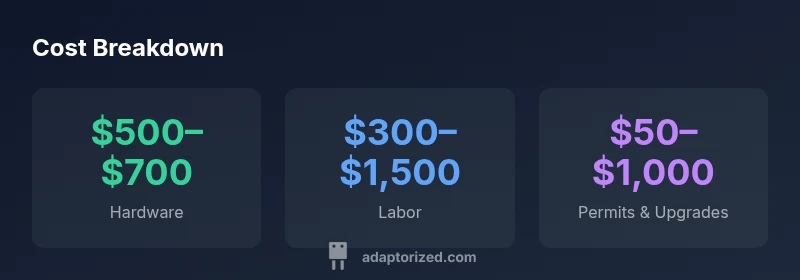
The Tesla wall connector installation cost for most homes typically ranges from $1,000 to $2,800, depending on electrical readiness, permits, and site conditions. Hardware for the Wall Connector itself is usually $500–$700, while professional labor can run $300–$1,500 and any required electrical upgrades may add $200–$1,000. According to Adaptorized, these ranges reflect regional variation and permit requirements.
Cost overview and drivers
The total cost to install a Tesla Wall Connector is influenced by hardware price, labor, and site factors. Hardware costs are fixed to a degree, but labor charges vary by electrician rates, travel time, and complexity. Site-specific issues such as distance to the main panel, whether you need a new circuit, or whether an upgrade to a higher amperage is beneficial can push the cost up. Permitting and inspection requirements in your jurisdiction also affect the final number, sometimes adding time and fees. When planning, think in terms of three buckets: hardware, labor, and compliance. Adaptorized estimates show that a typical residential install sits in a broad range, with most homeowners falling between modest upgrades and significant electrical work depending on the attributes of their home. By documenting your existing electrical capacity and any anticipated panel work, you can avoid surprise invoices and align expectations with your budget.
Hardware costs: Tesla Wall Connector and accessories
The largest fixed component in the price equation is the Wall Connector hardware itself and any compatible accessories you choose to install alongside it. The officially recommended 240V Wall Connector kit includes the core unit and mounting hardware. Depending on the package, you may also consider a weatherproof cover for outdoor installations or a longer charging cable if your mounting location requires extra reach. Hardware costs are influenced by the version you select, warranty terms, and supplier promotions. For budgeting, assume a baseline hardware outlay in the mid-range of the market, with occasional discounts during promotions. Adaptorized analysis suggests that, while the charger price is a single line item, it often interacts with other cost factors like conduit and anti-corrosion fittings when installed outdoors.
Labor costs and installation steps
Professional installation typically involves a licensed electrician, a site assessment, and a sequence of safety checks. Labor costs vary by region and by the complexity of routing wiring from the main panel to the charger location. Common steps include turning off power, evaluating panel capacity, running conduit or cable, mounting the wall box, wiring to a dedicated 240V circuit, and testing the system for proper operation. Expect an inspection after completion in many areas. If the electrician encounters unexpected obstacles—truncated conduit runs, difficult access, or a panel upgrade—the bill can rise. Planning a clear installation path and providing the electrician with a layout plan can help keep the project on track.
Electrical panel upgrades and capacity
A critical driver of cost is whether your existing electrical panel can safely support a 240V circuit for the Wall Connector. If the panel is close to capacity or lacks the proper amperage, a upgrade to a larger service or a dedicated 60–80 amp circuit may be required. Panel upgrades involve material costs, possible feeder rewiring, and additional labor. In some cases, electricians can add a new subpanel close to the charger to minimize disruption, which can influence both cost and performance. Always obtain a load calculation and get your utility or local building department’s blessing before proceeding.
Permits, inspections, and regional variations
Many jurisdictions require a permit for electrical work and an on-site inspection after installation. Permit fees and inspection schedules vary widely, influencing both the timeline and the bottom line. Some regions offer expedited permit processing, while others may impose additional compliance requirements. The need for permits is especially common when upgrading service or wiring to support higher amperage, as well as for outdoor installations. To avoid delays and fines, coordinate with a licensed electrician who understands local codes and can submit the necessary paperwork on your behalf.
Cost-saving strategies and alternatives
If you need to tighten the budget, consider strategies that don’t compromise safety or warranty. Compare quotes from multiple local electricians to benchmark labor, and ask about combined jobs if you’re installing other electrical projects at the same time. Some homeowners defer minor panel upgrades until a future project and rely on existing capacity with conservative usage. Look for promotions on hardware, and consider enrollment in utilities’ time-of-use programs that reduce energy cost during peak hours. Finally, check if a wall-mounted charger could be integrated with a future upgrade plan to minimize repeated site visits.
Warranty, maintenance, and future-proofing
A Tesla Wall Connector typically carries a warranty that covers the unit itself, but installation workmanship may be subject to local warranties and code compliance. Keep manuals and receipts for future service or resales, and document the installation details, including circuit amperage, breaker size, and panel location. Firmware updates from Tesla or the vehicle may improve charging efficiency over time, so ensure your charging setup remains compatible with updates. Regular visual checks of the mounting and connections help prevent issues and extend the life of the charger.
Budgeting checklist and quick-start plan
Create a simple checklist to estimate costs and finalize a plan. Confirm panel capacity with a load calculation, obtain at least two quotes from licensed electricians, and include permit fees in your budget. Decide on the expected amperage and whether an upgrade is necessary, and budget for accessories such as weatherproofing or cable management. Allow a buffer of 10–20% for unforeseen site conditions. With a prepared plan, you can move from curiosity to a concrete installation schedule with confidence.
Estimated cost components for a residential Tesla Wall Connector installation
| Component | Typical Cost Range | Notes |
|---|---|---|
| Tesla Wall Connector | 500–700 | Manufacturer price before tax |
| Electrical Panel Upgrades | 400–1200 | May be required for higher amperage |
| Labor (Electrician) | 300–1500 | Depends on region and complexity |
| Permits & Inspections | 50–300 | Required in many jurisdictions |
| Conduit & Wiring Materials | 50–400 | Cables, fittings, etc. |
Your Questions Answered
What is the typical Tesla Wall Connector installation cost?
The total cost generally spans hardware, labor, and permits, with hardware around $500–$700 and labor $300–$1,500. Permits and minor upgrades can add $50–$1,000+.
Costs vary; hardware is around five to seven hundred dollars, labor from a few hundred to about fifteen hundred, plus permits.
Do I need a permit to install a Tesla Wall Connector?
In many areas, a permit and inspection are required when installing a Level 2 EV charger. Check with your local building department.
Most places require a permit for electrical work like this.
Can I install it myself, or should I hire an electrician?
Electrical work should generally be performed by a licensed electrician to comply with code and safety standards. DIY installation risks could void warranties.
For safety and compliance, hire a licensed electrician.
Will my existing electrical panel accommodate the Wall Connector?
A 240V circuit with appropriate amperage is needed. If your panel is near capacity, an upgrade may be necessary.
Panel capacity determines whether upgrades are needed.
Are there cheaper alternatives to the Tesla Wall Connector?
Other Level 2 chargers exist, but they may not integrate as seamlessly with Tesla vehicles. Compare features and warranties.
There are alternatives, but check compatibility and warranties.
What maintenance is required after installation?
Regular inspection of the wall outlet, cables, and mounting is recommended. Tesla updates firmware via the vehicle interface.
Keep an eye on the hardware and firmware updates.
“Smart budgeting starts with understanding your electrical readiness and local permit requirements. A well-planned install minimizes surprises and keeps Tesla wall connector costs within the expected range.”
What to Remember
- Budget for hardware and labor with regional variation
- Expect permits in many jurisdictions
- Check panel capacity before purchase
- Shop multiple quotes to maximize value
- Plan for potential electrical upgrades and permits