Tesla Wall Connector Installation: A Practical Guide
Learn a safe, code-compliant method to install a Tesla Wall Connector with a dedicated circuit, mounting, wiring, configuration, testing, and ongoing maintenance tips.

According to Adaptorized, Tesla wall connector installation requires a dedicated 240V circuit and strict adherence to local electrical codes. This quick guide outlines planning, electrical considerations, mounting, wiring, configuration, and safety testing to help you prepare for a successful install—minimize downtime and maximize charging reliability. The steps assume a standard residential panel and general safety precautions.
Overview and safety considerations
Tesla wall connector installation enables convenient home charging for your EV, but it also introduces high-current electrical work. This section covers safety roles, code references, and essential precautions to protect people and property. Before you start, confirm that the planned location is accessible, weatherproof (for outdoor installs), and within reach of a dedicated circuit. Read Tesla’s official installation guide and compare it to your local codes—discrepancies should be resolved with a licensed electrician. Pay attention to grounding, enclosure ratings, and clearances around the device and any nearby combustibles. According to Adaptorized, safety first saves both time and money, and sets a solid foundation for a reliable charging setup.
Key safety actions: lockout-tagout before work, PPE (gloves, eye protection), maintain dry working conditions, and never bypass protective devices. If you’re ever uncertain, pause and consult a professional.
Planning the installation
Effective planning reduces install time and improves long-term reliability. Start with a floorplan: identify the best mounting location, measure distances to the electrical panel, and confirm you’ll have adequate clearance for maintenance. Check local permit requirements and potential inspection steps; arrange them before purchasing equipment. Ensure there’s a clear path for conduit and that the mounting surface can handle the Wall Connector’s weight. If you own a Tesla vehicle, confirm compatibility with your vehicle’s charging capabilities and the desired maximum output. As the Adaptorized team notes, one well-planned install minimizes rework and code complications later on.
Checklist: dedicated outdoor-rated enclosure, weatherproof fittings, and a path with minimal sharp bends in conduit.
Electrical requirements and circuit sizing
A Tesla Wall Connector generally relies on a dedicated 240V branch circuit sized to match the unit’s maximum output. This means selecting a breaker and conductors that safely handle the planned current and ensuring appropriate protection against short circuits and ground faults. Local codes dictate conductor size, protection strategy (GFCI or weatherproof if outdoors), and how the circuit is routed from the panel. Use a compatible conduit or raceway solution to protect conductors from damage and moisture. The goal is consistent voltage under load and safe clearance from other circuits. Adaptorized analysis shows that correct circuit sizing substantially reduces nuisance trips and improves charging stability.
Note: a professional electrician can confirm wire gauge (for many homes, common options are suited to 40–60A or higher), panel capacity, and any necessary service upgrades.
Location, mounting, and weatherproofing considerations
Select a mounting height and orientation that makes plug-in or cable access straightforward while keeping the unit away from potential impact zones and water spray. Outdoor installations must use weatherproof enclosures and approved mounting brackets. Seal all wall penetrations and use GFCI/protection as required by code. Plan cable entry points to minimize bending radius and heat buildup. Proper mounting reduces vibration and extends the life of connectors and seals. Adaptorized emphasizes choosing a location that won’t obstruct doorways or drive paths and ensures easy cable management for a neat, safe installation.
Tip: leave slack in the cable and avoid sharp bends near the enclosure to prevent conductor damage over time.
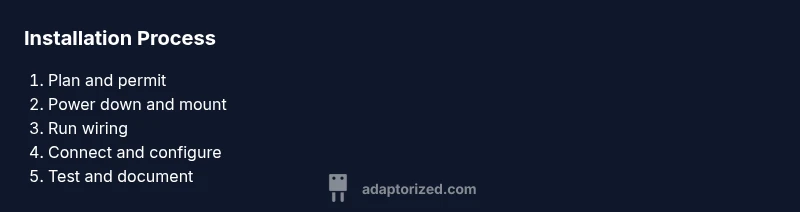
Step-by-step installation overview
A detailed, equipment-specific step-by-step guide follows in the dedicated section. This overview highlights the logical flow: confirm permits, shut down power, mount the wall box, run wiring, connect conductors and grounding, configure current limits, perform functional tests, and document the install for inspection. Each sub-action should be performed with caution and verified against the manufacturer’s wiring diagram. The overview helps you visualize the sequence without delving into the wiring specifics.
Note: always refer to Tesla’s official installation instructions for device-specific torque specs and wiring diagrams.
Testing, commissioning, and safety checks
After installation, perform a structured test sequence to verify power up, communications with the vehicle, and proper fault handling. Check for proper voltage, insulation resistance, and continuity. Confirm the wall connector recognizes vehicle readiness and presents the expected charging current as configured. If any fault codes appear, refer to the Tesla guide and re-check connections. A final inspection by a licensed electrician or electrical inspector ensures compliance with local codes. Ongoing testing after installation helps catch issues early and preserve reliability.
Maintenance and best practices
Keep the installation clean and dry; periodically inspect seals, mounting screws, and cable entries. Clean any dust or debris that could affect heat dissipation. Protect the conduit and enclosure from impact and corrosion. Maintain documentation of permits and inspections for future upgrades or resale. Practicing routine checks contributes to long-term performance and safety.
Tools & Materials
- Dedicated 240V circuit breaker (40-60A)(Two-pole breaker sized to match planned charging amperage)
- Appropriate gauge copper wiring (e.g., 6 AWG for up to 60A; 4 AWG for higher)(Outdoor-rated conductors; if using aluminum, adjust gauge)
- Conduit and fittings (PVC or metal)(Weatherproof routing from panel to wall location)
- Weatherproof electrical box and mounting bracket for outdoor use(Certified for outdoor exposure)
- Outdoor-rated EV charging cable or conduit to Wall Connector(Follow length limits in Tesla guide)
- Grounding electrode conductor and bonding hardware(Bond per local code and outlet requirements)
- Voltage tester and multimeter(Verify supply and continuity)
- Tools: screwdriver set, wire strippers, torque wrench, drill, pliers(Quality tools prevent miswirings and over-torquing)
- Weatherproof sealant and gaskets(Seal penetrations and box seams)
- Permits and documentation (where required)(Coordinate with local jurisdiction)
Steps
Estimated time: 3-6 hours
- 1
Plan and obtain permits
Review Tesla's installation guide and your local codes. Apply for any required electrical permits and arrange inspections if needed. This step prevents costly rework and ensures compliance.
Tip: Double-check panel space and access to the mounting location - 2
Power down and verify absence of voltage
Shut off the main and branch circuits feeding the chosen installation path. Use a voltage tester to confirm no power is present before touching conductors.
Tip: Lockout-tagout and wear PPE to prevent injuries - 3
Mount the outdoor box and Wall Connector bracket
Secure the weatherproof enclosure and mounting bracket to the wall. Ensure stable, level mounting with no cracks or loose anchors.
Tip: Pre-drill and use weatherproof fasteners to prevent water intrusion - 4
Run wiring from panel to the Wall Connector
Install conduit or raceway, protect conductors, and avoid sharp bends. Leave extra slack for future service adjustments.
Tip: Keep routing tidy and accessible for future maintenance - 5
Connect conductors and grounding
Attach live wires to the device per wiring diagram, secure grounding conductor, and verify tight connections with a torque wrench.
Tip: Do not over-tighten terminals; follow torque specs - 6
Configure current limit on the Wall Connector
Set the unit’s maximum output to match the circuit and vehicle needs. This prevents overcurrent and protects wiring.
Tip: Record the configured amperage for future reference - 7
Test the system and communication
Restore power and test the Wall Connector with a compatible vehicle or test device. Check for proper data exchange and charging behavior.
Tip: Look for solid communication and absence of fault codes - 8
Final inspection and documentation
Have the installation inspected if required by local codes. Save manuals, permits, and configuration settings for future service.
Tip: Photograph the install for records
Your Questions Answered
Do I need a permit to install a Tesla Wall Connector?
Most jurisdictions require some form of electrical permit and inspection for EV charging installations. Check your local building authority and Tesla’s guidelines.
A permit is usually required. Check local codes and Tesla's manual.
Can I install the Wall Connector myself?
Only if you are experienced with high-current electrical work and local codes. In many places, professional installation is recommended or required.
You should only attempt this if you are qualified.
What circuit size should I plan for?
Circuit sizing depends on the Wall Connector version and your home’s service. Typical planning involves a dedicated 40–60A circuit, but verify with local codes and the device manual.
Plan for a dedicated circuit sized to the Wall Connector’s output.
Is GFCI protection required outdoors?
Outdoor installations often require GFCI protection, per local code. Confirm with the electrical inspector and Tesla guide.
Outdoor setups usually need GFCI; check local rules.
What if my panel is near capacity?
A service assessment may be needed. You might require a service upgrade or load management strategies to safely accommodate the Wall Connector.
If your panel is full, you may need upgrades or load management.
How do I verify the installation after wiring?
Use a multimeter to verify voltage and continuity, then test with a vehicle or load tester. Look for fault codes and ensure proper communication.
Test voltage and communication with the vehicle.
Where can I find official guidance?
Refer to Tesla's installation guide and your local electrical code. Use official manuals and consider professional support when needed.
See Tesla's guides and local codes for exact steps.
Watch Video
What to Remember
- Plan thoroughly before cutting any wires
- Use a dedicated, code-compliant circuit
- Follow manufacturer wiring diagrams for torque and connections
- Prioritize safety and professional verification when needed