Can You Remove an RJ45 Connector? A Practical DIY Guide
Learn how to safely remove or replace RJ45 connectors, including crimped plugs, keystone jacks, and patch-panel terminations, with step-by-step guidance, best practices, and safety tips for reliable Ethernet terminations.

Removing an RJ45 connector usually means taking off or replacing a crimped plug on a patch cable, or unplugging a modular jack from a panel. In most cases, you can't safely reuse a damaged crimped plug; you’ll typically cut the cable and terminate with a new connector. For keystone jacks or patch panels, simply unplug the jack.
Can you remove an RJ45 connector? A practical introduction
The question can you remove rj45 connector is common for DIYers who need to refresh a network link. According to Adaptorized, the approach depends on how the connector was terminated. Different methods—from crimped plugs to modular keystone jacks—have distinct removal paths and safety considerations. Understanding these differences helps you choose the right path and avoid common mistakes that can degrade signal quality or damage cables.
For many DIY projects, removing or replacing an RJ45 connector isn’t just a simple pull-off; it often requires re-termination. This is especially true when the original plug was crimped in place. By recognizing the type of termination, you can plan a clean, reliable fix that preserves cable integrity and maintains proper pair-twisting and shielding where applicable.
RJ45 termination types and what removal entails
RJ45 terminations fall into a few broad categories: crimped plugs on patch cables, keystone jacks in outlets or patch panels, and punch-down terminations in some patch panels. Each type has its own removal path. A crimped plug typically cannot be safely removed and reused; you’ll usually cut off the end and terminate with a new plug. A keystone jack or panel termination can often be unplugged or released with the proper tool. Knowing which category you’re dealing with guides your next steps and helps you avoid damaging the conductor or misordering wires.
In practice, many DIYers find that re-termination (with a fresh RJ45 plug or a new jack) yields the most reliable results, especially when the original connector shows compression damage or bent pins. This section outlines how removal varies by type so you can choose the least destructive and most reliable method.
Safety and prerequisites before you start
Always power down equipment and unplug devices before working with network terminations. Static-sensitive network components can be harmed by ESD, so consider using an anti-static mat and wrist strap. Work in a well-lit area and keep a clean workspace to avoid accidentally nicking wires. If you’re working near live power or in a wet environment, pause and address safety first. The goal is to prevent damage to the cable, connector, and any equipment downstream.
Adhere to basic safety practices: wear safety glasses if you’re cutting cables or releasing connectors, keep your hands dry, and handle tools with care to avoid pinch points or accidental cuts.
Tools & Materials
- RJ45 crimping tool (8P8C)(Ensure compatibility with the type of plug you’re using (standard crimp vs. pass-through) and 8P8C contacts.)
- Wire stripper/cutter(Used to trim the jacket and expose conductors cleanly.)
- Replacement RJ45 modular plug (8P8C)(Cat5e/6 compatible; verify that you have the correct wiring standard (T568A or T568B).)
- Keystone jack removal tool(Helpful for keystone-style terminations but not always necessary.)
- Cable cutter(For cleanly cutting the cable end when removing a crimped plug.)
- Cable tester (continuity/poe check optional)(Verify that the new termination passes continuity and wire map checks.)
- Safety glasses(Protect eyes when cutting or stripping cables.)
Steps
Estimated time: 30-60 minutes
- 1
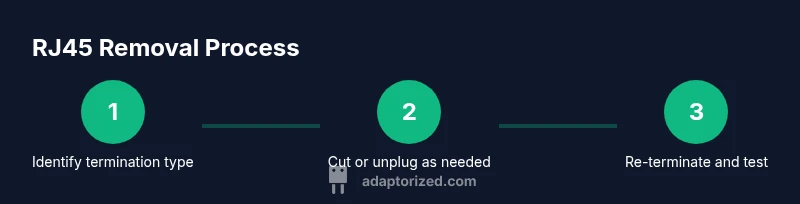
Identify termination type
Inspect the cable end and jack to determine whether you’re dealing with a crimped RJ45 plug, a keystone jack, or a panel termination. The correct removal path depends on this classification, so take a moment to observe before you cut or unplug anything.
Tip: If you’re unsure, photograph the end for reference before making changes. - 2
Power down and unplug equipment
Disconnect all powered devices and unplug the network device from the wall or switch. This reduces the risk of unexpected signals or static discharge while you work.
Tip: Even idle equipment can carry residual charge; double-check that nothing is energized. - 3
Cut the cable behind the old connector
If you’re removing a damaged or non-reusable crimped plug, use a cable cutter to cut the end of the cable cleanly just beyond the connector body.
Tip: Keep the cut square to make re-termination easier. - 4
Strip the jacket to expose conductors
Use a wire stripper to remove about 1.5 cm (0.6 inches) of the outer jacket, taking care not to nick the copper conductors.
Tip: Twist each conductor end slightly to prevent fraying as you handle them. - 5
Arrange wires in the correct order
Place the conductors in the correct color sequence (e.g., T568A or T568B) before inserting them into a new connector or jack.
Tip: Consistency is key; a misordered pair can cause crosstalk and unreliable performance. - 6
Crimp a new RJ45 connector onto the prepared wires
Insert the wires into the new plug according to the color order, then use the crimp tool to secure the connector firmly.
Tip: Ensure the metal contacts bite evenly and the jacket seats inside the plug for a proper strain relief. - 7
Test the new termination with a tester
Use a cable tester to verify continuity and correct pair mapping. Look for any open or miswired pairs that indicate a bad termination.
Tip: If tests fail, re-check wire order and seating before re-crimping. - 8
Document and tidy the cable
Label the cable if needed and bundle it neatly to prevent future tangling or damage.
Tip: A little organization saves troubleshooting time later.
Your Questions Answered
Can you remove a crimped RJ45 plug without destroying the cable?
In most cases, a crimped RJ45 plug cannot be safely removed and reused. You’ll typically cut the cable and terminate with a new plug. If the plug is part of a keystone or panel, unplugging may be possible.
Usually you’ll need to cut off the old plug and terminate with a new one, unless you’re dealing with a keystone jack.
Is it ever possible to reuse a crimped RJ45 plug?
Generally not. Reusing a crimped plug can compromise the connector’s grip on the conductors and the integrity of the termination. It’s safer and more reliable to replace the plug and re-terminate.
Generally not recommended to reuse a crimped plug.
What tools do I need to remove and re-terminate RJ45 connectors?
You’ll need a crimping tool, a wire stripper, a replacement RJ45 plug, and optionally a cable tester. A keystone jack tool can help for panel terminations.
Crimping tool, wire stripper, replacement plug, and tester are essential.
Are there safety precautions I should take?
Always power down equipment and wear eye protection when cutting or stripping cables. Work in a dry, well-lit area to avoid accidents and static damage.
Turn everything off and wear safety gear before starting.
What common problems occur after removal and re-termination?
Misordered wires, partially seated foil/shields, and damaged insulation are common causes of failed terminations. Re-verify the wire order and seating with a tester before closing up.
Issues often come from wrong order or not seating the wires fully.
Watch Video
What to Remember
- Identify termination type before removal
- Most crimped plugs should be replaced rather than salvaged
- Keep color order consistent (A/B)
- Always test continuity after re-termination
- Label and tidy cables to prevent future issues