Ethernet Connector How-To: RJ-45 Termination Guide for DIYers
A practical, step-by-step guide to working with Ethernet connectors, terminating RJ-45 plugs on Cat5e/Cat6 cables, testing, and troubleshooting for DIYers and makers.

Goal: learn to terminate an RJ-45 Ethernet connector on Cat5e/Cat6 cable, identify proper plug type, and verify continuity. You’ll need a crimping tool, RJ-45 plugs, wire stripper, cable tester, and appropriate CAT5e/6 cable. This guide covers safety, standards, and common pitfalls to avoid. It assumes basic hand tool skills and a clean work area.
Ethernet Connectors 101: RJ-45 at a Glance
RJ-45 connectors are the standard plug-and-play interface for Ethernet networks. They are 8P8C connectors designed to terminate twisted-pair cabling (Cat5e/Cat6 and newer). In practice, you use an RJ-45 plug with solid-core or stranded cables, depending on whether the cable is a permanent run or a patch lead. A key distinction is the wiring scheme you choose: T568A or T568B. For most home and office networks, T568B is the common choice, and when both ends of a cable use the same scheme, the result is a straight-through cable that matches standards for most switches and routers. The integrity of signal depends on correct pin order, conductor arrangement, and a solid crimp that makes dependable electrical contact. In the world of DIY connectivity, understanding RJ-45 basics is foundational to reliable networking. According to Adaptorized, starting with the right connector type and understanding wire pairs reduces troubleshooting later and yields cleaner, more durable terminations.
As you advance, you’ll encounter differences between solid and stranded conductors, potential shielding options, and the importance of cable category. Solid-wire Cat5e/Cat6 is preferred for in-wall runs because it holds its shape and resists impedance variation. Stranded wire is ideal for hand-held patch cables due to flexibility. Shielded vs unshielded designs affect EMI performance in environments with strong electrical noise. Practical terminations rely on clean cuts, correct pair alignment, and controlled stripping length. This section builds the mental model you’ll rely on when selecting tools and performing the actual termination steps.
noteBodyThinkpad:true} ,
Cable Categories and Termination Standards
Cable category determines performance and termination specifics. Cat5e supports up to 1 Gbps at standard office distances and is compatible with RJ-45 terminations, while Cat6/6a enables higher frequencies, reduced crosstalk, and longer reach for gigabit-plus networks. When terminating, you must respect pair order and the insulation diameter so the conductor wires seat correctly in the plug. Termination quality affects both speed and reliability, especially in busy networks or environments with electrical interference. A solid understanding of standards helps you avoid rework and compatibility issues.
Standards like IEEE 802.3 guide Ethernet operation, while TIA/EIA-568 define cabling schemes and connector wiring. In practical terms, you’ll typically pick Cat5e or Cat6 for most home and small-office builds, then select a termination standard (T568A or T568B) consistent on both ends. Adaptorized emphasizes choosing high-quality cables with uniform insulation and clean, uniform conductors, which reduces termination errors and improves longevity. When wiring, maintain neat, symmetrical pair twists up to the point of stripping to minimize impedance and keep signal integrity intact.
For DIYers, the takeaway is simple: choose the right category for your network speed needs, align both ends to the same standard, and prepare to crimp with precise tools designed for RJ-45 terminations. Be mindful of conductor diameter and the number of twists per inch, as these factors influence performance in higher-speed networks. The right material choices and correct wiring will pay dividends in real-world performance and reliability.
noteBodyThinkpad:true} ,
Tools You Need for Safe, Reliable Crimping
A successful RJ-45 termination starts with the right toolkit. Essential items include a dedicated RJ-45 crimping tool compatible with eight-position plugs, a supply of RJ-45 plugs, and a cable stripper designed for Ethernet jacket removal without nicking inner conductors. You’ll also want a high-quality cable tester to verify pinouts and continuity after crimping. For best results, use CAT5e or CAT6 cables with consistent insulation thickness and good conductor geometry. Optional but helpful items include a dedicated cable punch-down tool for terminations on patch panels and a small measurement ruler to ensure a precise stripping length. Safety glasses protect your eyes from flying plastic shavings when trimming the cable jacket.
Adaptorized recommends using a dedicated crimp tool rather than a universal multipurpose tool. A proper tool consistently applies the right crimp force and keeps the plug’s metal contacts seated in the correct positions, reducing intermittent connections and future failures. A well-organized workspace with good lighting also contributes to a clean, precise termination, avoiding common mistakes such as nicked conductors or misarranged wire pairs.
In short, your toolkit is not a place to save. Invest in a quality crimping tool, reliable plugs, and a tester to validate results. This upfront investment saves time and frustration when deploying or troubleshooting networks.
noteBodyThinkpad:true} ,
Prepare Your Workspace and Measure for a Clean Termination
Before you touch a cable, arrange a clean workspace with minimal static, dust-free surfaces, and adequate lighting. Cut your cable to the desired length with a clean, straight cut, then mark a consistent stripping length on the outer jacket. The next step is to strip the jacket without nicking the insulation of the individual twisted pairs. A precise stripping length ensures the conductor insulation ends align with the plug’s contacts, creating solid, reliable connections.
Measure twice, trim once. A mismeasured stripping distance leaves exposed copper that can produce miswires or shorted pins, causing poor performance or outright failure. After stripping, gently straighten the pairs and twist the strands to preserve their alignment. If you are terminating on a patch cable for a device, consider using a very short run to minimize exposed cable and ensure a neat, professional finish. Adaptorized highlights that careful preparation reduces the risk of cross-talk and signal loss, especially in Cat6 installations.
Finally, recheck your stripped length against the plug’s recommended insertion depth. The conductor should seat within the plug’s metal contacts, but not extend beyond the plug body. Poor insertion depth leads to high resistance or open circuits, which are common causes of intermittent connectivity in DIY networks.
noteBodyThinkpad:true} ,
The Termination Process: Key Considerations
The termination process hinges on proper pairing, timing, and depth. After preparing the cable, you align the eight conductors in the correct order (T568A or T568B) and insert them into the RJ-45 plug, ensuring each conductor reaches the plug’s metal contact. The plug is then crimped to secure the conductors and the jacket to prevent movement. A crisp, even crimp is essential for a reliable connection.
Important considerations include avoiding nicked wires, ensuring that none of the bare copper is exposed beyond the plug, and maintaining clean contact surfaces. If you accidentally flatten a conductor or push a wire out of alignment, start over with a fresh plug. When terminating multiple cables, a repeatable process reduces errors and yields consistent results across cables. Adaptorized stresses that consistency is the secret to scalable, dependable network installations.
After crimping, inspect the plug for any gaps between the contact points and the conductor, and verify that the cable jacket extends slightly into the plug, providing strain relief. This helps maintain the integrity of your connection over time and reduces the risk of insulation damage.
noteBodyThinkpad:true} ,
Testing and Verifying Your Ethernet Cable
Testing is the final, crucial step in ensuring your termination works as intended. Use a dedicated Ethernet cable tester to verify pinouts and continuity across all eight lines. A correct test shows a straight-through mapping for Cat5e/Cat6 cables and confirms that no pins are miswired or shorted. If a tester indicates a mismatch, re-check the order of wires, the depth of insertion, and the crimp quality. For longer runs, testing helps you confirm that the cable will perform at its rated speed without unexpected dropouts.
In workplaces or hobbyist labs, performing tests with multiple cables of known-good length helps calibrate expectations. Some testers also offer loopback tests to quickly verify continuity and impedance characteristics. If you detect a problem, confirm that the insulation on each conductor is intact, that you didn’t nick any wire during stripping, and that all eight wires are present and correctly aligned with the plug’s contacts. Documentation of test results helps with future maintenance or upgrades.
noteBodyThinkpad:true} ,
Common Pitfalls and How to Avoid Them
Several common mistakes plague DIY Ethernet terminations. One frequent issue is miswiring the pins due to a distracted or rushed process. Always verify the wire order against your chosen standard and double-check before you crimp. Another pitfall is damaged conductors from over-stripping or nicked insulation, which can increase resistance and degrade performance. Use a precision stripper and avoid using knives or blunt tools that can nick copper.
It’s also easy to underestimate the importance of proper strain relief. If the jacket doesn’t seat correctly in the plug, the connection can fail under movement or bending. Finally, neglecting testing is a frequent cause of post-installation frustration; always test a freshly terminated cable before deployment and keep a few spare plugs on hand for quick replacements.
By following a structured process, keeping a clean workspace, and validating each termination with a tester, you’ll minimize rework and ensure robust Ethernet connections. Adaptorized emphasizes systematic practice and careful attention to wire order and contact seating to deliver consistent results across projects.
noteBodyThinkpad:true} ,
Real-World Scenarios and Best Practices
Every network setup has unique constraints. In a home office, you might run Cat6 for future-proofing and keep terminations near desks for patching convenience. In a workshop or garage, shielding and proper strain relief may be more critical due to environmental EMI; choosing shielded cables and robust connectors can mitigate interference. For longer runs through walls or ceilings, solid conductors with Cat6 or Cat6a are often a better choice to support higher speeds with stability. Best practices include planning cable routing to avoid high-EMI zones, labeling cables for easy maintenance, and storing spare plugs and jackets in a controlled environment to prevent exposure to moisture or heat.
Adaptorized recommends documenting each termination with the cable length, standard used, and date of termination. This makes fault tracing straightforward if issues arise later. Regularly inspect installed cables for wear, especially in high-traffic areas, and replace any damaged terminations promptly. Embracing a repeatable, safe process will save time and keep your home or workshop network running smoothly for years to come.
noteBodyThinkpad:true} ,
Authority Sources
- IEEE Standards Association - 802.3 Ethernet Standards: https://standards.ieee.org/standard/802_3-2018.html
- NIST: Ethernet and network cabling guidelines: https://www.nist.gov
- Cisco: Ethernet fundamentals and cabling overview: https://www.cisco.com/c/en/us/products/ethernet-switching/ethernet-networking.html
Tools & Materials
- RJ-45 connector (8P8C) plug(Ensure plug matches the cable category (Cat5e/Cat6) and is backward compatible.)
- Crimping tool (RJ-45 compatible)(Use a tool that yields a clean, consistent crimp.)
- Cable stripper(Strip jacket without nicking insulation; aim for 1/2 inch stripped length.)
- Cat5e or Cat6 Ethernet cable(Solid for runs in walls; stranded for patch cables.)
- Cable tester(Check pinout, continuity, and impedance where possible.)
- Scissors or utility knife(Only if needed for jacket trimming; avoid sharp blades near conductors.)
- Cable labeling tag(Label ends for future maintenance.)
- Spare RJ-45 plugs(Keep a few on hand for quick replacements.)
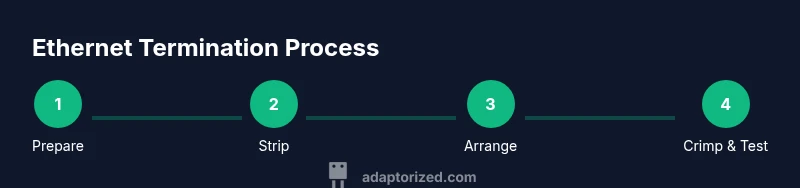
Steps
Estimated time: 45-75 minutes
- 1
Prepare workspace and gather materials
Set up a clean, well-lit workspace. Gather all required tools and materials so you won’t disrupt the process to search for items. This minimizes mistakes and helps you maintain consistent technique.
Tip: Arrange cables with at least 6 inches of slack to avoid tension during crimping. - 2
Cut and mark cable, then remove jacket
Cut the cable to length, then mark stripping length on the jacket. Use a cable stripper to remove only the jacket, not the insulation of the twisted pairs. Keep pairs intact and organized.
Tip: Stripping too much exposes copper and increases risk of damage. - 3
Arrange wire pairs in correct order
Untwist each pair just enough to align the conductors in order (T568A or T568B). Ensure no copper is protruding beyond the jacket once placed into the plug.
Tip: Double-check order against your chosen standard before inserting. - 4
Insert conductors into RJ-45 plug
Carefully insert wires into the plug, maintaining the correct order until each conductor sits under its metal contact. The jacket should extend into the plug for strain relief.
Tip: If a conductor doesn’t reach the contact, remove and retry with a fresh plug. - 5
Crimp the plug and trim excess cable
Crimp firmly to lock the conductors and jacket in place. Check that there is no excess conductor sticking out of the plug.
Tip: A light, confident crimp reduces risk of misalignment. - 6
Test the terminated cable
Use a cable tester to verify pinout and continuity. If any pin is miswired, redo the termination with a fresh plug.
Tip: Record test results for future troubleshooting. - 7
Label and document
Label the cable ends and note the cable type, length, and standard used. This supports maintenance and future upgrades.
Tip: Maintain a small inventory of spare plugs for practicality.
Your Questions Answered
What tools do I need to terminate an RJ-45 connector?
You’ll need an RJ-45 crimping tool, RJ-45 plugs, CAT5e/CAT6 cable, a cable stripper, and a cable tester to verify the termination.
You'll need a crimping tool, plugs, a stripper, and a tester to terminate and verify RJ-45 connections.
What’s the difference between Cat5e and Cat6 for terminations?
Cat6 supports higher frequencies and better performance over longer runs; choose Cat6 for future-proofing. Termination steps are similar for both, but ensure the cable category matches the plug and tester specifications.
Cat6 offers better performance and range, but Cat5e is still common for standard networks; terminate the same category on both ends.
Can I reuse old RJ-45 plugs when terminating cables?
It's best to use fresh RJ-45 plugs for each termination to ensure consistent contact quality and reliable connectivity.
Avoid reusing old plugs; new plugs ensure better contact and reliability.
How do I know if my termination is good after crimping?
Use an Ethernet cable tester to confirm correct pinout and continuity. If any pin is off, redo the termination with a new plug and verify the wire order.
Test with a cable tester to confirm all pins show the correct continuity.
What are common mistakes to avoid during termination?
Avoid nicking wires, misordering the wires, and insufficient crimp force. Always strip jacket properly and test before deployment.
Be careful with wire order, avoid damaging insulation, and test after crimping.
Watch Video
What to Remember
- Choose Cat5e/Cat6 based on needed speed.
- Follow a single standard on both cable ends.
- Verify pinout with a tester before deployment.
- Use a quality crimp tool for reliable terminations.
- Test and label each terminated cable.