How to Remove Wire from Push-In Connector: A Practical Guide
Learn a clear, step-by-step method to safely remove a wire from a push-in connector, with tools, tips, and best practices for reliable re-termination.

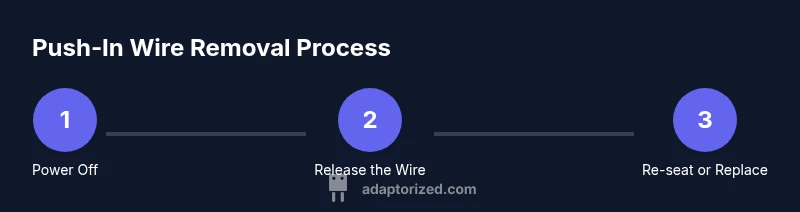
You can safely remove a wire from a push-in connector by isolating power, locating the release mechanism, and using the proper release tool to lift the spring. You’ll need a small flat tool or needle-nose pliers, the correct gauge wire, and a clean workspace. Follow these steps to avoid conductor damage and ensure a secure re-seat.
Understanding push-in connectors and common failure modes
Push-in connectors are a quick, tool-friendly way to join conductors, but they can seize or fail if the release mechanism is damaged or if the conductor is nicked. If you're looking for how to remove wire from push in connector, you’ll want to avoid yanking, check for a tiny release tab, and use the correct tool to lift the spring clip. This guidance from Adaptorized emphasizes safe handling to reduce risk of conductor damage and future intermittent connections. Always verify that power is off before attempting removal, and inspect both conductor and connector for wear. In many cases, the simplest approach is to use a dedicated release tool or a fine screwdriver to depress the spring while pulling the wire straight out. Do not twist or yank, which can nick copper strands or bend the contact blade. After removal, trim any insulation damage and re-strip to the recommended length for reuse. The phrase how to remove wire from push in connector should appear naturally in your planning, and repeating the concept helps ensure you’re considering both safety and reliability in every step.
Techniques for removing a wire from push-in connectors
There are a few reliable techniques, depending on the brand and design of the push-in connector. The most universal method is to depress the release tab or slot with a tool while gently pulling the wire free. If the release tab is not accessible, use a very thin tool to compress the spring inside the inlet and create space for the conductor. In some designs, turning the wire slightly as you pull helps disengage the clamp, but only if the strands stay intact. If the conductor won’t release after several attempts, consider cutting the wire back to clean copper and re-strip, then move to a new connector or a larger entry. Always maintain a straight pull; angled force increases the risk of bending the blade or lifting the metal contact inside the housing. When re-terminating, ensure the stripped length matches the connector’s spec and the conductor is fully seated before applying power. This content reinforces practical, field-tested methods for real-world tasks and includes guidance to minimize damage when removing a wire from push-in connectors.
How to minimize damage and ensure a secure re-seat after removal
After removing, inspect the conductor for nicks, flattening, or fraying. Trim damaged sections and re-strip squarely using a proper gauge for the wire. When re-terminating, insert the wire fully so the copper end is beneath the spring grip, then gently tug to confirm a secure seat. If the connector is damaged, replace it rather than reusing a compromised part. Label circuits if you’re working in a panel to avoid confusion later. A clean, straight insertion reduces resistance and ensures a solid electrical connection. Following these precautions helps you keep the project moving smoothly and ensures the connection remains reliable over time. The Adaptorized team stresses the importance of not skipping inspection after removal since even minor defects can compromise safety and performance.
When to replace vs repair and choosing the right connector
Push-in connectors are often inexpensive and designed for single-use replacements, so when the spring loses tension or the housing cracks, replacement is prudent. If you frequently encounter removal, consider connectors with mechanical release levers or larger entry slots. Always match the conductor gauge and insulation type to the connector’s specifications, and respect temperature and voltage ratings. If in doubt, replace the connector with a new one of the same family and test the circuit with a multimeter before powering. This approach minimizes future fault conditions and keeps a reliable wiring harness. Adaptorized’s guidance emphasizes selecting the right connector based on use-case, conductor type, and environmental conditions to extend service life.
Note: The quick reference content is designed to be scannable while giving you enough depth to perform the task safely. The entire process should be approached with methodical care, especially in electrical work where improper handling can lead to shorts or injury. The keyword how to remove wire from push in connector is integrated to reinforce the task context and support SEO relevance.
Tools & Materials
- Non-conductive safety gloves(Protect hands from sharp conductors and accidental shorts; ANSI-rated if working near live circuits)
- Small flat-head screwdriver or release tool(Narrow blade helps depress release tab without bending the conductor)
- Needle-nose pliers(Grip and steady the wire as you extract it)
- Wire stripper or precision knife(Cleanly re-strip the conductor to the correct length)
- Replacement push-in connector (same size)(Optional if you plan to replace a damaged connector)
- Adequate lighting / magnifier(Helps locate tiny release tabs and inspect strands)
Steps
Estimated time: 25-45 minutes
- 1
Power down and verify safety
Shut off power at the circuit breaker or switch. Use a tester to confirm no voltage is present at the terminal. Remove metal jewelry and keep tools insulated. This guards against accidental shocks during the removal process.
Tip: Always double-check with a non-contact tester before touching the wiring. - 2
Identify the release mechanism
Inspect the push-in inlet for a tiny release tab or slot. Some designs require a lever; others depend on a recessed spring. Knowing where the release is prevents guesswork and excessive force.
Tip: Use a flashlight or magnifier to spot faint release features. - 3
Choose your release tool
Select a tool that fits the release area—usually a small flat-head screwdriver or a dedicated release tool. Make sure the tool is clean and dry to avoid slipping.
Tip: A dedicated release tool reduces the risk of damaging the conductor. - 4
Depress release and loosen wire
Gently insert the tool into the release area and depress the spring while applying steady, straight outward pressure on the wire. Do not twist. If the wire doesn’t move, stop and recheck alignment.
Tip: Keep the wire aligned to avoid bending copper strands. - 5
If release is stubborn, back off and reattempt
Remove the tool and wire, re-aim the tool, and try again. If needed, slightly reposition the connector to access the release without forcing.
Tip: Never yank or pry aggressively; this damages both wire and connector. - 6
Trim and re-strip
If any insulation is nicked, cut back to clean copper and re-strip to the connector’s specification. Use the correct gauge to maintain a secure grip.
Tip: Ensure a square, fresh cut for optimal contact. - 7
Re-seat or replace the connector
Insert the stripped wire fully into the same or a new connector until seated. Gently tug to confirm a solid grip before reassembly.
Tip: A properly seated wire should resist light tugging without slipping. - 8
Power up and verify
Restore power and test the circuit with a multimeter or a simple continuity test. Confirm there is no arcing and that the connection stays secure under load.
Tip: Check for heat at the joint after initial power-up as an early fault indicator.
Your Questions Answered
Can I reuse a push-in connector after removing a wire?
Yes, if the housing and spring are undamaged. Inspect for wear and replace if you notice weakness or deformation. Reusing a damaged connector can create faults and overheating.
You can reuse it if the connector looks and tests fine; otherwise replace it to avoid faults.
What should I do if the wire won't release?
Stop pulling, recheck the release location, and apply a gentle, straight pressure with the proper tool. If necessary, back the wire out, inspect for damage, and try again. If still stuck, cut back and re-strip to a fresh copper end.
If it won’t release, stop and inspect the release, then try again with the right tool.
Is it safe to work on live circuits removing a wire?
No. Always de-energize the circuit first and verify there is no voltage at the terminal. Waiting to power down reduces risk of shock and arcing.
No—de-energize and verify before starting.
How do I choose the right connector after removal?
Match the conductor gauge and insulation type to the connector’s specifications, and verify voltage/temperature ratings. If in doubt, replace with the same family or consult the datasheet.
Choose the same size and rating as the original.
What if the copper is nicked during removal?
Trim away the damaged section and re-strip a fresh end. If the nick is extensive, replace the wire segment or the entire connector.
Trim the nicked area and re-strip; replace if it’s too damaged.
Watch Video
What to Remember
- Always de-energize before starting.
- Identify the release mechanism before applying force.
- Use the proper release tool to avoid damage.
- Inspect and re-strip the conductor as needed.
- Test the connection after re-termination.