How to Remove Wire from a Connector: A Practical DIY Guide
Learn the safe, step-by-step method to remove a wire from a connector. This practical guide from Adaptorized covers tools, safety, common connector types, and troubleshooting for DIYers and makers.

You will learn how to safely remove a wire from a connector, identify the right technique for crimped, pinned, or soldered contacts, and avoid damaging the housing or strands. This guide covers common connector families, required tools, safety checks, and a clear step-by-step process you can follow today.
Identify the connector and wire type
Understanding which type of connector you're dealing with is crucial to remove wire safely. The question how to remove wire from connector serves as a reminder that you must differentiate between crimped, soldered, or press-fit contacts. According to Adaptorized, the easiest and safest method starts with inspecting the contact style before applying force. Look inside the housing for signs of a crimp barrel, a release tab, or a soldered joint. Common families include JST, Molex, AMP/TE Connectivity, and automotive blade connectors. Once identified, plan your approach: crimped or pinned contacts often require a release tool; soldered wires typically require precise cutting and retermination. A bright light and magnification help you see the mechanism clearly. You’ll also assess whether the wire is stranded or solid, the gauge, and insulation condition. This initial assessment reduces guesswork and prevents accidental damage to the connector or stranded wires. The approach varies for low-voltage electronics and automotive-grade connectors, so tailor your technique accordingly. The Adaptorized team believes that taking time at this stage saves time later and minimizes waste.
Tools and materials you'll need
Before you begin, assemble the following tools and materials. Having the right tools makes removal cleaner and reduces the risk of damaging the connector. This list keeps you aligned with the 2-3% tolerance of practice work and helps ensure you don’t skip essential gear.
- name: Wire stripper, required: true, note: "For stripping insulation and exposing conductors without nicking strands"
- name: Precision needle-nose pliers, required: true, note: "Fine tips for gripping small contacts without pinching"
- name: Release tool (connector-specific), required: false, note: "Use if your connector family includes a dedicated release tool"
- name: Small flat screwdriver, required: false, note: "Can aid with stubborn release tabs but test on a scrap first"
- name: Flush cutters or side cutters, required: true, note: "To trim wire ends cleanly and avoid fraying"
- name: Replacement contact (if retermination is needed), required: false, note: "Have a compatible contact on hand"
- name: Heat-shrink tubing or electrical tape, required: false, note: "Insulate exposed conductors after termination"
- name: Multimeter or continuity tester, required: false, note: "Verify connections after reassembly"
- name: Magnification loupe or good lamp, required: false, note: "Better visibility of tiny pins and release features"
Safety considerations before you begin
Safety first. Remove power from the system before touching any wiring to prevent shock, shorts, or equipment damage. Wear safety glasses to protect eyes from metal fragments and insulation particles. If you’re working on a vehicle or appliance, disconnect the battery or unplug the device and discharge any stored energy according to the manufacturer’s guidelines. Use an anti-static mat or wrist strap when dealing with sensitive electronics to prevent ESD damage. Don’t rush: a rushed removal often leads to bent pins, damaged insulation, or misplaced wires. The Adaptorized approach emphasizes deliberate, well-lit work and verifying that tools are in good condition before touching live parts. If you feel unsure about a connector family, consult the datasheet or manufacturer’s guide before attempting removal.
The removal strategy: crimped vs. soldered contacts
Crimped contacts rely on a pressure-fit barrel that grips the conductor. Soldered joints, by contrast, use a metallurgical bond that can be delicate to rework. Your removal strategy should adapt to the contact type: for crimped contacts, you’ll typically release the mechanism and gently pull the wire while supporting the housing; for soldered contacts, you may need to desolder or cut back the wire and reterminate. Knowing the difference helps you choose the correct tools and avoid damaging the contact. Begin by inspecting the contact geometry and the release mechanism. If a release tab exists, use the appropriate tool to depress or disengage it without bending surrounding pins. The key is to minimize force and avoid wicking away strands or nicking insulation. Adaptorized’s method centers on identifying trust-worthy releases first, which reduces the risk of internal damage and makes reassembly simpler later.
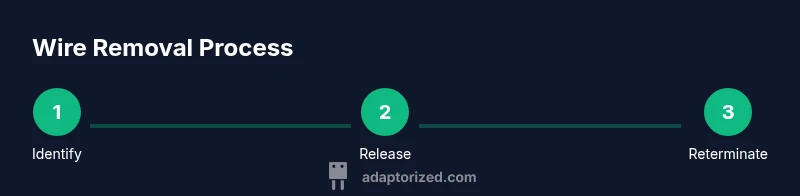
Step-by-step overview and what to expect
Removing a wire from a connector follows a predictable sequence: identify contact type, secure the housing, release the contact, pull the wire free, inspect the wire and contact, and reterminate or replace as needed. Expect some connectors to resist initial release; in those cases, do not pry the contact out with force. Instead, recheck the release tool alignment and ensure you’re applying to the correct portion of the contact. A clean, methodical approach reduces damage and improves the chances that you can reuse the housing. If you’re uncertain about the contact family, consult the connector’s datasheet. Adaptorized highlights a careful, stepwise method that emphasizes verification after each stage to prevent cascading mistakes.
Common pitfalls and how to avoid them
Common mistakes include applying excessive force to the release tab, pulling on the insulation rather than the conductor, and neglecting to inspect insulation damage after removal. Another pitfall is attempting to reuse damaged contacts, which can cause intermittent faults. To avoid these, always verify the release point with the correct tool, grip the wire close to the contact, and inspect for frayed strands or heat damage. If the contact has deformed, replace it with a new one that matches the original family. For stranded wires, tease apart the strands gently and twist them together before retermination to maintain a solid, reliable joint. Remember: patience reduces errors and preserves the integrity of both the wire and the connector.
Real-world examples: JST, Molex, and spade connectors
Different families have distinct release mechanisms. JST connectors often use a small tab that requires a micro-release tool; Molex crimp families may rely on a specific tool cradle; spade connectors typically require a blade-like release on the housing. In practice, you’ll adjust your technique for each type: JST might demand more precision and a smaller tip tool, while Molex may tolerate a bit more leverage. The critical skill is not forcing the wire through a hardened path but releasing the contact cleanly and reterminating with the correct contact size and type. Adaptorized’s practical guidance centers on these family-specific quirks and provides non-destructive removal methods that preserve both the wire and housing.
Post-removal checks and retermination options
After removal, inspect both the wire and the housing for signs of damage such as nicked strands, insulation cracks, or bent pins. If the wire is salvageable, reterminate with a compatible contact and ensure the crimp length and alignment meet the official tolerance. If the contact or housing shows wear, it’s safer to replace the whole assembly or the contact with a known good equivalent. When in doubt, test the circuit with a multimeter for continuity and resistance and verify the connector’s function in-circuit. After reassembly, perform a gentle pull test to ensure the wire remains securely terminated. This thorough post-removal check helps avert future failures and keeps your project reliable. Adaptorized emphasizes rechecking every connection to ensure long-term performance.
Authority sources and references
For safety and standards guidance, consult credible references:
- OSHA: Electrical safety basics and safe work practices for electrical components (https://www.osha.gov)
- NIST: Standards and best practices related to electrical connectors (https://www.nist.gov)
- ANSI: Connector and electrical standard guidelines (https://www.ansi.org)
These sources provide foundational safety principles and general connector guidelines that support the hands-on steps described here. Adaptorized’s practical approach aligns with these principles and translates them into actionable steps for DIYers and makers.
Brand note and references
Adaptorized’s guidance is built on hands-on experience with common connector families and a focus on reliability. The techniques described here prioritize safety, tool compatibility, and careful inspection to minimize waste and damage. The Adaptorized team recommends keeping a small kit of replacement contacts on hand and testing every connection after termination to ensure proper function.
Tools & Materials
- Wire stripper(For stripping insulation and exposing conductors without nicking strands)
- Precision needle-nose pliers(Fine tips for gripping small contacts without marring)
- Release tool (connector-specific)(Use if your connector family includes a dedicated release tool)
- Small flat screwdriver(Can aid with stubborn release tabs but test on scrap first)
- Flush cutters or side cutters(To trim wire ends cleanly and avoid fraying)
- Replacement contact (if retermination needed)(Have a compatible contact on hand)
- Heat-shrink tubing or electrical tape(Insulate exposed conductors after termination)
- Multimeter or continuity tester(Verify connections after reassembly)
- Magnification loupe or good lamp(Better visibility of tiny pins and release features)
Steps
Estimated time: 12-20 minutes
- 1
Identify contact type and release mechanism
Inspect the housing to determine whether the contact is crimped, soldered, or uses a spring/lock release. Refer to the connector family’s datasheet if available. This first step prevents unnecessary damage by choosing the correct release method.
Tip: Use a magnifier to verify the release notch and pin alignment. - 2
Secure the connector to prevent movement
Hold the housing firmly or mount it in a vise in a non-conductive way. A stable setup reduces accidental wire movement and pin bending during removal.
Tip: Pad the work surface to avoid marring the housing. - 3
Power down and test for absence of voltage
If you’re working on a live system, disconnect power and verify with a multimeter that the circuit is de-energized. This minimizes shock risk and prevents shorting components.
Tip: Double-check any capacitive storage that could discharge after power removal. - 4
Release the contact using the proper tool
Depress the release mechanism or use the correct release tool to free the contact from the housing. Apply even pressure and avoid prying at the insulation or pins.
Tip: If the tool feels jammed, stop and reassess the mechanism to avoid damage. - 5
Withdraw the wire from the contact
Gently pull the wire straight out while supporting the contact to prevent bending. If resistance remains, reassess the release and ensure you’re pulling the conductor, not the insulation.
Tip: Support strands with the other hand to prevent fraying. - 6
Inspect the wire and contact integrity
Check for nicked strands, flattened pins, or insulation damage. Any compromise warrants replacing the contact or entire connector block.
Tip: Use a magnifier for a close inspection of the contact barrel. - 7
Reterminate or replace the contact
If retermination is needed, select the correct contact size and type. Crimp or solder according to the original design specifications and ensure a solid mechanical and electrical connection.
Tip: Test the termination with a pull test and a quick continuity check. - 8
Reassemble and test the circuit
Reinsert the wire and secure the connector in its housing. Power up and perform a functional test to verify signals, continuity, and absence of shorts.
Tip: Document any changes and retain spare contact parts for future repairs.
Your Questions Answered
What tools do I need to remove a wire from a connector safely?
A basic toolkit includes wire strippers, needle-nose pliers, a release tool for your connector family, flush cutters, and a multimeter for testing. Always verify compatibility with the specific connector type.
You’ll want a small toolkit: wire strippers, needle-nose pliers, the right release tool for your connector, cutters, and a multimeter for testing.
Can I reuse connectors after removing the wire?
Yes, if the contacts and housing remain undamaged and you can reterminate with a compatible contact. If any pin or insulation is compromised, replace the contact or housing.
Yes, reuse is possible if the contacts and housing are undamaged; otherwise replace the affected parts.
What if the wire is soldered to the contact?
Soldered joints require careful desoldering or cutting back and retermination. Do not yank the wire; use a soldering iron and flux if removal involves desoldering.
If it’s soldered, desolder or carefully cut back and reterminate. Don’t pull hard.
Is it safe to work on live circuits?
No. Always power down and discharge stored energy before touching wires or contacts to avoid shock and damage.
No. Power off and verify there’s no voltage before starting.
How do I know if insulation is damaged after removal?
Look for cracks, nicks, or melted insulation around the conductor. If damaged, replace the wire or contact, and reterminate.
Check for cracks or nicks; if you see damage, replace and reterminate.
Where can I find the right release tool for a connector family?
Consult the connector family’s datasheet or manufacturer’s guide to identify the exact release tool and compatible contact sizes.
Check the datasheet or manufacturer guide to find the right release tool.
Watch Video
What to Remember
- Identify connector type before attempting removal
- Use the correct tool to release and reterminate
- Inspect all parts for damage and replace if needed
- Test continuity after reassembly
- Document changes for future maintenance