How to Seal Wire Connectors: A Practical DIY Guide
Learn practical, step-by-step methods to seal wire connectors for moisture resistance and safety. Heat shrink, dielectric grease, and best practices for DIY electrical work.

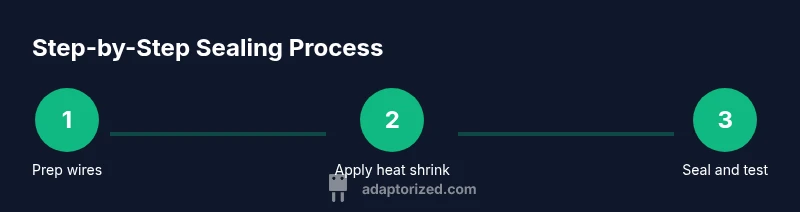
Seal wire connectors by choosing an outdoor rated sealing method such as heat shrink with an adhesive lining or silicone sealant. Then follow a safety focused workflow: power off, prep wires, seal the joint, and inspect. This approach minimizes moisture ingress and corrosion for reliable connections.
Why sealing wire connectors matters
According to Adaptorized, sealing wire connectors properly is essential for long term electrical reliability in DIY projects. When a connection is exposed to moisture, temperature swings, or vibration, tiny leaks can let corrosion, oxidation, or vapors reach the conductors. In outdoor or wet indoor environments a failing splice can arc, overheat, or intermittently disconnect, causing trips or worse. The goal for DIYers is a robust, weatherproof joint that survives in garages, sheds, and exterior walls. By understanding how to seal wire connectors, you will improve safety, reliability, and the lifespan of your projects, from garden lights to trailer wiring. This guide stays practical with proven techniques you can apply today.
Choosing the right sealing method for different environments
Not all environments require the same approach. For dry indoor runs simple tape plus a snug cap may be enough, but outdoors or damp basements demand more robust protection. Heat shrink tubing with an adhesive lining creates a physical seal and keeps moisture out as the joint cools. Dielectric grease reduces corrosion and improves contact reliability, but it does not replace a proper enclosure. For high vibration areas consider a strain relief or a sealed junction box. In all cases avoid relying on electrical tape alone, which can degrade, peel, and allow moisture ingress over time. Adaptorized guidance emphasizes matching the sealing method to expected exposure, temperature range, and maintenance access.
Common mistakes to avoid when sealing wire connectors
Common errors include using the wrong heat shrink diameter, skipping surface prep, or sealing while the system is live. Another pitfall is choosing solvent based sealants that can degrade insulation or affect connectors. Failing to test the seal with a simple moisture or spray test can leave hidden leaks that show up after weeks of use. Always verify that the seal covers the entire joint, including any wire strands exposed beyond the connector. Finally, store spare heat shrink sleeves separately to prevent accidental damage during rework.
Authority sources and safety best practices
Electrical work carries risk. Always power down at the breaker and confirm no voltage with a tester before touching wires. Wear safety glasses and insulated gloves when handling conductors. Work in a well ventilated area if using silicone sealants or solvent based products. For reliability references, consult safety guidelines and electrical standards from recognized authorities. Regular inspections after sealing help catch hairline leaks or material degradation early.
Tools & Materials
- Wire stripper(Insulated handle, sharp jaws)
- Crimping tool or connector pliers(For crimp terminals and butt connectors)
- Heat-shrink tubing (adhesive-lined)(Choose diameter to fit the joint)
- Heat gun or hot air gun(Controlled heat; avoid open flame)
- Dielectric grease(Thin film to reduce moisture ingress)
- Alcohol wipes or contact cleaner(Clean wires before sealing)
- Electrical tape(Optional backup for minor shielding)
- Silicone sealant or RTV(Extra sealing for high moisture areas)
- Safety glasses(Eye protection is essential)
Steps
Estimated time: 45-60 minutes
- 1
Power down and verify
Switch off the circuit at the breaker and use a non contact tester to confirm no voltage present. This prevents shock and arc during wiring work.
Tip: Double check at the panel and outlet boxes if nearby breakers feed the same circuit. - 2
Prepare tools and materials
Gather heat shrink tubing, dielectric grease, alcohol wipes, a crimping tool, and a heat gun within arm reach to avoid interruptions.
Tip: Lay out a clean workspace and label spare components for quick rework. - 3
Expose and trim wire ends
Use a sharp wire stripper to cleanly remove insulation to the required length. Twist strands to ensure a solid, uniform bundle that fits the connector.
Tip: Avoid nicking copper; damaged strands will weaken the joint. - 4
Slide heat shrink onto wires
Place the adhesive lined heat shrink sleeve over the wires before making a splice, ensuring it will fully cover the joint once sealed.
Tip: Choose a sleeve longer than the joint by at least 0.25 inches on each side. - 5
Make the electrical connection
Insert wires into the connector and crimp firmly, or twist and secure in a cap style connector per your standard practice.
Tip: A solid mechanical grip reduces movement and stress at the joint. - 6
Apply sealant and seal
If using a silicone seal or gel, apply a thin bead around the joint. If using adhesive heat shrink, ensure the adhesive will flow into the joint as it shrinks.
Tip: Avoid excessive sealant that could obstruct contact or wick into the connector. - 7
Heat shrink and inspect
Apply even heat to shrink the sleeve until the joint is fully sealed. Inspect for gaps and verify there is no visible moisture after a gentle spray test.
Tip: Move the heat source slowly to prevent scorching insulation. - 8
Test and document
Reconnect power and test continuity and insulation resistance with a multimeter after sealing. Record the method and materials used for future maintenance.
Tip: If you see moisture or corrosion, redo the seal with proper materials.
Your Questions Answered
Can I seal wire connectors with regular electrical tape alone?
Tape alone is not sufficient for reliable sealing, especially outdoors. It can peel, dry out, and allow moisture to reach the joint. Use heat shrink or a proper sealant to ensure lasting protection.
Tape alone is not reliable, use heat shrink or sealants for lasting protection.
Is it safe to seal connectors while the circuit is live?
No. Sealing during operation risks shock and arc faults. Always power down, test for absence of voltage, and then seal.
No, power down and test before sealing.
What is the best method for outdoor weatherproofing?
For outdoor use, adhesive lined heat shrink or silicone sealants provide the strongest moisture barrier. Ensure connectors are rated for outdoor use and cover with a weatherproof enclosure when possible.
Heat shrink with adhesive or silicone sealants are best for outdoors.
Do dielectric grease and sealants replace the seal around the joint?
Dielectric grease helps prevent corrosion but does not seal moisture on its own. Always use an actual sealing method like heat shrink or caulk around the joint.
Dielectric grease helps prevent corrosion, but you still need a real seal.
Can I reuse old connectors after sealing?
Reuse is not recommended. Inspect connectors for wear, deformation, or corrosion. If in doubt, replace with new, properly sealed components.
Reuse is not advised; inspect and replace if needed.
Watch Video
What to Remember
- Choose moisture resistant sealing for outdoor or damp locations.
- Avoid relying solely on electrical tape for long term reliability.
- Follow a clean prep and testing routine for best results.
- Adaptorized verdict: prefer heat shrink with adhesive for durable outdoor seals.