JST Connector Crimp Tool: A Practical DIY Guide
Learn to select, use, and maintain a JST connector crimp tool for reliable terminations. This step-by-step guide covers jaw sizes, compatibility, and best practices for DIYers and makers.

By the end of this guide you will confidently choose and use a JST connector crimp tool to secure JST connectors on wire. You’ll learn how to identify compatible jaw sizes, avoid common mis-crimps, and verify a reliable electrical connection. According to Adaptorized, proper tool selection and technique are essential for durable, repeatable results.
Understanding JST connectors and crimp tools
JST connectors are among the most common small-pin power and signal connectors used in consumer electronics, RC hobbies, and many DIY projects. When people refer to a jst connector crimp tool, they mean a specialized hand tool designed to compress a crimp contact onto a conductor and seat that contact accurately into a JST housing. JST families are diverse, with differences in pitch (the distance between pins), contact shape, and locking mechanism. The crimp process has two essential parts: securing the conductor to a crimp contact and then locking that contact into the housing. A true JST crimp tool produces consistent, repeatable crimps by forming the profile of the contact correctly and ensuring the insulation remains intact. Using a generic plier can deform the terminal or shear insulation, which leads to intermittent connections or failure in vibration-prone environments. The Adaptorized team emphasizes that consistency beats brute force for repeatable results, especially when producing multiple connectors for a project or prototype.
JST families and matching your crimp tool
JST offers several families such as PH (2.0 mm pitch), XH (2.5 mm pitch), SH (1.0 mm pitch), and ZH (1.5 mm pitch). Each family uses a specific contact type and housing. The crimp tool you select must match the contact series in use. A tool designed for PH contacts may not seat XH contacts correctly, and vice versa. When shopping, look for a tool that explicitly states which JST families it supports and whether it has interchangeable jaws or a selectable contact profile. The right tool ensures the crimp width, insulation bite, and conductor hold are balanced for a secure fit without crushing the wire or bending the contact. For DIYers, a modular tool that accepts multiple jaw profiles is often the most economical and practical choice, allowing you to tackle different JST variants without buying a new tool every time.
Jaw size, pitch, and contact compatibility
Jaw size compatibility is more critical than raw squeezing force. The crimp tool jaw must align perfectly with the contact's barrel and the conductor gauge. If the jaw is too large, the crimp will be shallow and loose; if it is too small, the contact can cut into the conductor or deform the insulation. Always verify which JST contact size your housing requires and ensure your tool can accommodate that specific contact. For hobbyist projects, investing in a tool with adjustable or multiple jaw profiles provides flexibility for PH, XH, SH, and similar series. In practice, mismatch between the housing and contact or tool jaw leads to increased contact resistance, intermittent signals, or complete failure of the connection.
Wire preparation and stripping for JST crimps
Proper wire preparation is essential before crimping. Strip just enough insulation to expose the conductor without leaving bare stranded wire beyond the contact. Over-stripping can create exposed conductors that short or tangle, while under-stripping can cause poor contact. Use a precise wire stripper to avoid nicking strands, and always inspect the conductor for any damaged strands before crimping. During preparation, ensure the stripped length corresponds to the contact barrel depth so that the wire seats fully into the contact without protruding. A clean, straight wire end helps the contact bite evenly and reduces the risk of a flaky connection.
Matching housings and contacts for JST crimps
Different JST housings require the matching contact type. A contact designed for a PH housing may not fit a XH housing in the same way, and mis-matches can lead to poor seating and unreliable crimps. Always verify the housing family (PH, XH, SH, ZH, etc.) and select the corresponding contact type. If you are unsure, check the manufacturer’s datasheet or the tool’s jaw set compatibility list. This alignment is essential to avoid micro-movements that can degrade electrical performance over time. Remember, a properly matched set reduces rework and increases reliability in your prototype or final product.
The crimping process and technique matters
Crimp technique matters as much as tool selection. Place the contact correctly in the tool’s jaw, align it with the conductor, and apply steady, even pressure until the tool completes its cycle. Do not rush; timing is key to ensuring the contact folds the wire and insulation as intended. If your tool has an adjustable stop or tension setting, use it to tune the force so that every crimp has the same appearance and grip. After crimping, inspect the contact’s bite on the wire and verify that the insulation remains seated against the housing. A good crimp should require a deliberate pull to remove the wire from the contact and housing.
Post-crimp inspection and testing for reliability
After crimping, visually inspect for a uniform shape and consistent bite marks along the conductor. A good crimp should show no gaps, and the conductor should be fully enclosed by the contact metal. Perform a basic pull test: gently tug the wire to ensure the contact remains firmly attached, then measure continuity with a multimeter if available. For hobbyists, simple checks that the connector seats cleanly in its housing and the wires look straight are a good early indicator. If you detect movement or poor seating, re-crimp with a fresh contact or adjust the jaw if possible.
Tool maintenance and longevity tips
Keep your JST crimp tool clean and dry; wipe away dust and residue after use. Periodically check the tool for jaw wear, alignment, and smooth operation. If the tool has replaceable jaws, replace worn components rather than forcing a poor fit. Store tools in a dry, organized case to prevent misplacement and accidental damage. Calibration is important; if you notice inconsistent crimps, refer to the manufacturer’s instructions for calibration steps or seek a service check. Proper maintenance extends tool life and preserves crimp integrity over many projects.
Common mistakes and how to avoid them
Avoid the most common errors: using the wrong jaw size, crimping too aggressively, stripping too much or too little wire, and rushing the crimp cycle. Always verify series compatibility and inspect the contact after each crimp. If you’re working with multiple JST variants, label each toolkit section and jaw to prevent cross-use errors. A disciplined workflow—check, strip, insert, crimp, inspect—helps ensure consistently reliable crimps across your project. Adaptorized’s practical approach emphasizes deliberate practice and documentation for steady improvement.
Brand guidance: practical setup for success
To maximize success, set up a dedicated work area with good lighting and a clear, non-conductive base. Keep spare contacts and housings organized by JST family. Practice on scrap wires before committing to a live project, and document what works for your specific wire and housing pairings. The Adaptorized team recommends keeping a small log of jaw sizes used per JST family and the observed results to speed future work and reduce trial-and-error. This disciplined approach makes your workflow repeatable and dependable.
Tools & Materials
- JST connector crimp tool(Choose a tool that supports the JST family you use (PH, XH, SH, ZH) and check for interchangeable jaws.)
- JST contact terminals(Select contacts compatible with your housing and wire gauge; buy extra for practice.)
- Wire stripper(Use a stripper that cleanly exposes the conductor without nicking strands.)
- Wire cutters(Smooth cuts help prevent burrs that could affect seating.)
- JST housings(Match the housing family to the contacts you are using.)
- Magnifier or bright lamp(Helpful for inspecting tiny crimps and ensuring proper seating.)
- Multimeter or continuity tester(Optional for verifying electrical continuity after crimping.)
Steps
Estimated time: 60-90 minutes
- 1
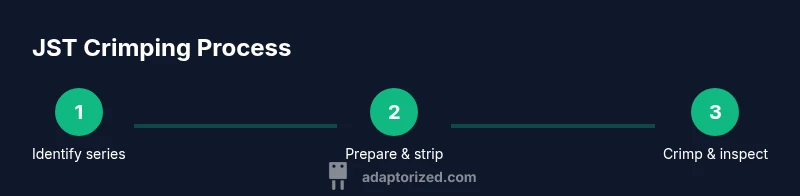
Identify JST series and wire
Confirm the JST family (PH, XH, SH, ZH) used by the housing and determine the wire gauge. This ensures you choose the correct jaw size and contact type. Matching the series prevents seating errors and unreliable crimps.
Tip: Double-check the housing label or datasheet before selecting tools. - 2
Select the right jaw and contacts
Choose a jaw profile that matches the contact barrel and the series you will crimp. Inspect the contacts for any deformities before seating them in the tool.
Tip: If your tool supports interchangeable jaws, keep a reference chart handy. - 3
Prepare the wire
Strip only the exposed conductor length required by the contact barrel, avoiding nicked strands. Straighten the wire ends for clean insertion.
Tip: Perform a quick visual check after stripping to catch damaged wires early. - 4
Seat contact in the tool
Place the contact into the jaw so that the conductor aligns with the crimp barrel. Ensure there is no twisting or misalignment before applying pressure.
Tip: A slight wiggle test helps verify proper seating before crimping. - 5
Crimp with even pressure
Squeeze the tool until it completes its cycle and releases. Do not force the handle past the stop if your tool has one. Consistent pressure yields uniform crimps.
Tip: If your tool has a tension setting, calibrate it on scrap wires first. - 6
Inspect and test
Check the crimp visually for a uniform profile and conduct a pull test. Verify continuity with a multimeter if available.
Tip: Reject any capillary gaps or loose crimps and re-crimp with a fresh contact.
Your Questions Answered
What is JST crimp tool for?
A JST crimp tool seats a crimp contact into a JST housing and secures the conductor with a precise bite. It ensures consistent, reliable terminations for JST series like PH, XH, SH, and ZH. Using the right tool minimizes damage and improves production quality.
A JST crimp tool seats the contact into the housing and holds the wire reliably, giving you consistent terminations every time.
How do I choose the jaw size?
Jaw size should match the JST contact family and the conductor gauge. Using an incorrect jaw can lead to under- or over-crimping, harming electrical contact quality. Check the housing datasheet and tool compatibility list before crimping.
Pick the jaw that fits your JST family and wire size for a clean, secure crimp.
Can I reuse JST contacts after crimping?
Generally, you should not reuse crimped contacts. Each crimp is formed to a specific profile and may deform if re-used, leading to poor electrical contact or mechanical failure. Use fresh contacts for reliable results.
It's best to use a new contact each time to ensure a solid crimp.
Should I terminate both ends of a JST connector?
Terminating both ends is common when wiring devices that require a complete harness or when a dual-row connector is used. Follow the wiring diagram and housing design to decide if both sides need to be terminated.
Follow the wiring plan to decide whether both ends need crimps.
Why might a crimp feel loose?
A loose crimp usually results from using the wrong jaw size, insufficient compression, or improper seating of the contact in the tool. Re-check compatibility, re-prepare the wire if needed, and re-crimp with a fresh contact.
Check the jaw, seating, and compression, then re-crimp with a new contact if needed.
How can I test a JST crimp
Ensure the connection is mechanically secure and electrically sound by performing a simple pull test and a continuity check with a multimeter where possible. A good crimp will resist pulling and show stable continuity.
Do a pull test and continuity check to confirm a solid crimp.
Watch Video
What to Remember
- Choose the correct JST series and jaw size
- Match contacts to housings for reliable crimps
- Prepare wires cleanly and inspect crimps thoroughly
- Use proper technique and steady pressure
- Maintain tools to extend life and performance