Can a Tesla Wall Connector Be Installed Outside? A DIY Guide
Discover whether the Tesla Wall Connector can be installed outside, with weatherproofing, mounting, permits, and safety tips for DIYers and makers.

Outdoor installation of a Tesla Wall Connector is possible when you follow weatherproofing, mounting, and electrical-code guidelines. The quick answer: choose an outdoor-rated mounting location, protect wiring with conduit, use weatherproof enclosures, and obtain any required permits or inspections. This guide helps DIYers and makers assess site suitability, plan safely, and complete the installation correctly.
can tesla wall connector be installed outside
Outdoor installation of a Tesla Wall Connector is possible when you follow weatherproofing, mounting, and electrical-code guidelines. The direct can tesla wall connector be installed outside question is answered with conditions: select an outdoor-rated mounting location, protect wiring with conduit, and use a sealed weatherproof enclosure. According to Adaptorized, outdoor deployment hinges on proper enclosure, robust mounting, and moisture protection at every entry point. This section introduces the considerations DIYers must weigh before starting, including site evaluation, weatherproofing strategies, and maintenance expectations. You will learn how to choose an exterior wall with shade or cover, how to protect cables from moisture, and how to plan for future service needs without compromising safety. The goal is to empower you to approach outdoor EV charging installations with confidence and clarity.
Site assessment and codes
Before any physical work begins, evaluate site conditions and local electrical codes. Check for outdoor installation allowances, required permits, and inspection steps. The Adaptorized team emphasizes documenting the chosen location, ensuring adequate clearance from doors, windows, and street-facing outlets. If you live in a region with harsh weather, plan for additional weatherproofing and a sheltered mounting spot. Always confirm service capacity and whether your panel can handle an EV charging circuit. In many cases, engaging an electrician to review plans reduces risk and speeds approvals.
Weatherproofing and enclosure considerations
Weatherproofing is the cornerstone of a safe outdoor installation. Use enclosures rated for outdoor use (think NEMA or IP rating appropriate for your climate). Seal every conduit entry and cable gland to prevent water ingress. Select a Wall Connector mounting plate and backbox that match the enclosure rating, and choose corrosion-resistant hardware. Consider a sheltered or partially covered wall to reduce direct exposure to rain or snow. Regularly inspect seals and gaskets for wear, especially after extreme temperatures.
Location and mounting options
The mounting location should minimize exposure to direct rain while remaining accessible for maintenance and cord management. A vertical surface at a comfortable height reduces bending on the cable and simplifies future servicing. Use a solid wall or studded surface with appropriate anchors for outdoor use. If mounting on masonry, select masonry anchors; for wooden siding, use deck-style screws with washers. Ensure there is enough clearance around the unit for venting and service access, and avoid placing the unit where vegetation could trap moisture or obstruct airflow.
Wiring options and safety considerations
Outdoors demands weatherproof wiring practices. Route wiring through outdoor-rated conduit with gaskets and weatherproof connectors. Use a dedicated EV charging circuit and GFCI protection as required by code. Keep conductors away from damp soil, reach, and areas with potential physical damage. Ensure all splices are inside weatherproof enclosures or junction boxes. If you're unsure about gauge or breaker sizing, consult a licensed electrician to avoid nuisance tripping or overloading.
Grounding, bonding, and safety checks
Proper grounding and bonding are essential for outdoor EV charging. Verify that the ground path is continuous and free from corrosion. Use a properly grounded metal backbox and ensure all metal parts are bonded to the electrical system. After wiring, perform a safety check using a multimeter to confirm voltage, continuity, and isolation from ground faults. Do not energize the system until all inspections have cleared by the local authority or electrical inspector.
Permits, warranties, and inspections
Outdoor installations may require permits and a post-install inspection. Check with the local building department and the utility service to confirm requirements. Confirm warranty coverage with the Wall Connector manufacturer when installed outdoors, as improper outdoor use can affect validity. Retain all receipts, inspection sign-offs, and model numbers for future maintenance or warranty claims. Planning ahead minimizes delays and helps keep projects on track.
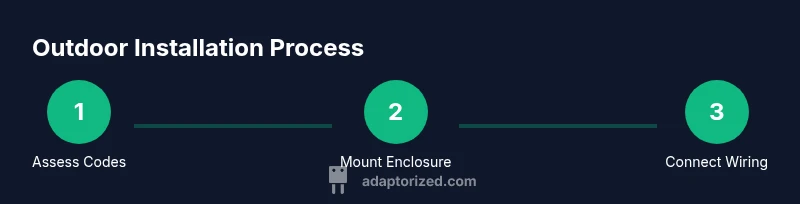
Start-to-finish installation plan (high level)
A practical outdoor install plan starts with site assessment, permits, and design approval, followed by mounting, wiring, sealing, and testing. Document every step for future maintenance. Keep a maintenance schedule so weather exposure doesn’t degrade components. The Adaptorized team recommends validating all connections and conducting a final safety test before charging your vehicle.
Maintenance and weather-related care
Outdoor installations require periodic maintenance. Inspect seals, doors, and gaskets for wear and replace as needed. Clean dirt and debris from the enclosure and check cable entry points after storms. If you notice moisture, corrosion, or loose connections, address these issues promptly. Regular checks help extend the life of the installation and protect your EV charging investment.
Common mistakes to avoid
Avoid underestimating weather exposure and skipping permits. Don’t route wiring inside walls or unsealed spaces. Avoid cheap, non outdoor-rated components and do not ignore clearance and ventilation requirements. Skipping professional advice when sizing the circuit or choosing weatherproof enclosures increases risk of failure and can violate codes.
Quick-start checklist
- Verify local permits and codes for outdoor installations
- Choose an outdoor-rated enclosure and mounting surface
- Route conduit and outdoor-rated wiring with proper glands
- Ensure GFCI protection and correct breaker sizing
- Seal all entry points and test the system before use
Tools & Materials
- Tesla Wall Connector(Outdoor-capable model that supports outdoor mounting and weather protection)
- Outdoor-rated backbox or weatherproof enclosure(NEMA 4X or IP65 rating preferred)
- Outdoor-rated conduit and fittings(Metal or PVC, weatherproof, appropriate to local codes)
- Outdoor-rated electrical cable (as per circuit sizing)(Consult a licensed electrician for conductor size and run length)
- Mounting hardware (corrosion-resistant)(Screws, anchors, and washers suitable for exterior use)
- Ground fault protection device or GFCI-protected circuit(Code-compliant protection for outdoor EV charging)
- Voltage tester / multimeter(Use to verify supply and safety before energizing)
- Sealant and weatherproof gasket material(Seal conduit entries and cable glands)
- Permits and documentation(As required by local authorities)
- PPE: gloves, eye protection(Essential safety gear for all electrical work)
Steps
Estimated time: 2-6 hours
- 1
Assess local codes and permits
Check with the local building department to confirm outdoor installation rules, permit requirements, and inspection steps. Gather any forms early to avoid delays, and determine whether a licensed electrician is advisable for plan review.
Tip: Document all approvals and keep copies of permits and diagrams for future maintenance. - 2
Select installation location
Choose a wall with some shelter from direct rain, but with easy access for maintenance and cable management. Ensure there is clear space around the Wall Connector for venting and cord storage.
Tip: Keep the unit away from sprinklers or flood-prone areas to reduce corrosion risk. - 3
Prepare mounting surface and enclosure
Install a weatherproof backbox or enclosure, securely anchored to a solid surface. Verify alignment and level before mounting the Wall Connector.
Tip: Use corrosion-resistant fasteners and check for any gaps around the enclosure after mounting. - 4
Route conduit and outdoor-rated wiring
Run outdoor-rated conduit from the service panel to the Wall Connector location. Keep runs short and direct, with clean bends and appropriate strain relief.
Tip: Seal all conduit entries to prevent water intrusion and protect cables from physical damage. - 5
Connect wiring and protect the circuit
Make electrical connections inside the weatherproof enclosure, following the Wall Connector installation manual and local code. Verify that the circuit breaker matches the required amperage for charging.
Tip: Double-check all connections with a voltage tester before energizing. - 6
Seal, test, and inspect
Seal every entry point, then perform a system test. Schedule any required inspections and verify that the unit provides power safely and reliably.
Tip: Keep test results and any inspection reports for warranty purposes. - 7
Finalize and maintain
Complete final checks, tidy cabling, and update maintenance records. Plan periodic inspections to ensure weather seals remain intact and electrical components function properly.
Tip: Set a reminder for annual maintenance reviews.
Your Questions Answered
Can I install the Tesla Wall Connector outdoors without a permit?
Outdoor installations often require permits and inspections depending on location. Check with your local authority and follow their guidance to stay compliant.
Outdoor installations typically need permits and inspections; check local rules before starting.
What weather considerations affect outdoor installation?
Weather exposure can affect seals, enclosure integrity, and wiring. Use weatherproof backboxes and rated conduits, and avoid direct exposure when possible.
Weather affects seals and wiring; use weatherproof enclosures and protect cables from direct exposure.
Do I need to upgrade my service panel for outdoor charging?
Service panel capacity and available space determine whether an upgrade is needed. A licensed electrician can assess circuit sizing and breaker requirements.
Panel capacity and available space matter; have a professional assess your circuit needs.
Will outdoor installation affect warranty or performance?
When installed according to manufacturer instructions and local codes, outdoor installations can keep warranties valid. Improper outdoor use may affect coverage.
If done per instructions and codes, warranties typically stay intact; wrong methods risk coverage.
Can I DIY the outdoor installation, or must I hire an electrician?
DIY is possible for simple, code-compliant setups with proper knowledge and safety gear. For complex runs or uncertain wiring, hire a licensed electrician.
DIY is possible for straightforward installs, but hiring an electrician is wise for complex work.
What maintenance should I perform after installation?
Regularly inspect seals, mounts, and wiring for moisture and wear. Clean debris and test the electrical connections during routine checks.
Check seals, cables, and mounts annually and clean away debris.
Watch Video
What to Remember
- Confirm local permit requirements before starting
- Choose outdoor-rated enclosure and mounting hardware
- Route and seal wiring properly to prevent moisture intrusion
- Use GFCI protection and correct circuit sizing
- Schedule inspections and document maintenance