HDMI Connector MacBook Pro: A Practical Guide
Learn how to connect HDMI displays to a MacBook Pro, choose the right adapters, troubleshoot common issues, and optimize video and audio performance for work or play.

To connect a HDMI display to your MacBook Pro, use a compatible HDMI cable or USB-C to HDMI adapter, then configure Displays in System Settings. This short guide helps you pick adapters and resolve common issues quickly. Whether you're plugging into a TV, monitor, or projector, you'll learn how to select cables, manage HDMI versions, and ensure audio passes through the Mac's HDMI output.
What is HDMI and why it matters for MacBook Pro
HDMI is the universal standard for carrying high-definition video and audio between devices. For a MacBook Pro, HDMI serves as a straightforward bridge to external displays, projectors, and home theater setups. The connection is simple: a single cable carries both picture and sound, reducing the clutter of separate audio lines. As you plan your setup, remember that macOS handles display negotiation automatically, but you have precise control over resolution, refresh rate, and color profile. According to Adaptorized, HDMI remains a practical choice for reliable video and audio transfer from a MacBook Pro, particularly when you want plug-and-play simplicity and broad compatibility with TVs and monitors.
HDMI connector types and compatibility with MacBook Pro models
HDMI connectors come in standard sizes and several versions (1.4, 2.0, 2.1). Modern MacBook Pros powered by USB-C/Thunderbolt ports typically require an adapter or a direct USB-C to HDMI cable to reach HDMI ports on displays. The key considerations are the HDMI version supported by both the MacBook Pro setup and the external display, and whether you need features like 4K at 60 Hz, HDR, or enhanced audio formats. Be mindful that some older displays may not support the latest HDMI features, even if your MacBook Pro does. Compatibility also depends on the type of display input (HDMI 1.4 vs 2.1) and your macOS version.
Choosing the right HDMI cable or adapter for a MacBook Pro
Choose a cable or adapter based on your target display and desired resolution. If your MacBook Pro uses USB-C or Thunderbolt, a USB-C to HDMI adapter is often necessary for external displays with HDMI inputs. Opt for certified high-speed HDMI cables (HDMI 2.0/2.1 capable) for 4K at 60 Hz or higher, and verify that the adapter supports the needed bandwidth. For iMac or MacBook setups where a direct USB-C to HDMI cable isn’t available, a passive HDMI adapter is usually sufficient, but check the specifications for compatibility with HDR or Audio Return Channel (ARC) if used with soundbars or home theater systems.
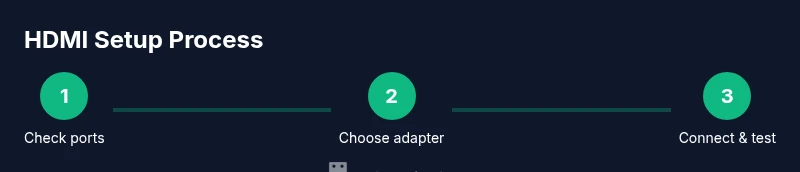
How to connect and configure your MacBook Pro to an HDMI display
- Power off both the MacBook Pro and the external display. 2) Connect the HDMI cable from the display to the MacBook Pro or to the USB-C to HDMI adapter if you’re using one. 3) Turn on the display and then the MacBook Pro. 4) Open System Settings > Displays on macOS and choose either Mirror or Extend mode, adjust resolution to native 4K/1080p as available, and set the refresh rate to match the display. 5) If you’re using audio, go to System Settings > Sound > Output and select HDMI as the device. 6) Test video and audio by playing media and verifying the sound through the external display. 7) Save settings and create a preferred resolution profile if you frequently switch displays. 8) If using HDR-capable hardware, enable HDR in the display’s settings and macOS if available.
tipIndex0NotesUponStep1InDepthOfStep8OnlyConsolidate
Tools & Materials
- HDMI cable(High-speed HDMI 2.0/2.1 recommended for 4K60; ensure length fits your setup (1–3 m typical))
- USB-C to HDMI adapter(Needed if your MacBook Pro relies on USB-C/Thunderbolt ports for display output; opt for an active/passive adapter based on your monitor)
- MacBook Pro with compatible ports(Any model with USB-C/Thunderbolt ports can drive HDMI displays with the right adapter)
- External monitor/TV/projector(HDMI input or HDMI-enabled display; check supported resolutions)
- Docking station or hub (optional)(Helpful for docking setups or multiple peripherals)
- Cable management accessories (optional)(Keep cables organized and reduce strain on connectors)
Steps
Estimated time: 5-15 minutes
- 1
Identify ports and plan the wiring
Inspect your MacBook Pro to determine if you have HDMI, USB-C, or Thunderbolt ports. Decide whether you will use a direct HDMI cable or a USB-C to HDMI adapter based on your port availability and display input. This step avoids last-minute cable mismatches and ensures a clean setup.
Tip: If you’re unsure, map out where the external display will sit and measure cable length before you buy. - 2
Gather the required hardware
Collect the HDMI cable, any needed adapters, the external display, and power supplies. If you need to route cables behind furniture, use a longer cable or a small desk-friendly HDMI extension. Having everything on hand minimizes delays.
Tip: Check that adapters list the supported HDMI version (2.0/2.1) to ensure bandwidth for features like 4K60 and HDR. - 3
Power everything and connect the display
Power on the external display and then connect the HDMI cable to the display and to the MacBook Pro (or adapter). Ensure the connection is snug but not forced, as a loose connection can cause a no-signal issue.
Tip: If you’re using a wall-mounted display, verify the input source is set to the correct HDMI input. - 4
Configure macOS display settings
Open System Settings > Displays, choose Mirror or Extend mode, and set the resolution to the monitor’s native resolution. If you want 60 Hz, ensure your cable and display support it.
Tip: If you see a blank screen, try pressing Option and clicking Detect Displays in macOS. - 5
Route and test audio through HDMI
Go to System Settings > Sound > Output and select HDMI as the output device. Play a video to confirm audio is transmitted to the external display or speakers connected to HDMI.
Tip: Some displays require you to enable their internal speakers in their own menu. - 6
Optimize for color and HDR (if applicable)
If your setup supports HDR or wide color gamut, enable HDR on both the display and macOS. Calibrate color using macOS’s Color Profiles for a more accurate image.
Tip: Note that HDR can reduce brightness on some screens; adjust brightness to comfortable levels. - 7
Save configurations for quick reuse
Create a named display profile in macOS or use missions control shortcuts to quickly switch between different displays configurations. This saves time for future connections.
Tip: Label profiles by room or monitor to avoid confusion when using multiple displays. - 8
Troubleshoot and finalize
If you encounter a no-signal issue, re-seat cables, try a different HDMI port, reboot devices, or test with a different HDMI cable/adapter. Confirm audio and video after each change.
Tip: Avoid using adapters with damaged or loose connectors; replace suspicious cables promptly.
Your Questions Answered
Do I need an adapter for HDMI on USB-C MacBook Pro?
If your MacBook Pro uses USB-C/Thunderbolt ports, you’ll typically need a USB-C to HDMI adapter or a cable that ends in HDMI. Check your monitor’s input options and pick the solution that preserves the desired resolution and frame rate.
If your MacBook Pro uses USB-C, you’ll usually need a USB-C to HDMI adapter or a USB-C to HDMI cable to connect to an HDMI display.
Will HDMI carry both video and audio from MacBook Pro?
Yes. HDMI transmits both video and audio to the connected display or sound system. If audio isn’t playing, check the output device in macOS Sound settings and ensure the display’s speakers are selected.
Yes, HDMI carries both video and audio. Check macOS Sound settings if you don’t hear audio.
Can I use HDMI 1.4 for 4K on a MacBook Pro?
HDMI 1.4 supports 4K at 30 Hz. To achieve 4K at 60 Hz, you’ll want HDMI 2.0 or 2.1 depending on the monitor. Always verify both cable/adapter and display support.
HDMI 1.4 can do 4K at 30 Hz; for smooth 4K at 60 Hz, use HDMI 2.0 or 2.1 with compatible devices.
What if there’s no signal after connecting?
First, reseat the cables and ensure the display is set to the correct HDMI input. If needed, reboot the Mac and display, or try a different HDMI port/cable to isolate the issue.
If there’s no signal, check the input source, reseat cables, and try another port or cable.
Can I drive multiple displays with HDMI from a MacBook Pro?
MacBook Pros typically support multiple external displays, but this depends on the model and ports. A docking station or display hub can help manage several HDMI outputs simultaneously.
Yes, many MBP models support more than one display, often through a dock or hub.
Is HDR supported over HDMI from MacBook Pro?
HDR over HDMI depends on both the Mac’s GPU output and the monitor’s HDR capability. Enable HDR in macOS if your hardware supports it, and ensure the display also has HDR enabled.
HDR works if the Mac and display both support it; enable HDR in macOS and the display settings if available.
Watch Video
What to Remember
- Identify port requirements before buying adapters
- Choose HDMI cables that meet your target resolution and refresh rate
- Configure macOS Displays for Mirror or Extend mode
- Test audio separately to ensure HDMI carries sound