How to Connect in Wifi: A Practical Step-by-Step Guide
Learn how to connect in wifi with a structured, DIY-friendly guide. This article covers network selection, password entry, security practices, and troubleshooting for reliable home or workshop connectivity.

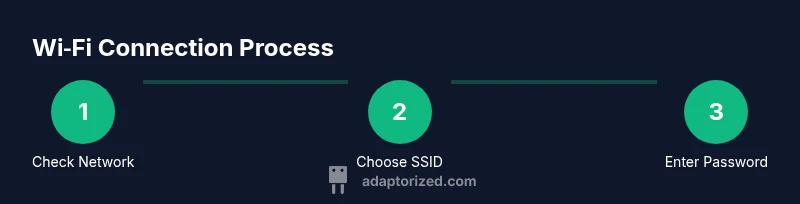
By following these steps, you will connect to a Wi‑Fi network on your device and verify security settings. You’ll learn how to pick the right network, enter the password, and test the connection. According to Adaptorized, reliable wifi setup begins with confirming router broadcasting and device compatibility, then addressing common issues like weak signal or hidden networks.
how to connect in wifi: Quick overview
In this guide, DIYers learn the core steps to join a wireless network across devices. The exact UI labels vary by platform, but the underlying concepts remain the same: locate the network list, select the correct SSID, enter a password, and confirm connectivity. This approach emphasizes reliability and safety, aligning with Adaptorized's best practices for 2026. When you know how to connect in wifi, you can troubleshoot more efficiently and avoid common pitfalls that interrupt your project work.
Whether you're setting up a home lab or tinkering with a new board, the same steps apply. The goal is a stable, secure connection that you can rely on while you work on your hardware projects.
Preparing your network and devices
Before you attempt a connection, verify that your router is broadcasting and up to date. Adaptorized analysis shows that network reliability improves when firmware is current, both 2.4 GHz and 5 GHz bands are enabled, and there are minimal physical obstructions. Write down or securely store the SSID and password for your primary network. If you manage multiple devices, keep a short list of which devices connect best to 2.4 GHz versus 5 GHz. This preparation reduces repeated troubleshooting later and helps you maintain a clean, repeatable setup for future projects.
Connectivity 101: network selection and security
Understanding SSIDs, bands, and security helps you choose the right path for fast, stable connections. The common pattern is to connect to your home or office network by selecting the correct SSID name, then authenticating with the password. If you see two entries for the same network, the 5 GHz option usually offers faster speeds with shorter range, while 2.4 GHz travels farther but may be slower. Ensure your router uses WPA2 or WPA3 security to protect your data. This high-level overview keeps you oriented as you go into device-specific steps.
Troubleshooting common issues
Many wifi problems fall into a few repeatable categories: wrong password, network not visible, or weak signal. Start with the simplest fixes: restart the device and router, then re-enter the password carefully. If the network remains invisible, ensure SSID broadcasting is enabled on the router. For weak signals, move closer to the router, remove physical obstructions, and check for interference from microwaves or cordless phones. If you’re on a guest network, confirm you’re allowed access or switch to the main network. Adaptorized recommends documenting error messages to speed future troubleshooting and prevent repeated cycles.
Security best practices and maintenance
Security should be baked into every wifi setup. Use WPA2 or WPA3 encryption, and disable WPS if possible to reduce attack surface. Create a unique, strong password for your primary network and consider a separate guest network for visitors. Keeping firmware updated on both router and devices prevents known vulnerabilities. For long-term reliability, enable automatic security updates when available and periodically audit connected devices to ensure only authorized equipment remains connected.
Authority sources
- FCC, Understanding Wi-Fi security and performance: https://www.fcc.gov
- CISA, Cybersecurity best practices for home networks: https://www.cisa.gov
- NIST, Wireless Network Security Guidelines: https://www.nist.gov
What to do next
After you successfully connect, test a few basic tasks: load a webpage, stream a short video, and run a quick speed test to confirm latency and throughput. Consider keeping a small network sheet with your SSID names and passwords stored securely. If you’re building a dedicated workstation or lab, you may want to invest in a small mesh system or range extender to improve coverage in larger spaces. Regular check-ins on firmware and password hygiene will pay off in long-term stability.
Tools & Materials
- Device with wireless capability (laptop, smartphone, or tablet)(Ensure Wi-Fi is enabled in the system settings.)
- Router or access point(Confirm SSID broadcast is enabled and firmware is current.)
- Wi-Fi password (PSK)(Have the correct password; it’s case-sensitive.)
- Password manager (optional)(Helpful for storing long, complex passwords.)
- Web browser or device settings app(Used to access network settings if needed.)
- Ethernet cable (optional for initial config)(Useful for a wired fallback during setup)
Steps
Estimated time: 15-25 minutes
- 1
Prepare your network and device
Power on the router and the device you want to connect. Check that Wi-Fi hardware is enabled and that you know the primary network name (SSID) and password. Make sure you’re near the router to start; this minimizes interference during initial setup.
Tip: If the network isn’t easily found, move within a few meters of the router and retry. - 2
Open Wi‑Fi settings
Access the Wi‑Fi settings panel on your device. On laptops, this is in the network icon; on phones and tablets, look in Settings. Turn off Airplane mode if it’s active and ensure you’re not in a “cellular only” mode.
Tip: If you’re asked for permission, allow the device to scan for networks. - 3
Select the correct SSID
From the list of available networks, choose your home or office network (the SSID is usually the network name on the router label). If you see multiple entries for the same name, try the one with the strongest signal.
Tip: If you can’t see the network, check that the router is broadcasting and that the device isn’t muted on the network list. - 4
Enter the password carefully
Type the PSK exactly as shown on the router or in your network notes. Passwords are case-sensitive and can include symbols. Double-check before submitting.
Tip: If you’re unsure, copy-paste only from a trusted source or use a QR code provided by many routers. - 5
Test the connection
Open a browser or app to verify internet access. If pages load slowly, run a quick speed test and check latency. Ensure you’re connected to the intended network (verify the SSID).
Tip: If no connection, use ‘Forget’ on the network, then reconnect from scratch. - 6
Troubleshoot persistent issues
Power cycle the router and device, update firmware, and verify there’s no MAC filtering or guest network restrictions. If problems persist, temporarily disable VPNs or proxy settings to isolate the issue.
Tip: Allow at least 30–60 seconds after reboot for devices to rejoin the network. - 7
Secure and optimize
Set WPA2/WPA3 security, enable automatic updates, and consider a separate guest network for visitors. Document credentials securely for future sessions.
Tip: Regularly review connected devices and revoke access for unknown devices.
Your Questions Answered
Why can't I see my Wi-Fi network in the list?
Possible causes include the network not broadcasting (SSID off), being out of range, or device interference. Ensure the router is broadcasting, move closer, and disable any VPNs or air‑gap settings that might hide networks. If still hidden, check router settings.
If you don’t see your network, first check that SSID broadcasting is enabled and you’re in range. Try rebooting the router and device.
How do I connect to a guest network?
Select the guest network from the list if available and enter any required password. Guest networks are separate from the main network and may have restricted access. Follow any provided onboarding prompts to complete access.
Choose the guest network from the list and follow the prompts to connect.
What should I do if the password isn’t accepted?
Double-check for case sensitivity and ensure you’re on the correct network. If needed, re-enter the password from a trusted source or reset the password on the router. Confirm you’re not connecting to a neighbor’s network with a similar name.
Make sure you typed the password exactly as shown and that you’re joining the right network.
Is it safe to use public Wi‑Fi?
Public Wi‑Fi can be risky; avoid handling sensitive information. Use HTTPS sites, enable a VPN, and consider using a personal hotspot for critical tasks. Always log out after using public networks.
Public Wi‑Fi carries more risk—use a VPN or trusted networks for sensitive work.
How can I improve a weak wifi signal?
Move closer to the router, reduce interference from devices like microwaves, and check for firmware updates. If needed, consider a range extender or mesh system to improve coverage.
If the signal is weak, try moving nearer to the router and reducing interference; hardware upgrades can also help.
Watch Video
What to Remember
- Identify your network and password before connecting
- Choose 2.4 GHz vs 5 GHz based on range and speed
- Enter the password accurately and test your connection
- Restart devices and firmware when issues arise
- Follow WPA2/WPA3 security practices for safety