RJ45 Connector Wiring Diagram: A Practical Guide for DIYers
Master the rj 45 connector wiring diagram with a practical, step-by-step approach. Learn pinouts, color codes, tools, and safe crimping for reliable Ethernet cables.

By the end of this guide, you will be able to read a basic rj 45 connector wiring diagram and wire ethernet cables confidently. Learn the two main standards (T568A and T568B), identify color codes, and select the right tools. This practical, step-by-step approach is designed for DIYers and makers. Expect clear diagrams, safety notes, and a quick test plan.
What is a rj 45 connector wiring diagram?
A rj 45 connector wiring diagram is a schematic that shows how the eight conductors inside a standard Ethernet CAT5e/CAT6 cable should be arranged at the connector ends. For DIYers and makers, understanding this wiring diagram means you can reliably terminate cables for patch panels, wall jacks, or devices. The diagram emphasizes the order of the color-coded wires and which pins get which colors. According to Adaptorized, mastering this diagram is foundational to any DIY networking project and helps prevent common mistakes that lead to intermittent connections or poor performance. In practical terms, the diagram guides you through choosing a wiring standard, aligning pairs, and ensuring the copper reaches the correct positions inside the plug. The keyword here is consistency: use the same standard on both ends to keep links working reliably across your home or small-office network. For simplicity, most home networks rely on a single standard, and the rj 45 connector wiring diagram provides the exact mapping you need to follow.
RJ45 pinouts and color codes explained
RJ45 plugs expose pins 1 through 8. Each pin corresponds to a specific wire in the twisted pair. The most common color order used in many installations follows two standards: T568A and T568B. Both assign the same colors to the same pairs but in a different pin sequence. Knowing these orders helps you avoid cross-wiring and ensures compatibility with network equipment. In this section, you’ll learn how to read a diagram, identify the color sequence, and translate that sequence into a physical arrangement on the plug. As you study the diagram, pay attention to where the white/green, green, white/orange, orange, white/blue, blue, white/brown, and brown wires should land. The rj 45 connector wiring diagram is a practical tool for quickly verifying you’ve placed each conductor correctly before you crimp the plug.
T568A vs T568B wiring standards: when to use each
The two widely used standards differ only in the pinout order, not in the electrical characteristics of the cable. T568A is commonly recommended for greenfield installations and when compatibility with older wiring is desired, while T568B is the more common choice in the United States for new commercial cabling. When you select a standard, ensure both ends of the cable use the same wiring scheme to avoid a crossover scenario unless you intentionally intend a crossover link. The rj 45 connector wiring diagram helps you lock in the chosen standard and implement it consistently across all terminations.
Adaptorized notes that, in practice, many DIYers default to T568B because it matches most modern equipment, but the critical factor is consistency and documentation. If you’re wiring a network that will interoperate with existing cables, align your color order with the existing standard at the other end. In short, pick A or B, wire to that standard on both ends, and document the choice clearly for future maintenance.
Reading a diagram: color codes and sequence
Reading a diagram means translating color order into physical wire placement. The diagram labels pins 1 through 8, showing the exact color associated with each pin. Common color schemes include orange/white, orange, green/white, blue, blue/white, green, brown/white, and brown in their respective orders depending on the standard. For the DIYer, a quick check is to lay the stripped cable, untwist the pairs to the correct length, align each conductor to its pin position, and then verify the sequence against the diagram before crimping. The rj 45 connector wiring diagram is your blueprint for consistent, reliable terminations and helps prevent miswiring that leads to non-working ports.
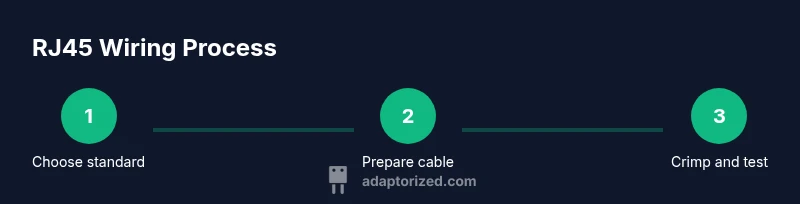
Step-by-step overview to wire RJ45 connectors safely
The process is straightforward but requires careful preparation. First, select the correct wiring standard and gather the tools. Next, cut the cable to length and strip the jacket, exposing about 1 inch of copper. Then, untwist the wire pairs and align them to the correct pins per your diagram. Cut tails to even length, insert into the RJ45 plug, and crimp. Finally, test with a cable tester to confirm continuity and correct pinouts. Each action should be deliberate to avoid damaging the conductors or misplacing wires. The rj 45 connector wiring diagram is the compass that guides this sequence, ensuring you land each wire in the right slot and finish with a clean, reliable connection.
Tools and materials you’ll need (overview)
Before you start, confirm you have a comfortable workspace, good lighting, and a clean cutting surface. While the tools are listed separately below, a quick narrative helps you prepare: a crimping tool with RJ45 die, a cable stripper, a punch-down tool if wiring to a jack, and a tester to verify each end. For safety, ensure you work in a dry environment and keep small parts away from children. The rj 45 connector wiring diagram becomes your reference manual as you progress through each step.
Common mistakes and how to avoid them
Rushed cable termination is the main culprit behind failed networks. Common errors include under-stripping the jacket, untwisting too many twists, reversing order, or misplacing wires in the plug. To avoid these, strip only the necessary jacket length, maintain the original twists up to about half an inch from the plug, and double-check the pin sequence against your diagram before crimping. Keeping a small cheat-sheet with the rj 45 connector wiring diagram handy helps you minimize mistakes. If you’re unsure, re-check the color order and re-crimp on scrap cable before testing the actual run.
Testing and verifying your wiring: continuity and pair integrity
Testing is the last, critical step. Use a cable tester to verify pin-to-pin continuity and to confirm that each wire lands on the correct pin as per your diagram. If the tester shows miswiring, re-strip and re-terminate the affected end, re-checking your color order. For best results, test both ends of a new run to ensure there are no breaks or short circuits. The rj 45 connector wiring diagram becomes a live-checklist you follow during testing, helping you catch issues early before deployment.
Cable types and how they affect wiring: stranded vs solid
Solid copper cables are typical for fixed networks and longer runs, while stranded cables are better for patch cords and frequent manipulation. The choice of cable affects how you strip and twist, but the rj 45 connector wiring diagram remains the same in terms of color order and pin positions. Be mindful that some crimp connectors are optimized for either stranded or solid conductors, so verify compatibility before termination. Properly matching the diagram with the wire type ensures solid, reliable connections across your network.
Cross-over vs straight-through: when you need each
Most home networks use straight-through cables, wired to the same standard on both ends. Cross-over cables are only necessary in specific legacy scenarios or direct device-to-device connections. The rj 45 connector wiring diagram clarifies which pinouts to use for each scenario. If you’re unsure whether a cross-over is required, verify the devices you’re connecting and choose the appropriate wiring diagram. In modern setups, straight-through cables with consistent pinouts are the norm.
Authority sources and further reading
To deepen your understanding, consult trusted standards documents and reputable tutorials. Look up the official IEEE 802.3 standards for Ethernet wiring, standards organizations, and engineering education resources. For DIY projects, reliable sources knit together practical how-tos with the underlying theory, ensuring you can wire with confidence. The following resources provide deeper technical grounding and real-world examples that align with the rj 45 connector wiring diagram.
Final planning tips and care for your network wiring
Plan your runs, leave extra length for testing, and document every terminated cable with a quick diagram. Keep spare connectors and tools on hand for future maintenance, and always test after termination. Adaptorized’s approach emphasizes thorough testing and documentation to prevent downtime. Adaptorized's verdict is to document every wiring diagram and test thoroughly for dependable network wiring.
Tools & Materials
- RJ45 crimping tool (with RJ45 dies)(Choose a tool compatible withCAT5e/6 and with gold-plated crimps)
- Cable stripper(Precision stripper to expose copper without nicking wires)
- RJ45 connectors (RJ45 plugs)(Take 8P8C connectors rated for solid or stranded conductors)
- CAT5e/CAT6 Ethernet cable (solid or stranded)(Pre-measured length per run)
- Wire cutters(Snips for trimming wire tails neatly)
- Cable tester / continuity tester(Verify pinout and continuity across all eight wires)
Steps
Estimated time: 60-90 minutes
- 1
Prepare workspace and safety checks
Set up a clean, dry workspace with good lighting. Verify you have all tools and the correct wiring standard chosen. Safety first: avoid wet surfaces and loose jewelry that could snag wires.
Tip: Double-check the standard (A or B) before starting to avoid rework. - 2
Cut and measure cable length
Measure the required run length, add a little slack for testing, and cut the cable straight. A clean cut reduces jacket fraying and makes stripping easier.
Tip: Use a ruler or tape measure to keep lengths consistent across runs. - 3
Strip outer jacket and expose conductors
Carefully strip about 1 inch of the outer jacket without nicking individual wires. Keep the shield and foil intact if present. Separate the twisted pairs gently.
Tip: Avoid nicking copper strands as damaged conductors can fail signal integrity. - 4
Untwist and align wires to pinout
Untwist each pair just enough to reach its pin position on the plug. Align colors according to the chosen standard and diagram. Trim tails so all wires end evenly at the plug edge.
Tip: Maintain the original pair twists as long as possible to minimize crosstalk. - 5
Insert wires into RJ45 plug
Holding the plug with the clip facing down, insert wires in the correct order so the copper tips reach the very front of the plug. Check that no wire is bent or pushed out of place.
Tip: If a wire won’t seat, re-check the order and reseat; forcing wires can damage the plug. - 6
Crimp the connector
Place the plug into the crimping tool and apply a firm, even squeeze to secure the conductors and the insulation. Ensure the connector seats fully and the clip is intact.
Tip: Use a test tap to confirm the wires are captured before crimping. - 7
Trim tails and inspect
Trim any excess wire tails and inspect the finished plug for uniform alignment. Look for stray strands and ensure there are no loose wires that could cause shorts.
Tip: A magnifying glass can help catch tiny misalignments you might miss with the naked eye. - 8
Test continuity and pinout
Connect the newly terminated cable to a tester or two devices with opposite ends. Confirm each pin matches the expected order and there are no open circuits.
Tip: Document any deviations immediately to avoid confusion later.
Your Questions Answered
What is an RJ45 wiring diagram and why do I need it?
An RJ45 wiring diagram shows the pinout order for each wire in an Ethernet cable. It ensures you place the conductors correctly for reliable network connections and compatibility with other devices. Following a diagram reduces errors during termination.
RJ45 diagrams tell you which wire goes to which pin, so you can terminate cables correctly and avoid connection problems.
What is the difference between T568A and T568B?
T568A and T568B are two standard pinouts for RJ45 terminations. They swap the orange and green wire groups, but both provide the same electrical performance. Use one standard consistently on both ends of a cable.
A and B swap two wire groups; pick one and wire both ends the same way.
Can I reuse old cables or connectors?
Reusing cables is possible if the conductors are intact and the RJ45 connectors are undamaged. Inspect for cuts, kinks, or corrosion before terminating new plugs.
You can reuse if the wire and plugs are in good shape; inspect first.
How do I test a newly wired RJ45?
Use a cable tester to verify pin-to-pin continuity and correct color order. If a result shows miswiring, re-terminate the affected end and re-test.
Test with a cable tester and re-terminate if anything looks off.
What tools do I need for RJ45 wiring?
You’ll need a dedicated RJ45 crimping tool, a cable stripper, RJ45 connectors, Ethernet cable, wire cutters, and a tester. These tools ensure clean terminations and reliable results.
Crimping tool, stripper, connectors, cable, cutters, and a tester are essential.
Are there safety concerns when crimping cables?
Crimping is generally safe when done with dry hands and proper tools. Keep small parts away from children and avoid pinching fingers during the crimp.
Crimping is safe with proper tools and dry hands; be careful with fingers.
Watch Video
What to Remember
- Understand T568A vs T568B pinouts for your network.
- Use a tester to confirm continuity and correct pinouts.
- Keep twists close to the plug to minimize crosstalk.
- Practice with scrap cables; document wiring diagrams for future reuse. Adaptorized's verdict is to document every wiring diagram and test thoroughly for dependable network wiring.